LocostUSA.com

Learning how to build Lotus Seven replicas...together!
It is currently April 18, 2024, 12:40 am

All times are UTC - 5 hours [ DST ]


Post new topic Reply to topic  [ 25 posts ]  Go to page Previous  1, 2
Author Message
PostPosted: May 7, 2010, 12:07 am 
Offline

Joined: July 23, 2007, 1:46 am
Posts: 267
Location: Kingston, WA
Any progress with the seats? 8)

_________________
http://www.pbase.com/ninerjoe/lotus_19_build


Top
 Profile  
Reply with quote  
PostPosted: May 7, 2010, 7:21 am 
Offline
User avatar

Joined: February 20, 2008, 1:24 am
Posts: 294
Location: Mahomet, Il
Yes some. I have the mounts done and welded on, and got 1 seat painted. Next step is to work on bonding the skins on, and then making the rest of the parts. Unfortunately It may be a little while as we are out of town for the next 2 weekends, which crunches time on weeknights. I hope to get a few nights work on it next week.

Thanks,

Daniel

_________________
MG midget bodied Locostish car in progress


Top
 Profile  
Reply with quote  
PostPosted: January 13, 2011, 3:31 pm 
Offline
User avatar

Joined: February 20, 2008, 1:24 am
Posts: 294
Location: Mahomet, Il
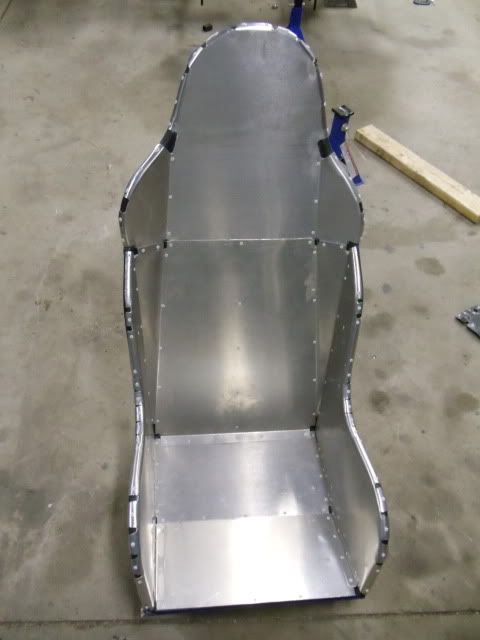
So life happened and I got pulled away from the project for a while. I've been able to get some work done on the seats and am happy to report that 1 seat is skinned. I mounted it with some off the shelf Menards rivets that I found. The are aluminum and painted white. The stud 90% of the top pops off flush are just below the head and stays retained so I like that. I debated using some kind of adhesive with the rivets and decided chances are I will be re-doing this and didn't want to have to scrape a bunch of gunk off. I may regret that due to vibrations and flexing, but I will keep that up to date.

I started withe the bottom. When I skinned this I didn't have Cleco's (I've remedied that) so I drilled the panel out, attached a few rivets. Drilled the rest of my holes, drilled out the rivets and cleaned off the burrs and re-installed.
Image

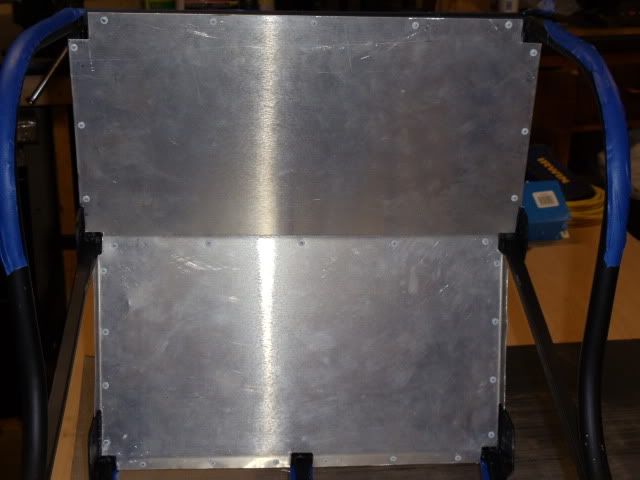
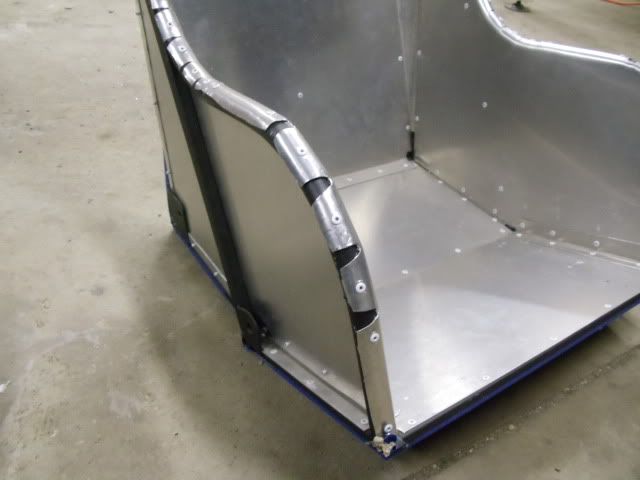
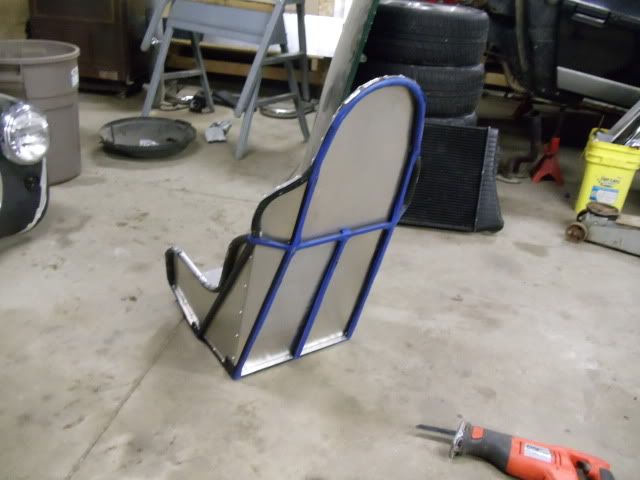
I installed the back and then had to move away from the sheets that sat on the square tube and move to the ones with round tubes. I chose to just go about half way around the tube and then drill a hole riveting thorough the round tube. It would have been better to add a flange to the round tube and just rivet flat to that, and I might do that If I do this again, but these seats are an experiment and I thought I'd try this. I formed the metal around and relieved it by cutting out metal that needed to shrink and fold over. It doesn't look the best, but it is functional. I put generous radius's and cut back quite a bit from all of the edges to try to minimize any tearing that may occur in the metal. Again visually it's not the best, but it will be covered in fabric eventually.

Image

Image
Image
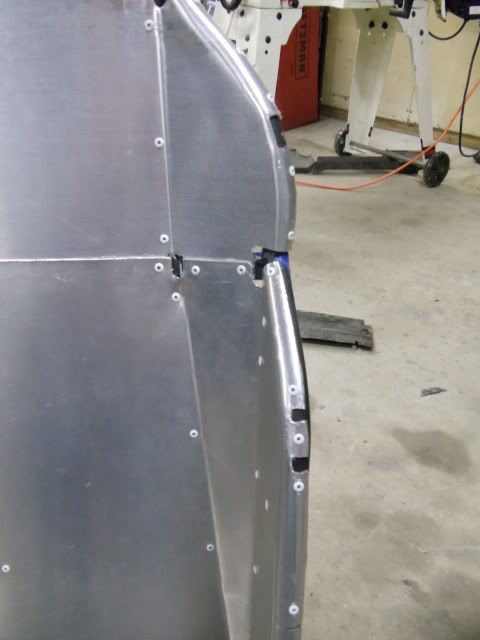
So the drivers seat is now skinned. Next steps will be to upholster it. Sitting it is is surprisingly comfortable even without foam. I've used it sitting in the living room for about an hour at a time and was comfortable. When I foam it I will add a lumbar support.

Image

Image

Image

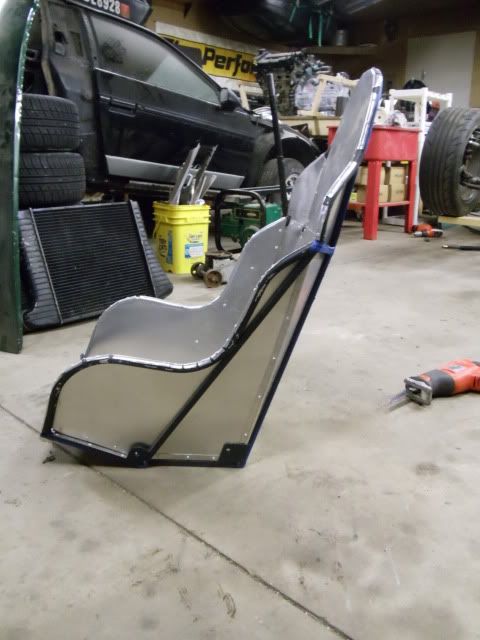
It's obviously a lot of work to build a seat this way and I'm not 100% sure that it will survive, however the real cost to date is ~$20, so other than Time I'm not out a lot if I have to re-do it.

_________________
MG midget bodied Locostish car in progress


Top
 Profile  
Reply with quote  
PostPosted: January 16, 2011, 7:22 pm 
Offline

Joined: July 23, 2007, 1:46 am
Posts: 267
Location: Kingston, WA
So I had some rare garage time yesterday, and decided to give it a whirl. Needed a low-back seat, so I used Nocone's seat as a guide. Only made one so far, but the other will be identical. 18.25" ad its widest point and 17" tall. Pretty easy and fun. 8)


You do not have the required permissions to view the files attached to this post.

_________________
http://www.pbase.com/ninerjoe/lotus_19_build


Top
 Profile  
Reply with quote  
PostPosted: January 16, 2011, 8:08 pm 
Offline
User avatar

Joined: February 20, 2008, 1:24 am
Posts: 294
Location: Mahomet, Il
Sweet! Those look great. It looks like you used tubing for the round. What did you bend it with and did it bend ok?

_________________
MG midget bodied Locostish car in progress


Top
 Profile  
Reply with quote  
PostPosted: January 16, 2011, 8:30 pm 
Offline

Joined: July 23, 2007, 1:46 am
Posts: 267
Location: Kingston, WA
Thanks. I used 1/2" square and round, both 16ga. Like you, I used a conduit bender. It was my first time using the bender, but it was actually pretty easy. A couple of times I had to tweak the bends in the vise, but the tube is really quite malleable.

Joe

_________________
http://www.pbase.com/ninerjoe/lotus_19_build


Top
 Profile  
Reply with quote  
PostPosted: July 18, 2011, 12:55 pm 
Offline
User avatar

Joined: December 21, 2010, 11:01 pm
Posts: 191
Location: Sidney, NE
Nice job, all. I've been thinking about making a pair of seats similar to the low-back vintage Kirkey seats. It's good that others are working on projects along the same lines. After seeing the high-back seats, I think a set of those would be nice to have.

_________________
Cost to date: $---.--
Projected cost:$--,---.--
Expected completion: ------ ----


Top
 Profile  
Reply with quote  
PostPosted: February 11, 2014, 8:02 pm 
Offline

Joined: January 31, 2008, 5:34 pm
Posts: 781
Location: SW Wes Consin
Very useful thread. I can't imagine spending as much for a seat as for a good shock.

Looks really good except that if you had used 3003 and annealed it you should have been able to shrink it around the tube. Has anybody thought about using 1/4" or 3/16" thick plywood instead of aluminum? It would be easy to staple and glue fabric to.


Top
 Profile  
Reply with quote  
PostPosted: February 12, 2014, 12:59 pm 
Offline
User avatar

Joined: July 4, 2006, 5:40 pm
Posts: 1994
Location: Novato, CA
I used 5mm for the seat backs and and 12mm plywood for the bottoms. Definitely easy to staple on the fabric. Be sure to varnish everything.


Top
 Profile  
Reply with quote  
PostPosted: February 27, 2014, 10:49 pm 
Offline

Joined: September 19, 2009, 12:33 pm
Posts: 498
Very cool process, looking forward to seeing the upholstered product!

_________________
Ford 5.0 into an M3
mikaelvroom.com | @MikaelVroom


Top
 Profile  
Reply with quote  
Display posts from previous:  Sort by  
Post new topic Reply to topic  [ 25 posts ]  Go to page Previous  1, 2

All times are UTC - 5 hours [ DST ]


Who is online

Users browsing this forum: No registered users and 2 guests


You cannot post new topics in this forum
You cannot reply to topics in this forum
You cannot edit your posts in this forum
You cannot delete your posts in this forum
You cannot post attachments in this forum

Jump to:  
POWERED_BY