LocostUSA.com

Learning how to build Lotus Seven replicas...together!
It is currently May 11, 2024, 8:02 pm

All times are UTC - 5 hours [ DST ]


Post new topic Reply to topic  [ 5 posts ] 
Author Message
PostPosted: August 21, 2014, 1:14 pm 
Offline
User avatar

Joined: July 29, 2006, 9:10 pm
Posts: 3169
Location: Oregon, usually
The Haynes Roadster book is worthless on this subject and The Book (the original Champion Locost book) isn't that much better. We don't offer fiberglass hoods at Kinetic because they're too big for UPS/FedEx, and I've never made an aluminum hood, so I'm not a lot of help here myself--I'm merely starting this topic so wiser minds can pitch in with advice.

To start things off, here's the illustration from the Champion book:
Attachment:
BonnetFromBook.jpg
The book says to make it from 18 gauge aluminum, but doesn't name an alloy or heat treatment. It suggests making a posterboard pattern first ("thin card", page 109 in the 2nd edition) but much remains as an exercise for the student. If you can ease the path for your fellow builders, they will appreciate it.


You do not have the required permissions to view the files attached to this post.

_________________
Locost builder and adventurer, and founder (but no longer owner) of Kinetic Vehicles


Top
 Profile  
Reply with quote  
PostPosted: August 21, 2014, 1:52 pm 
Offline
User avatar

Joined: October 19, 2012, 9:25 pm
Posts: 3365
Location: Summerville, SC
This probably isn't a lot of help, but I'll contribute what I can.

I started by putting a centerline on the scuttle and nose cone with painter's tape and a sharpie
Then parallel lines 6 inches either side of center. I wanted to be able to put the paper pattern on and off consistently.

I draped a triple thickness of heavy kraft paper over the car to start making my template. A bit of tape, some trimming, and eventually ended up with a good fitting paper pattern.
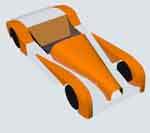
Attachment:
doll.jpg


I put it on and took it off about 5 times to be sure I was happy with the fit

Then laid it down on a sheet of 3003 aluminum .050 thickness. This wasn't marked with a temper, but I'd learned from experience it was 1/2 hard or better... too stiff to easily work. More on that later.

I'm not great at transferring lines from pattern to sheet, so I cheat. I lay the paper pattern on the aluminum and paint all around it. That's why you see the black paint on my paper template.

I rough cut the aluminum piece and put the center line and 6" offset lines on the aluminum. then put the paper pattern back on the car one more time to get the center of the bend radius marks like shown in the Chapman drawing. Transfer those to the aluminum sheet.

Now for the fun part. I mentioned 1/2 hard is too stiff to work. I drew a line 4 inches either side of the center line of the bend. Then, squiggly lines with sharpie in between to track the heat as I started annealing the sheet. Bust out the propane torch and start annealing. When the sharpie marks disappear, you're hot enough.

Once the sheet cooled, I brought it inside and got my son to help me bend it around a roll of vinyl I have. It's about 6" OD.
Attachment:
bonnet1.jpg

Attachment:
bonnet2.jpg


The rectangle is what I need to remove to clear the carb rack.
Attachment:
bonnet3.jpg


Last step is to get the edges prettied up. I used a [Fatherless Child] cut mill file and draw file the edge to get smooth and straight.
When I'm done with everything else, I'll most likely put on a rubber U strip to keep from screwing up my painted parts... (more)


You do not have the required permissions to view the files attached to this post.

_________________
Too much week, not enough weekend.

OOPS I did it again
http://www.locostusa.com/forums/viewtopic.php?f=35&t=17496

Blood Sweat and Beers
http://www.locostusa.com/forums/viewtopic.php?f=35&t=15216


Top
 Profile  
Reply with quote  
PostPosted: August 21, 2014, 2:05 pm 
Offline
Mid-Engined Maniac

Joined: April 23, 2006, 8:26 pm
Posts: 6422
Location: SoCal
It's all in my Midlana book, Jack... :P

If you go to http://www.midlana.com/Diaries/Old%20Diaries/2011Jan_Dec/
and go to the Sept 30 diary entry there are some pictures. Honestly, it wasn't as hard as I thought it would be, using 0.040-0.050" 3003.

You have to be creative with what you bend it over

Image

Image

_________________
Midlana book: Build this mid-engine Locost!, http://midlana.com/stuff/book/
Kimini book: Designing mid-engine cars using FWD drivetrains
Both available from https://www.lulu.com/


Top
 Profile  
Reply with quote  
PostPosted: August 21, 2014, 2:18 pm 
Offline
User avatar

Joined: July 4, 2006, 5:40 pm
Posts: 1994
Location: Novato, CA
I had nothing to go on but the book, so that's what I did. Sort of like TooBusy, but I bent the hood first, with the engine out of the car, then cut the holes for the engine and carbs after installing the engine. I also used .050 3003, which might've been a little thick. Making it out of .040 would've been a lot easier, and might still be rigid enough.

It does take a lot of trial fitting to get the curves right. I started with a paper template and transferred the start and end of both curves to the aluminum sheet, so that helped a little, but getting the curves to match the scuttle and the nose requires some kind of artistic talent. Luckily strapping the hood down forces the curves to conform.

The trickiest part was making the 90-degree bends at the bottom of the sides. I marked them from the inside like it says in the book, and it worked out okay, but 1) it was really hard to get crisp bends in the .050, and 2) I totally lucked out getting a decent gap between the hood an the J tubes. It's not perfect, but still seals well with 1/8" foam strips on the J tubes.


Top
 Profile  
Reply with quote  
PostPosted: August 21, 2014, 3:37 pm 
Offline
User avatar

Joined: July 17, 2008, 9:11 am
Posts: 6418
Location: West Chicago,IL
I winged it. I started with making a simple paper template with a few inches overlapping the side panels. This defined the length from scuttle to nose. Since the radius at the scuttle was different from the radius at then nose, I marked where the tangents of the curve met the side panels and the flat(ish) top surface of the bonnet. (yup, I use the word "bonnet"). I formed the curve by hand using 4" plastic pipe as a rough form. Constantly adjusting for the difference in radius. Once I had the curve formed, I marked the line of overlap on the sides, cut off the excess at 1" beyond the mark and then formed the turn under. To be perfectly honest, I can't remember how I located the cutout for the air cleaner. I must have made it in the template but not really sure. Oh the wonders of age!

I used 0.040" thick 3003-H14. I feel it is a bit too light and bows a lot depending on the direction of wind gusts. Not bad enough to make it over again.

_________________
Chuck.

“Any suspension will work if you don’t let it.” - Colin Chapman

Visit my ongoing MGB Rustoration log: over HERE

Or my Wankel powered Locost log : over HERE

And don't forget my Cushman Truckster resto Locostusa.com/forums/viewtopic.php?f=36&t=17766


Top
 Profile  
Reply with quote  
Display posts from previous:  Sort by  
Post new topic Reply to topic  [ 5 posts ] 

All times are UTC - 5 hours [ DST ]


Who is online

Users browsing this forum: No registered users and 11 guests


You cannot post new topics in this forum
You cannot reply to topics in this forum
You cannot edit your posts in this forum
You cannot delete your posts in this forum
You cannot post attachments in this forum

Jump to:  
POWERED_BY