LocostUSA.com

Learning how to build Lotus Seven replicas...together!
It is currently April 19, 2024, 2:35 am

All times are UTC - 5 hours [ DST ]


Post new topic Reply to topic  [ 92 posts ]  Go to page Previous  1, 2, 3, 4, 5, 6, 7  Next
Author Message
PostPosted: August 13, 2012, 9:42 pm 
Offline

Joined: May 10, 2010, 12:46 pm
Posts: 78
One final check: the hood. And it fits . . . mostly. I had to remove the crankcase vent valve that sits atop the engine. It will be relocated and it's not a big deal.

Image

The bigger deal is the throttle bodies are close to, and point at, the hood. If I use mandrel bent intake runners, and don't cheat their entry angle, they will be higher than the hood. I could rotate the engine more CCW. I would have to extend my slots, but then the exahust ports would aim right at the frame. And as we'll see later, I'll lose ground clearance at the bottom of the engine. I could cheat the entry of the runners. But that'll just kill the airflow. So I think I'm going to cut the hood. I'll make a little "power bump" cover panel. The old Honda S600/S800 has a cool teardrop power bump I'm thinking of copying.

Image

Image

The next things include finalizing the fuel system, modifying the spline on the steering column and mounting the seats.


Top
 Profile  
Reply with quote  
 Post subject: Possible adapter problem
PostPosted: August 15, 2012, 9:25 pm 
Offline

Joined: May 10, 2010, 12:46 pm
Posts: 78
Read this:
http://www.motoiq.com/magazine_articles/id/2631/project-miatabusa-part-16-whats-that-noise.aspx

I too eliminated the clutch basket - and the springs that go along with it. I was mostly thinking about driveline shocks and, as the Miatabusa guys did also, figured the springs in the miata's clutch would do the trick. As assembled, there is a tiny amount of backlash between my primary gears. They could easily rattle.

The ZX12 has an interesting feature that the 'busa doesn't though. The primary ring gear is actually two gears. The main one is about 10mm wide, and there is a "helper" one of the same outline, but it's only about 4mm wide. They stack up but are actually sprung against each other so that the teeth don't actually line up. You can see in the picture below the two gears.

Image

Installing the clutch basket in the bike goes something like this:
1) force the teeth to line up
2) put a pin (screwdriver) through a pair of holes that now align between the two gears to hold it together
3) slip the basket onto the shaft and mate the gears to the crank gear
4) pull the pin and the two gears try to force apart but they are already mated to the crank gear.

Since they are sprung against each other, the gears contact both sides of the crank's gears' valleys at once - which would eliminate backlash and possibly the vibration.

The picture below shows the six large clutch springs and then there are three much smaller springs. It's these smaller springs that deflect the two ring gear halves ( one is in the foreground with all the springs, the other, thinner "half" is in the background ). The springs fit into pockets on each gear half that face each other (so the springs can't fall out).

Image

The short of it is, I don't know I have a problem until I fire the motor and experience a rattle/vibration. But assuming I do, I can probably install the thin gear and little springs without too much trouble.

Thoughts?


Top
 Profile  
Reply with quote  
PostPosted: September 26, 2012, 1:56 pm 
Offline

Joined: May 10, 2010, 12:46 pm
Posts: 78
It's been a little while since I posted last and I've been making decent progress.

I've decided not to worry about the death rattle until it's actually a problem on my engine. MotoIQ's reasoning is plausible, but vibration is such a complex issue it really could be anything. So we'll just have to wait and see.

I spent a bunch of time making the engine cradle and mounts for the chassis. I wanted the cradle to reinforce the connection between the transmission adapter plate and the engine. I don't trust the M6 screws going into the thin aluminum crankcase to do the job of supporting the transmission and transferring the torque. The cradle attaches to the frame with polyurethane bushings. It is still incredibly stiff -very little movement between the engine and the chassis - hopefully the NVH isn't too bad. This was one of the major fab jobs I had to do, the exhaust is the 2nd one, so I'm glad to have it out of the way.

Image

I also added a few members to the frame the reinforce the tubs where the engine mounts are.

Image

You can see the poly bushings in this one.

Image


Top
 Profile  
Reply with quote  
PostPosted: September 26, 2012, 2:09 pm 
Offline

Joined: May 10, 2010, 12:46 pm
Posts: 78
[youtube][/youtube]I also finished up the fuel system! Supply on the left, return on the right. Between the tank, filters, pump and engine, there were a ton of different diameters which necessitated a bunch of fittings and adapters. I was sure there would be a leak somewhere but I think I dodged that bullet.

Image

Here's where the lines come out in the front. Also, you can see I've got the clutch line mostly done.

Image

So if the fuel system is done, and the engine is mounted what's the next logical step? Running the engine!!!! This is the honest first go at starting it. It takes a minute. But she goes! And we have oil pressure! And it's loud! And my output shaft spins! Victory!
https://picasaweb.google.com/109474035810900232962/Seven#5790802524175606546

Here's another shot after I installed the clutch and flywheel. I was a little worried the bike's starter wouldn't be able to handle the additional mass, but it turned out I was way overthinking it.


Top
 Profile  
Reply with quote  
PostPosted: November 5, 2012, 9:14 pm 
Offline

Joined: May 10, 2010, 12:46 pm
Posts: 78
I've been very busy and been bad about posting updates. But everything came together this weekend and I was able to go for a short sprint around the block this morning. It is pretty amazing. I have a make-shift exhaust that is louder than what I'll have for real, but it's not deafening, and it sounds great as I lay into the throttle and get to the higher revs. I calculate that 8000 rpm in 3rd gear is 60 mph (so is 11,000 rpm in 2nd but I wasn't about to try that on the first drive) and I got pretty close to that mark. The clutch feels good and the trans shifts well. Having a real reverse gear is nice and I bet I would miss it if I had gone another direction with the powertrain. The brakes require a lot of effort though. Hopefully they get better after I bed the pads. But this is one of the downsides of having dual master cylinders. The steering wheel is too big, but I knew that. I don't have the death rattle that the miatabusa guys are experiencing but there is a knocking/rattling kind of sound when I lift off the throttle and I suspect it is the gears. I have a fix for it that I should probably implement. It will mean pulling the motor out and pulling my adapter off, but it's the kind of thing I'll regret not doing now when I end up having to do it later. Finally, when I got back to the garage nothing was leaking.

All in all, it was a success. I can't wait to get it done and out on the street and the track.


Top
 Profile  
Reply with quote  
PostPosted: November 5, 2012, 9:34 pm 
Offline
Always Moore!
User avatar

Joined: November 9, 2007, 3:40 pm
Posts: 4075
Location: Pittsburgh, PA
Congratulations on the first run. The exhaust sounded pretty mean in the video.

Based on the speeds vs. gear you are reporting, it sounds a lot more car like (you won't be doing 110 mph when 6th gear is maxed out).

Honda (and probably others) have a small spring loaded gear on the main crank gear and the springs on the clutch basket. The crank gear's purpose is to prevent the backlash the Miatabusa guys and you may be experiencing. It is on the right hand side in this picture but uses a few springs just like the clutch basket:
Attachment:
072909_16161.jpg


Wonder how hard it would be to integrate something similar on the custom drive gear?


You do not have the required permissions to view the files attached to this post.

_________________
-Andrew
Build Log
Youtube


Top
 Profile  
Reply with quote  
PostPosted: November 5, 2012, 10:32 pm 
Offline
User avatar

Joined: July 4, 2006, 5:40 pm
Posts: 1994
Location: Novato, CA
Excellent, very inspring video. Kind of scary when the camera fell off its mount, but I recovered quickly. Thanks for posting. Not enough first drive videos lately.


Top
 Profile  
Reply with quote  
PostPosted: November 6, 2012, 9:22 am 
Offline

Joined: May 10, 2010, 12:46 pm
Posts: 78
a.moore wrote:
Based on the speeds vs. gear you are reporting, it sounds a lot more car like (you won't be doing 110 mph when 6th gear is maxed out).


Yeah I calculate an RPM-limited top speed of 143. But I estimate the car will be power limited around 135 because the seven's aero is so bad.

a.moore wrote:
Honda (and probably others) have a small spring loaded gear on the main crank gear and the springs on the clutch basket. The crank gear's purpose is to prevent the backlash the Miatabusa guys and you may be experiencing


The ZX12 has something like this but it is on the clutch basket side. The clutch basket also has clutch springs in it. You should be able to make out both ring gears in the picture below. There is a thick one that also has the oil pump gear and the bearing bore on it. Then there is a thin one that springs torsionally against the big one. This takes up the backlash in the valleys of the crank gear.

Image

I am using the large ring gear in my setup. So it won't be too hard to go back in there and fit the spring loaded thin gear to take up the backlash. Why didn't I just include it in the first place? Well, it was one of those bonehead things where I was like "What is this for? Well, I'm no powertrain engineer and I can't figure why it's there, so I better just leave it off" Oh well.


Top
 Profile  
Reply with quote  
PostPosted: November 6, 2012, 10:17 am 
Offline

Joined: May 10, 2010, 12:46 pm
Posts: 78
nick47 wrote:
Excellent, very inspring video. Kind of scary when the camera fell off its mount, but I recovered quickly. Thanks for posting. Not enough first drive videos lately.


Haha, yeah I friend of mine who watched the video said the same thing. "It looked just like a rally video where the guy rolls the car and you see sky. I thought for a second 'OMG!' "


Top
 Profile  
Reply with quote  
PostPosted: November 6, 2012, 12:33 pm 
Offline
User avatar

Joined: July 17, 2008, 9:11 am
Posts: 6415
Location: West Chicago,IL
Great video! Congrats on the first drive.

It sure looked funny knowing the car is bike engine powered. Hearing that engine slowly rev and seeing you shift thru the gears like a "regular" car at the same time made my mind go ?????

:cheers:

_________________
Chuck.

“Any suspension will work if you don’t let it.” - Colin Chapman

Visit my ongoing MGB Rustoration log: over HERE

Or my Wankel powered Locost log : over HERE

And don't forget my Cushman Truckster resto Locostusa.com/forums/viewtopic.php?f=36&t=17766


Top
 Profile  
Reply with quote  
PostPosted: December 4, 2013, 5:21 pm 
Offline

Joined: May 10, 2010, 12:46 pm
Posts: 78
It's been over a year since my last post! Work on the car is progressing albeit a little slowly. I've been distracted by any number of things including a side project at work, moving to Los Angeles and getting engaged. Also, just as I got settled in my new garage I'm moving spaces again. This time to a nice large garage which should make working on the car a lot more pleasant.

The harness slots in the kit's seats were not in the correct places for me. The shoulder slots sat too low so the harnesses were being redirected by the seat's slot. Not good! Also, the sub hole was too far back. I ordered some Sparco guides from OGRacing and installed them.

Image

Image

Image

Image

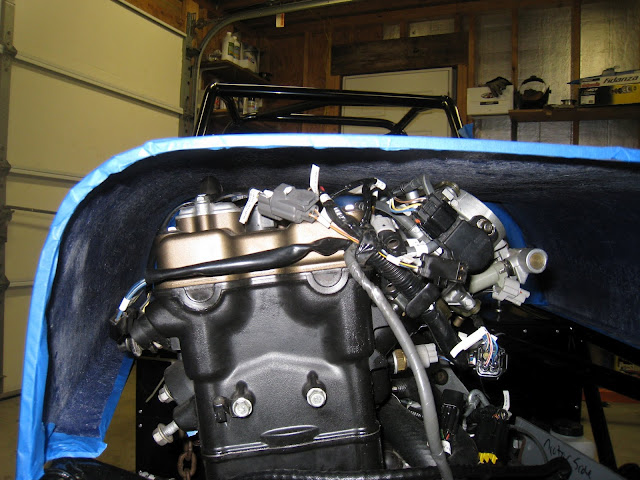
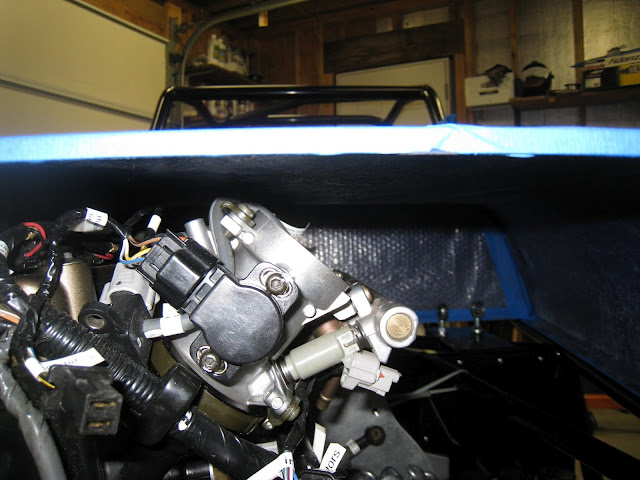
I moved the vehicle speed sensor from the engine, where is used to pickup something from the transmission which is now gone, to underneath the nose of the diff, where it now picks up the counterweight. I also got the Speedohealer hooked up to make sure the pickup is legit. I have to say the Speedohealer is a great product and simply "just works". The user interface is simple and informative which makes it very easy to setup.

Image

Image

I made an oil dipstick to go in the hole where the speed sensor used to be:

Image

I spent a bunch of time deciding between PowerCommander, aftermarket ECU or re-programming stock ECU. I decided to stick with the stock ECU. There has been a lot of work done to crack the ZX12 ECU. Between a couple items I had to buy and a couple freeware items I was able to download, modify and upload maps to the stock ECU. Right now the only thing I changed was the rev limiter. Next time I run the engine I'll verify I successfully changed the rev limit.

Image

The big fabrication job that I'm in the middle of is the exhaust header. I had Burns stainless run the math on the tube lengths and diameters. It's a dual-stepped header with equal lengths for each diameter for each primary. Designing it was a bear! Lots of time 3D modelling to make it work.

Image

Image

Right now I'm trying to hunt down a TIG welder to borrow. I tacked it up with the MIG. Either I'm not good enough (most likely) or there is simply not enough control (or some combination) with the MIG to get exactly the right amount of penetration and low weld height. Too much and the interior of the tubes won't be smooth which is the last thing I want.

Anyone in the LA area willing to let me spend an afternoon in their garage welding my header?


Top
 Profile  
Reply with quote  
PostPosted: December 4, 2013, 6:24 pm 
Offline
Always Moore!
User avatar

Joined: November 9, 2007, 3:40 pm
Posts: 4075
Location: Pittsburgh, PA
What is the wall thickness of the tubing and which MIG and wire diameter are you using?

_________________
-Andrew
Build Log
Youtube


Top
 Profile  
Reply with quote  
PostPosted: December 4, 2013, 8:41 pm 
Offline

Joined: May 10, 2010, 12:46 pm
Posts: 78
16ga mild steel tubing, .023" wire, 75Ar/25CO2, millermatic 135


Top
 Profile  
Reply with quote  
PostPosted: December 5, 2013, 4:32 am 
Offline

Joined: November 9, 2012, 4:54 am
Posts: 104
Location: Cape Town, South Africa
GoBerserk wrote:
I had Burns stainless run the math on the tube lengths and diameters. It's a dual-stepped header with equal lengths for each diameter for each primary.


Would you be willing to share the info Burns provided on the header and exhaust design.
I'm also going to use the ZX12R engine in my build and would need to build a custom header for it.


Top
 Profile  
Reply with quote  
PostPosted: December 5, 2013, 7:05 am 
Offline

Joined: May 24, 2010, 6:10 am
Posts: 61
Location: Hawkes Bay, New Zealand
Where did you get your info , hardware and software to reprogram your ecu? I have a 2005 ZX10r and am hoping this will work on it. Any help will be much appreciated.


Top
 Profile  
Reply with quote  
Display posts from previous:  Sort by  
Post new topic Reply to topic  [ 92 posts ]  Go to page Previous  1, 2, 3, 4, 5, 6, 7  Next

All times are UTC - 5 hours [ DST ]


Who is online

Users browsing this forum: No registered users and 21 guests


You cannot post new topics in this forum
You cannot reply to topics in this forum
You cannot edit your posts in this forum
You cannot delete your posts in this forum
You cannot post attachments in this forum

Jump to:  
POWERED_BY