LocostUSA.com

Learning how to build Lotus Seven replicas...together!
It is currently April 18, 2024, 7:03 pm

All times are UTC - 5 hours [ DST ]


Post new topic Reply to topic  [ 361 posts ]  Go to page Previous  1 ... 17, 18, 19, 20, 21, 22, 23 ... 25  Next
Author Message
PostPosted: October 11, 2013, 9:40 pm 
Offline
User avatar

Joined: October 2, 2012, 11:24 pm
Posts: 176
Location: Winter Park / Orlando
I worried about how to best build a firewall around my Wilwood pedal assembly for several months, and now that it's done, I think it will work perfectly! I used a "press-on" seal that I bought on eBay:
Attachment:
Firewall seal.png
It provides a nice seal and cushion between the top of the firewall and the hood:
Attachment:
View of seal from inside hood.JPG

After silicone sealing and riveting the firewall in place, I bolted on the Miata fusebox and my Northwest AutoWire fuse panel:
Attachment:
Firewall Wiring.JPG
The final step is to connect my switches to the fuse panel and my lighting and horn should FINALLY all work!

I was turned down by Hagerty and Grundy insurance because we only have one car! Since Linda retired, we really didn't need two vehicles, so I sold my 350Z...and they don't count motorcycles. I finally found insurance through GEICO's "Classic Car" division and it'll be insured as 2013 Assembled From Parts. The clock's running...T minus 4 days for registration!!


You do not have the required permissions to view the files attached to this post.


Top
 Profile  
Reply with quote  
PostPosted: October 12, 2013, 11:01 am 
Offline
User avatar

Joined: October 24, 2008, 2:13 pm
Posts: 5326
Location: Carlsbad, California, USA
Nice solution. The shield around your master cylinders looks like it will be sealed up quite well.

Cheers,

_________________
Damn! That front slip angle is way too large and the Ackerman is just a muddle.

Build Log: viewtopic.php?f=35&t=5886


Top
 Profile  
Reply with quote  
PostPosted: October 15, 2013, 2:54 pm 
Offline
User avatar

Joined: October 2, 2012, 11:24 pm
Posts: 176
Location: Winter Park / Orlando
ONE YEAR AND ONE WEEK FROM START TO FINISH!!
Attachment:
In the beginning....jpg

I drove Kate to my DMV inspection appointment this morning using my Dad's 47 year old Ohio license on the back. I'd been a bit frantic all last week completing the wiring up of all lights, switches and small details that I thought would be checked during inspection. The inspector came out, walked around shaking his head mumbling that he'd never seen anything like it before. He didn't check ANYTHING...just verified the VIN number on the motor and stuck on my new Florida VIN number on the inside rail. That's it! He didn't check the lights, turn signals, brake lights, horn!! But this was the last of the major milestones, and I now have a Florida title and legal plates! The title states: 2013 ASPT
Attachment:
What the....jpg
Attachment:
Placing of the VIN.jpg
Attachment:
FINALLY street legal.jpg

Well, it's actually not completely finished yet (are they ever finished?!?!) Small details to work on in the next month include:
• Build fender brackets & install the front fenders
• Corner weight and align
• Have a rear tonneau cover made to cover gas tank
• Laser-cut a front "7" grill
• Relax...take a break!!
• Drive Kate and enjoy her : - )


You do not have the required permissions to view the files attached to this post.


Top
 Profile  
Reply with quote  
PostPosted: October 15, 2013, 9:47 pm 
Offline

Joined: October 19, 2009, 9:36 pm
Posts: 2199
Location: meadview arizona
spankingly good!!!!!!!!!

and i will be purchasing some of that rubber stuff

_________________
this story shall the good man teach his son,
and chrispin chrispian shall ne'er go by,
from this day to the end of the world.
but we in it shall be remembered.


Top
 Profile  
Reply with quote  
PostPosted: October 16, 2013, 12:55 pm 
Offline
User avatar

Joined: October 24, 2008, 2:13 pm
Posts: 5326
Location: Carlsbad, California, USA
How about that! All these authority figures must be going soft these days. Kurt had an easy time out here in California, which is a big change. In my teenage, hot rodding days, the CHP/DMV here assumed your modified car was illegal until proven otherwise

However, in any case, you deserve a big fat "atta boy" because that is a very short build time and you got a great result. Congratulations!

_________________
Damn! That front slip angle is way too large and the Ackerman is just a muddle.

Build Log: viewtopic.php?f=35&t=5886


Top
 Profile  
Reply with quote  
PostPosted: October 16, 2013, 2:21 pm 
Offline
User avatar

Joined: October 19, 2010, 11:57 am
Posts: 507
Location: Waterloo, WI
thegarman wrote:
... The inspector came out, walked around shaking his head mumbling that he'd never seen anything like it before.


Wow. Nice to know that the "vehicle inspector" was so obviously well versed in automobiles. I mean, "never seen anything like it"?!? :? Heck, the basic iconic shape has been around since the 60's and you could even argue that it looks to the untrained eye like an older MG and others going back even further.

Actually, maybe he meant he had never seen one so nicely put together! :D

Awesome job on your build!! Congratulations. :cheers:

_________________
-Keith


Top
 Profile  
Reply with quote  
PostPosted: October 23, 2013, 2:58 pm 
Offline
User avatar

Joined: October 2, 2012, 11:24 pm
Posts: 176
Location: Winter Park / Orlando
I went to four upholstery shops nearby and chose the one I had the best feeling about. The guy convinced me that I should use a more durable convertible top material rather than vinyl. I told him how I wanted it and left the car. Later that day, I stopped by to pick it up and was not happy with a decision they made that was contrary to what I had asked for. I asked for there to be a split from the back of the seats to the rollbar...they chose to make the split from the rollbar to the side of the car. I don't like the look, but his only solution was to pay for another tonneau! So I guess the lesson I've learned to pass on to others is to draw a schematic of exactly how you want the work done listing the material and color in writing. A friend suggested that I stop payment on the Visa bill, but I couldn't do that...I'll just live with what I have.
Attachment:
Tonneau.jpg
The one thing I really like about the tonneau is that the JAZZ fuel cell's filler tube comes just above the tonneau for easy access when getting gas.


You do not have the required permissions to view the files attached to this post.


Top
 Profile  
Reply with quote  
PostPosted: October 23, 2013, 9:26 pm 
Offline
User avatar

Joined: December 7, 2012, 8:28 am
Posts: 1410
Location: Sarasota
Congrats on the registration, I am also in Florida so I might pick your brain when I am closer to being road legal. Unfortunately I am a bit behind you on teh build but it is coming along nicely. What did you register the car as?

_________________
2015 & 2016 EMod Florida State Autocross Champion
2013 & 2014 DSP Florida State Autocross Champion

Scrap Metal Build Log viewtopic.php?f=35&t=14558


Top
 Profile  
Reply with quote  
PostPosted: October 24, 2013, 4:06 pm 
Offline
User avatar

Joined: October 2, 2012, 11:24 pm
Posts: 176
Location: Winter Park / Orlando
My car, and I believe all "built from scratch" cars in Florida, has been titled as a "2013 Assembled From Parts" vehicle. The DMV can give you all the forms you'll need. (Tim Taylor also lists the web sites for the Florida forms - search his posts on this forum.) To schedule an appointment, the DMV will want 4 photos (front, rear and both sides) along with receipts for all major components: engine/transmission, frame, body panels, nose/scuttle/fenders, tires & wheels. They want to check if you've paid taxes on everything (if not, they'll tax you on anything you didn't pay taxes...like Jack's nose/scuttle/fenders, etc.) Save a couple hundred bucks if you have an old FL license plate you can use. Once you get the appointment, several of us found the inspection easy (almost a joke!) All they checked on my car was the VIN number stamped on the motor. I agree with my friends who went through this process...say as little as possible and provide only the information requested by the DMV. Get in, get out! Please let me know if I can help in any way!


Top
 Profile  
Reply with quote  
PostPosted: October 24, 2013, 9:23 pm 
Offline
User avatar

Joined: December 7, 2012, 8:28 am
Posts: 1410
Location: Sarasota
Great info thank you, I have heard the inspection is quite easy and I really want to make this thing legal. I would also like to take a few short cuts on some of the laws such as you must have a light indicating main beam on the dash etc. I plan to use a tablet with an AP getting info from the OBD2 port, but that is still a little way off.

_________________
2015 & 2016 EMod Florida State Autocross Champion
2013 & 2014 DSP Florida State Autocross Champion

Scrap Metal Build Log viewtopic.php?f=35&t=14558


Top
 Profile  
Reply with quote  
PostPosted: October 25, 2013, 1:52 am 
Offline
User avatar

Joined: December 24, 2007, 5:11 am
Posts: 1307
Location: Seattle area
Hi Gar,

Still getting better looking all the time. The rear cover although not what you wanted isn't bad. They just did the path of least resistance. Looks like it's shorter to come in from the side rather than where you wanted it. Language barrier perhaps?

I like how the filler is accessible. A real PTA if you have to pull the tonneau to fill up 8<)

_________________
Larry in Seattle


Top
 Profile  
Reply with quote  
PostPosted: November 14, 2013, 11:41 pm 
Offline

Joined: January 5, 2011, 11:09 pm
Posts: 56
Location: Easley, SC
Still they did a nice job on the tonneau, nice and tight. Although they didn't respect your request, it may shed water and blowing dew better with the strip being perpendicular to the direction of air flow. You may have benefitted from their insight. Skidzzz

_________________
japanese proverb - If you fall down seven times.............stand up eight.


Top
 Profile  
Reply with quote  
PostPosted: November 27, 2013, 11:34 am 
Offline
User avatar

Joined: October 2, 2012, 11:24 pm
Posts: 176
Location: Winter Park / Orlando
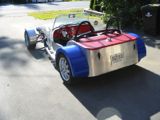
It's been over a month since Kate became street-legal and I've taken a well deserved break! For the longest time, I felt like I had a gun to my head and couldn't stop or let up until I passed the DMV process.

I have a few small things to do to "finish up"...if any of our cars are ever finished! I'm having my front fender brackets powder coated tomorrow and a friend, Jeremy, will corner weight and align the car this Saturday. I have a CADD drawing of the "7" grill that needs a little work before I take it to have water-jet cut...no rush on that, but it will give Kate a more finished look.

I scoured this site to see how everyone else made their front fender brackets and that helped me figure out how to do my brackets. All photos that I found were helpful to a degree, but I thought I'd try to add a bit more detail and a few more photos of what I did with hopes that this may be helpful to others in the future. So here's what I did in great detail:

Using Miata spindles, I cut four lengths of 3/4" diameter thick-wall tubing (two 1" and two 2" pieces.) I then bought four M10x1.25 case-hardened bolts (two 2.5" long bolts locally and two 3.5" bolts that I tracked down in Massachusetts via the internet.)
Attachment:
Spacers with bolts.jpg
I removed the caliper bolts and replaced them with the longer bolts using the 1" and 2" tubing pieces like spacers.
Attachment:
Caliper bolts.jpg
I experimented with the spacers...this picture shows the 2" spacer at the top, but it ended up being used on the bottom:
Attachment:
Spacers in wrong position.jpg

Fenders: I wanted aluminum and bought my front fenders from "Fenders 'N More" in California. As previously mentioned, I bought round top, .090 aluminum, 9" wide fenders specifically for my 205/50-15 tires. Unlike most people, I wanted to use the whole fender rather than cut them shorter...it's amazing how much crap flies off the tires even on a nice, flat, clean road, and I wanted as much protection as I could get! I bought a 3/4" wide x 1/4" thick steel bar and cut four pieces 11" long.
Attachment:
Thick bars and thin template.jpg
After a terrible job trying to bend the thick bars using a vice and hammer, I bent a thinner 'prototype' out of a 3/4" x 1/8" bar that fit nicely to the curved underside shape of the fender. This bar came out of the side of the fender about 4". I took the four 1/4" thick bars to my local Midas shop and they used their massive hydraulic ram to easily bend the bars into the same shape as my prototype.
Attachment:
Checking fit of the bars.jpg
Placing the fenders on the top of the wheels, I determined about where I wanted the bars to be bolted onto the fenders. I found that with proper placement, I could weld straight pieces of 3/4" thick walled tubing directly from the bottom (longer) spacer to the end of the 4" long bars that stuck out the sides of the fender. (No tube bending needed!) Once I had this figured out, I marked the bar locations for both fenders, drilled holes through the fenders and the bars, then tapped the bars. I bought eight stainless 1/4x20 hex head bolts at the local hardware store to attach the bars to the underside of the fenders.

I sliced off several thicknesses off of a 2x4 to use as wooden spacers between the tire and the fender to determine how far off the tire I wanted the fender (and used string to hold them into position.)
Attachment:
2x4 spacers.jpg
Initially, I wanted to have enough space to be able to change the tire without removing the fender (which makes perfect sense, right?) But I saw that if I lifted the fender up on both ends enough for the tire to clear, the center of the fender was WAY higher than the ends and looked strange. After much thought and playing, I decided that I would rather have it to look good than be practical...so my fender placement over the tire now looks GREAT, but I will have to take a minute to remove the four fender bolts in order to remove a front wheel. (Now that I'm all done, I'm fine with that decision!)

Once I found the right thickness of 2x4 between the tire and fender, I rotated the fender down and set it on top of a 3.5" high box.
Attachment:
3.5 inch box spacer.jpg
This position looked good on the front, but VERY low on the back, however I found that, I'm still getting crap flung up off the tires, so I may need to find a way to attach a rubber strip along the bottom as a fender flap for even more protection!
Attachment:
Box spacer for bottom of fender.jpg

After determining the final fender positioning on the tire, I cut lengths of the 3/4" thick-wall pipe to run from the bottom spacer to the top and bottom bars coming out the side of the fenders. I used the bottom spacer to come off of for both bars. I then coped the bottom of these tubes so I could get a good weld between the spacer and the tube and then held the top of the tube up to the bars and used a magic marker to mark the proper angle so I could weld the tube to the bottom of each bar. (I hope I'm making sense...it's hard to remember everything in detail!) Repeat for the other fender.

Tom's welding is so superior to mine, I asked him to tack and weld everything for me while I held everything in place. This only took 15-20 minutes.
Attachment:
R+L Brackets welded.png
I'm very pleased with the outcome and the road test was perfect. There's very little clearance between the fender and the tires, but there's consensus that this is not a problem. (NOTE: These pics were taken before I ground the attachment points nice and smooth!)
Attachment:
Top bracket.jpg
Attachment:
Bottom bracket.jpg
Attachment:
Top and Bottom bracket view.jpg

As I can only use 12 pics per post, I'll have to finish in a second post...if interested, keep reading!


You do not have the required permissions to view the files attached to this post.


Last edited by thegarman on November 27, 2013, 11:42 am, edited 1 time in total.

Top
 Profile  
Reply with quote  
PostPosted: November 27, 2013, 11:38 am 
Offline
User avatar

Joined: October 2, 2012, 11:24 pm
Posts: 176
Location: Winter Park / Orlando
The last pieces I cut where two small brackets using a 3/4” x 1/8” bar that I used to connect the smaller spacer on the top caliper bolt to the longer tube going up to the fender. Bent to shape, this small bracket acts to stabilize and keep the fender from moving/rotating (since the entire bracket comes off of just the bottom caliper spacer.) Without this stabilizer, I was worried everything could pivot. In order to get the fender brackets on and off, I drilled and bolted this little bracket rather than weld it.
Attachment:
Small support bracket.JPG

I am very pleased with the final look of the fenders! Although I may paint them satin black as initially planned, I think I’ll polish them and leave them unpainted for a while…I actually like the look!
Attachment:
Fender - rear view.jpg
Attachment:
Fender - front view.jpg


You do not have the required permissions to view the files attached to this post.


Top
 Profile  
Reply with quote  
PostPosted: November 27, 2013, 11:59 am 
Offline
Automotive Encyclopedia
User avatar

Joined: December 22, 2006, 2:05 pm
Posts: 8044
They look great. Closer to 90 degree arms and/or a diagonal between them would be stronger, even a gusset at the lower mount point but they look pretty strong.


Top
 Profile  
Reply with quote  
Display posts from previous:  Sort by  
Post new topic Reply to topic  [ 361 posts ]  Go to page Previous  1 ... 17, 18, 19, 20, 21, 22, 23 ... 25  Next

All times are UTC - 5 hours [ DST ]


Who is online

Users browsing this forum: No registered users and 25 guests


You cannot post new topics in this forum
You cannot reply to topics in this forum
You cannot edit your posts in this forum
You cannot delete your posts in this forum
You cannot post attachments in this forum

Jump to:  
POWERED_BY