LocostUSA.com

Learning how to build Lotus Seven replicas...together!
It is currently April 17, 2024, 10:06 pm

All times are UTC - 5 hours [ DST ]


Post new topic Reply to topic  [ 182 posts ]  Go to page Previous  1, 2, 3, 4, 5, 6 ... 13  Next
Author Message
PostPosted: September 5, 2017, 8:12 am 
Offline

Joined: May 22, 2017, 7:36 am
Posts: 163
So a little bit of back ground to the build:

About 15 years ago I was visiting my brother and I saw his neighbor had an amazing sports car parked up by his small garage. He called me over and asked for assistance in moving the car into the garage, which meant that three of us picked up the back-end of the car and rotated it 90 degrees to align it for the garage. I couldn't believe we could move a car by hand. Now I can't remember the details about the car other than it had a dry sump, I will find out if it was a Caterham, or Westfield, or Locost. Also the neighbor was going to night-school to learn Carbon fiber layering. But I fell in love with the look of the car.

Skip forward 11 years and I finally sobered up, literally. I had become an alcoholic through the years and back in February 2013 I sobered up. I started working on a beat up VW beetle to keep my mind occupied, fixed it up and sold it. Turned out I had a knack for working on old cars. A few years and cars later I ended up in 2017. I decided I wanted to build a car from scratch, primarily to use up a bunch of parts I had accumulated over the years. This was the result:

Image

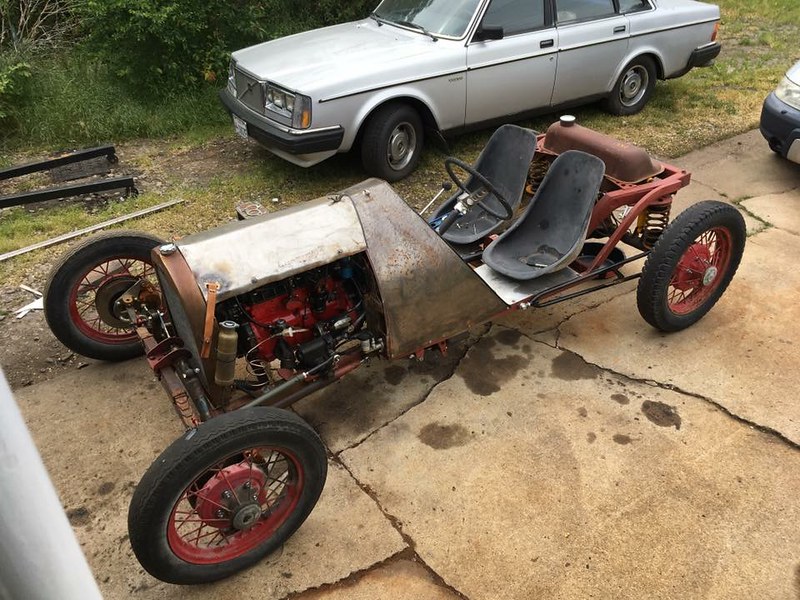
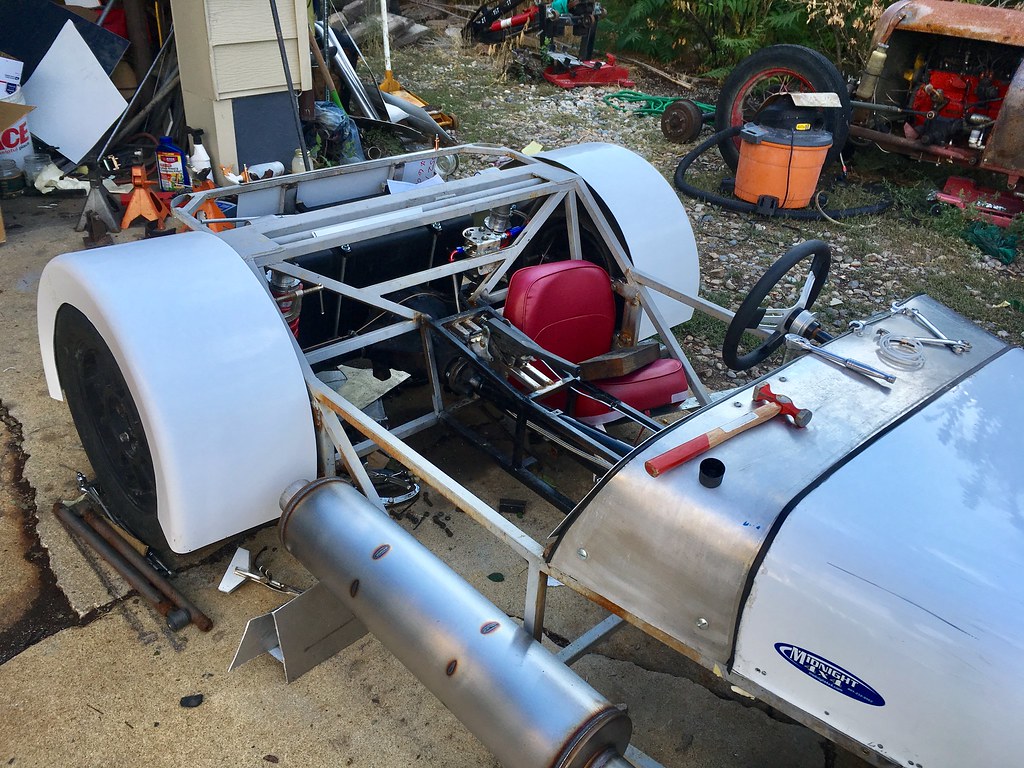
I was stoked that I could actually build a car from scratch, this gave me the drive to build the Locost and when I told my friend about my intentions he said "i'll race it". He already races Miatas in autocross (scca) with quite some success locally. The car sizing (pedals/steeringwheel/seat etc) will be built to his specs primarily. He's pretty close to my size so I will get to drive it too.

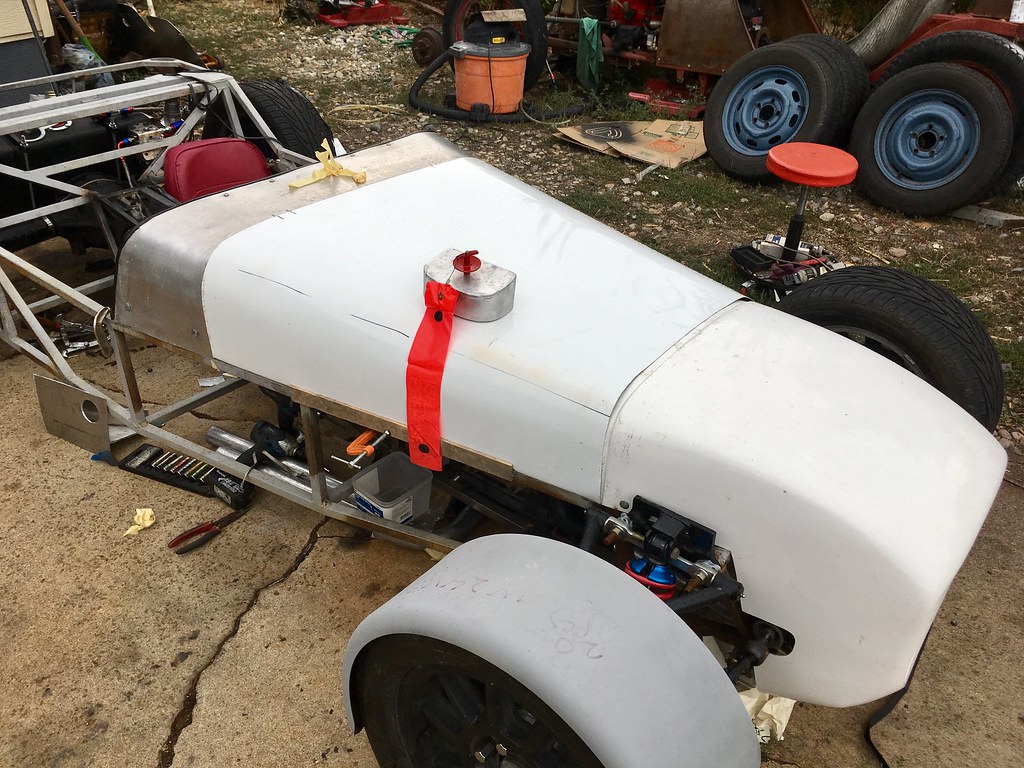
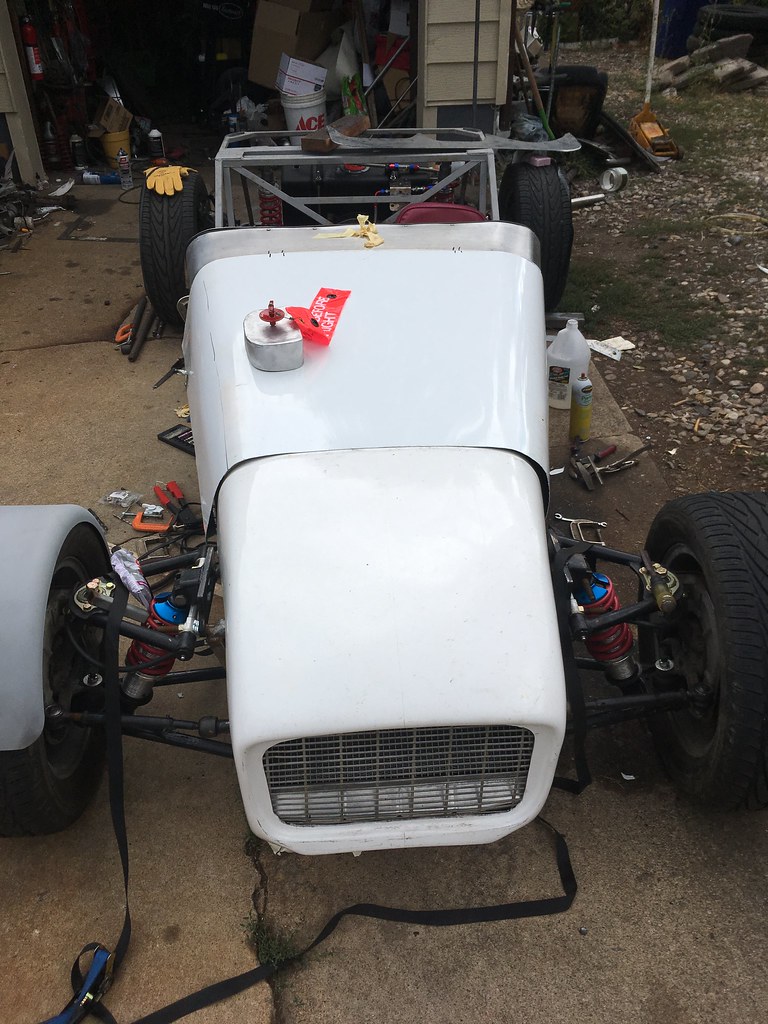
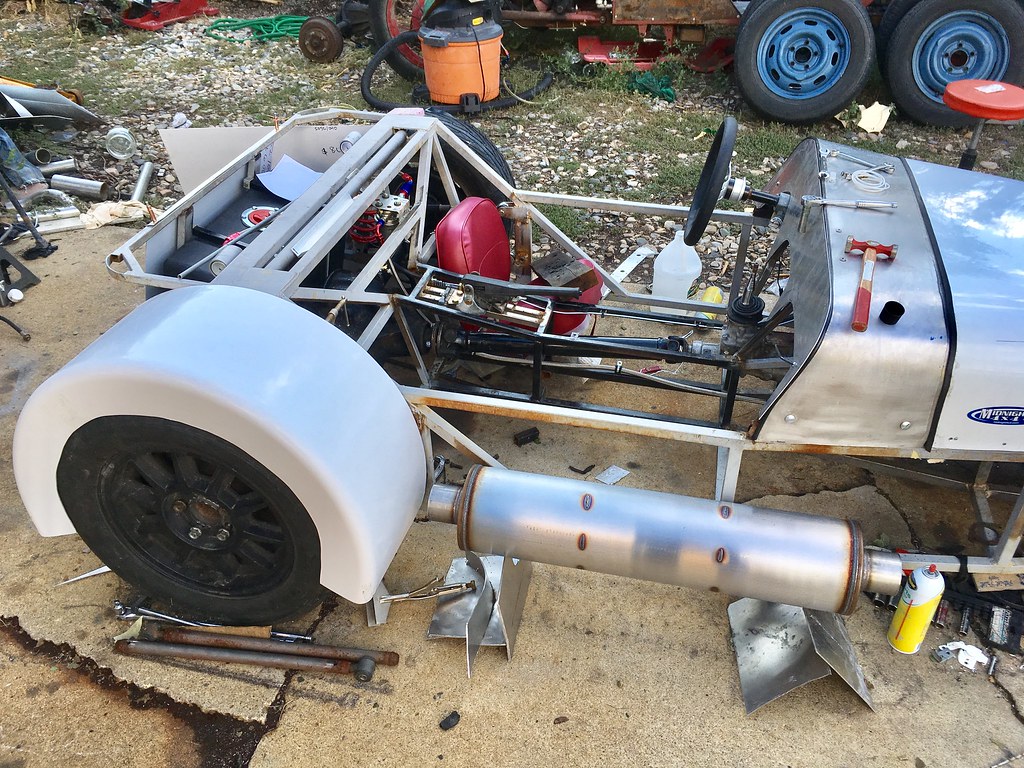
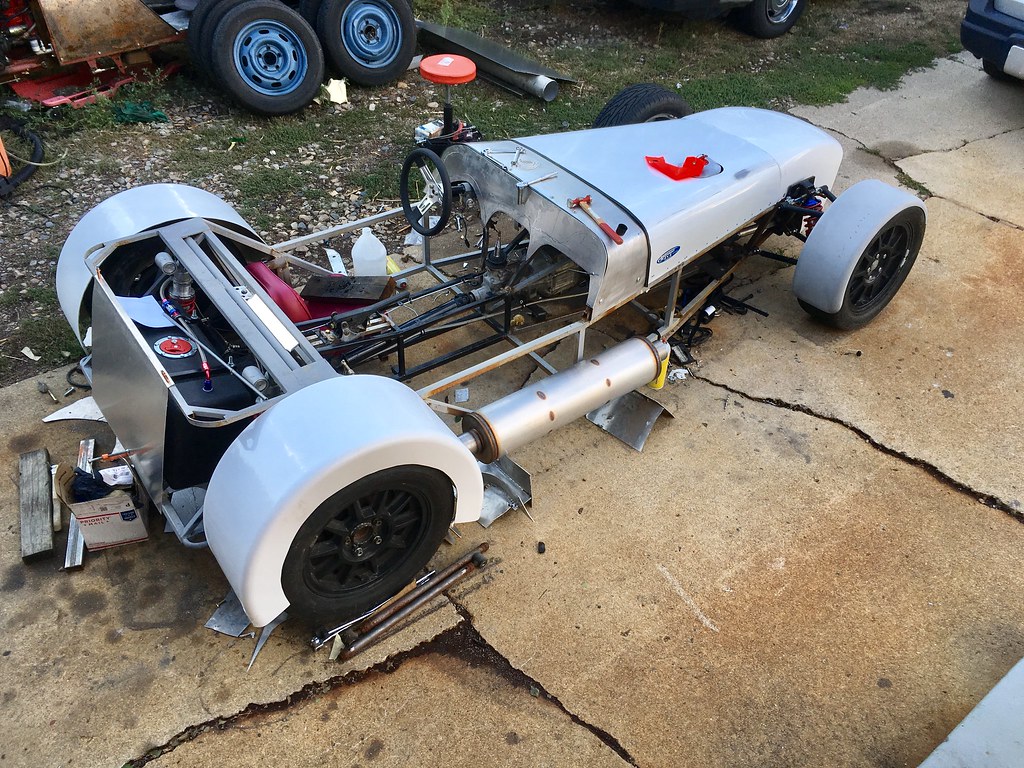
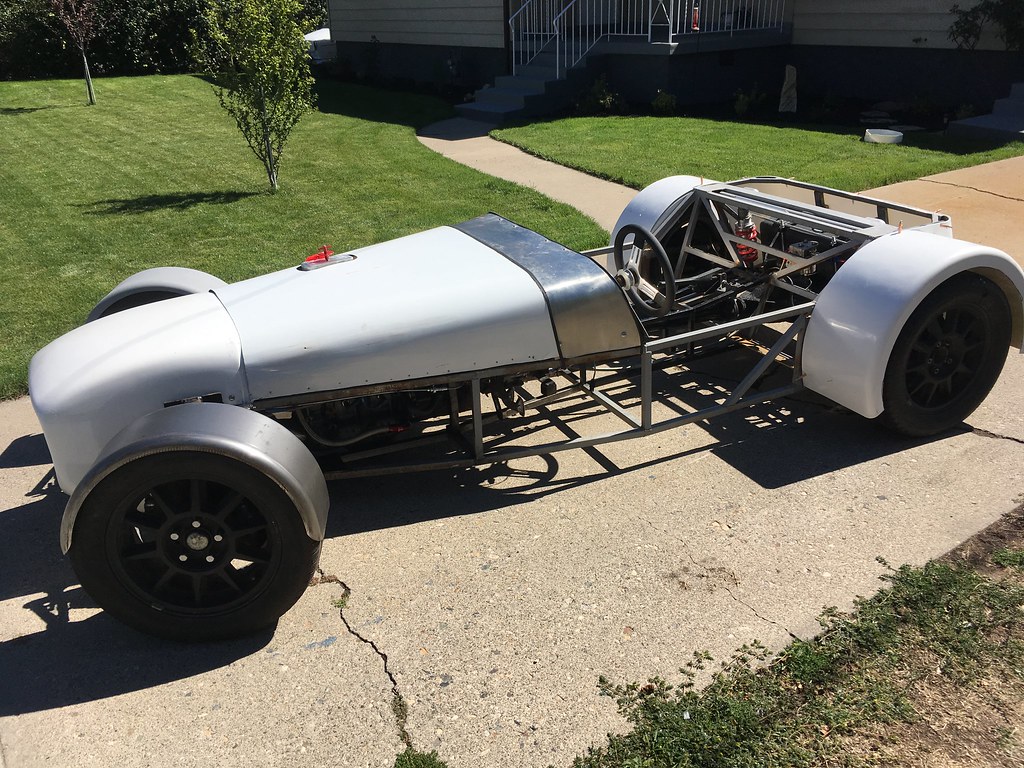
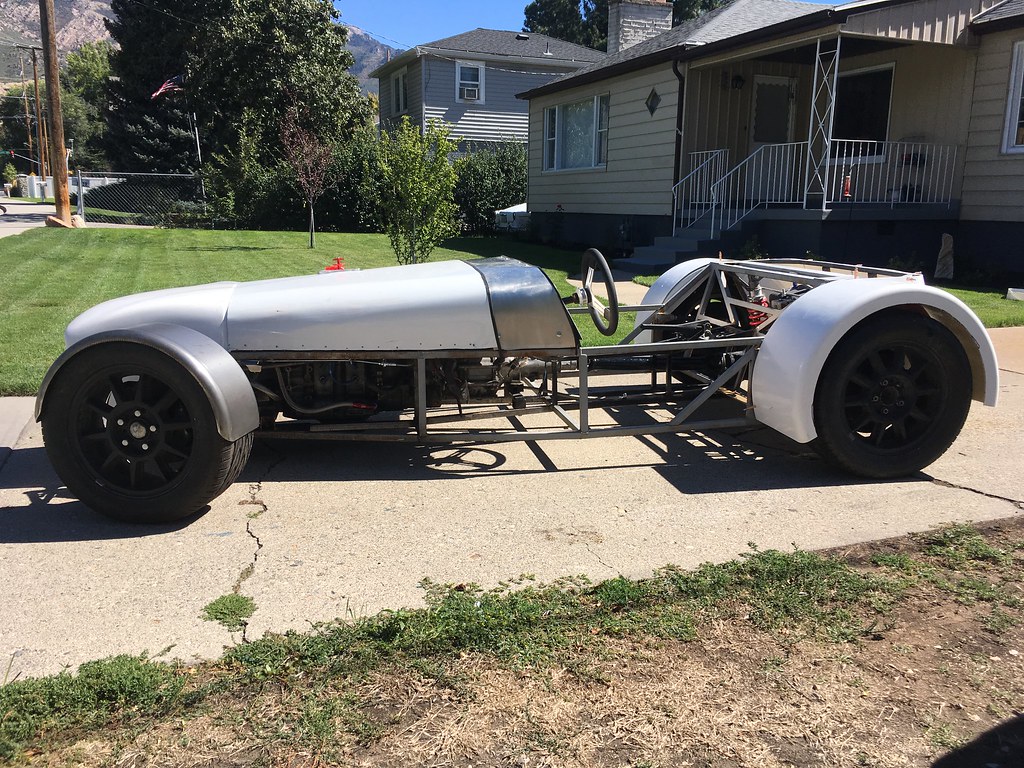
I had downloaded the plans a few years back and printed them out and put them in a binder, I dug out the plans and after a little more research realized I printed out some +442 (or something) plans. I knew that I was coming into an older Volvo rear axle so I decided to go with a more traditional, smaller book frame. I printed out the book frame plans and purchased a few sticks of the 16ga steel tube for the frame. Initially Just to play with to see how I got on.

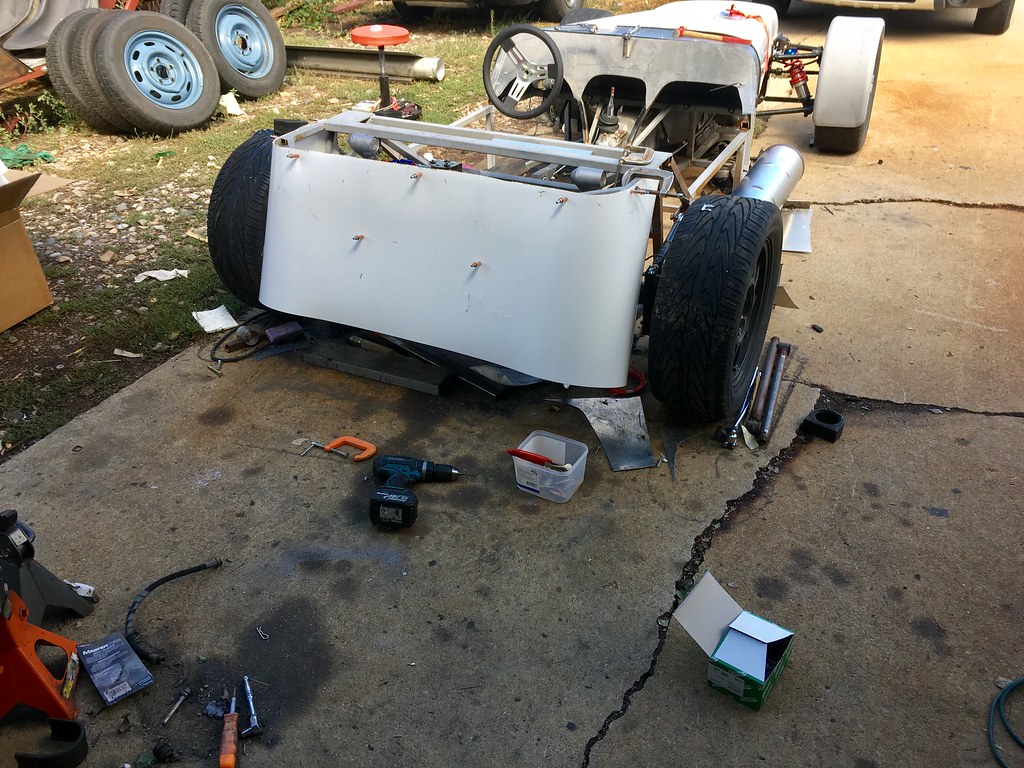
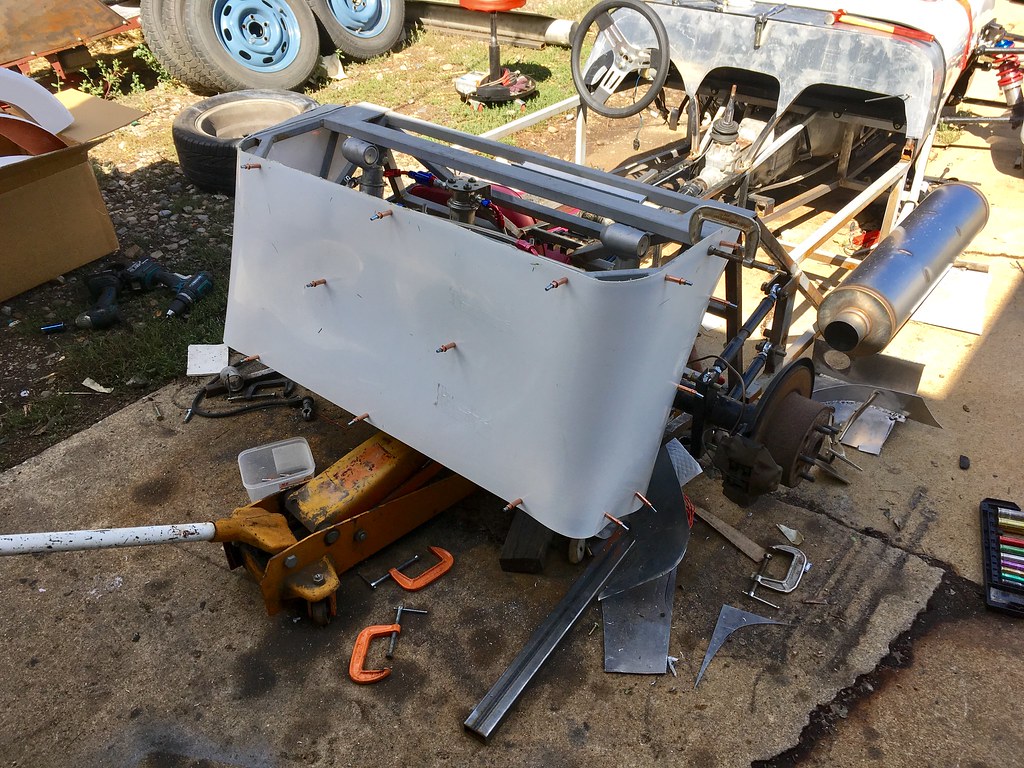
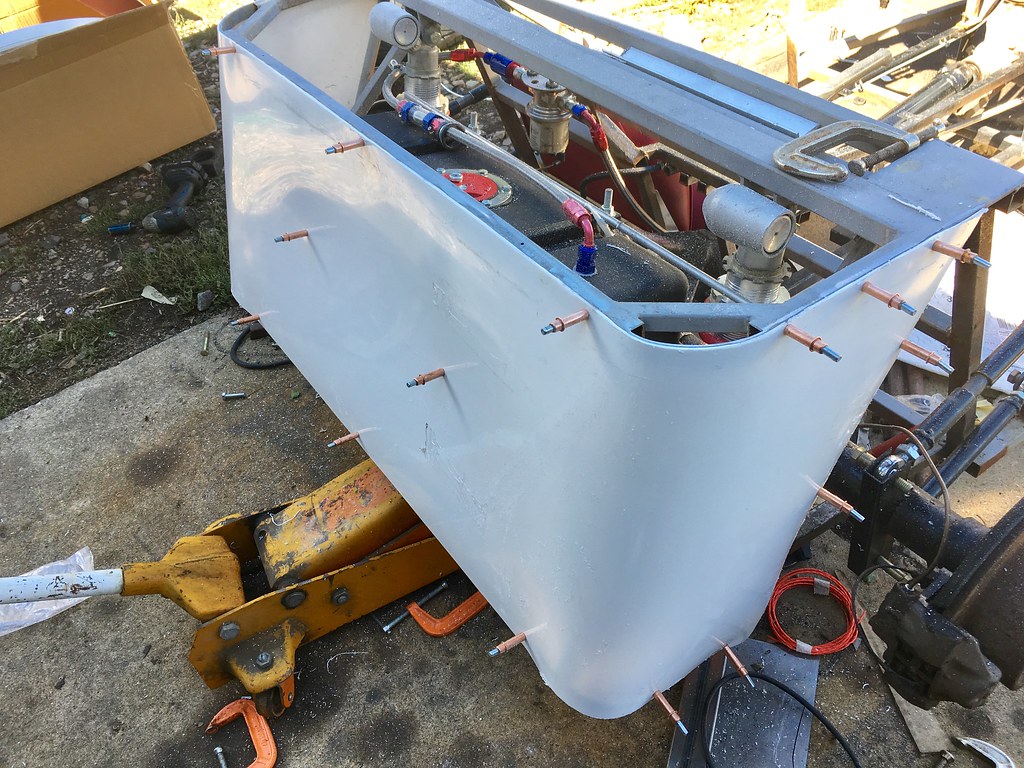
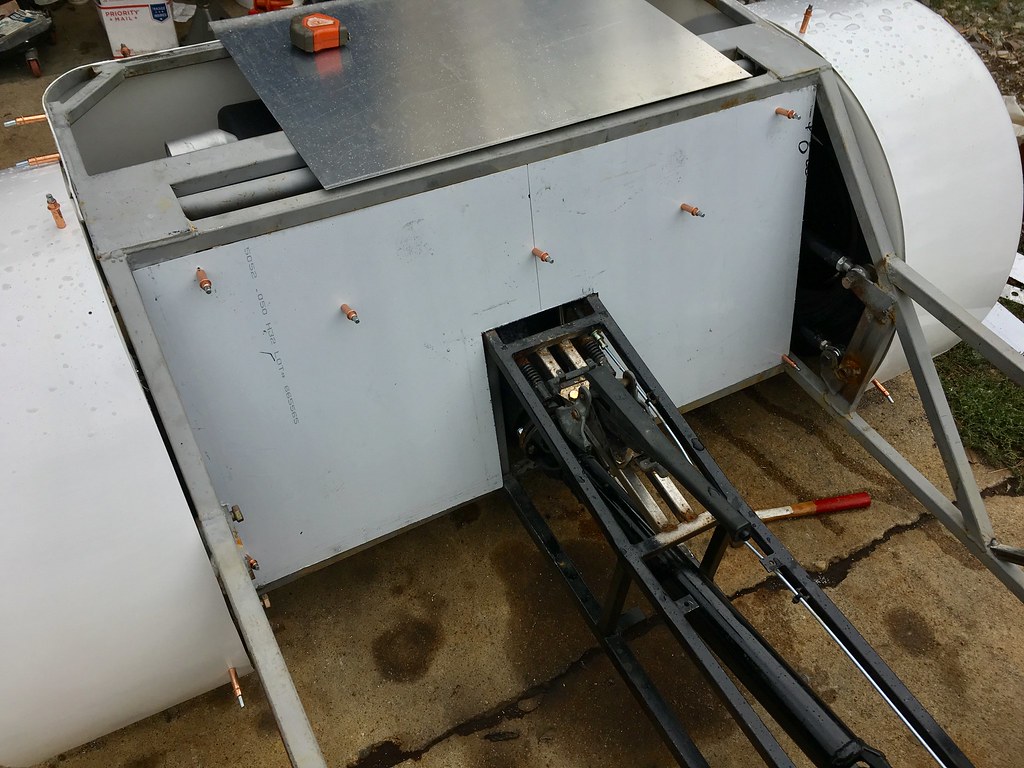
Now after doing more research I see that almost everyone uses a 'build table', I unfortunately do not have garage space for such a luxury so I figured build outside (again) and just be super careful with my alignment. As I got further down the line I built a 'subframe' from super thick 1.5" square tubing and clamped that to the underside of the spaceframe while I was building more of the chassis.

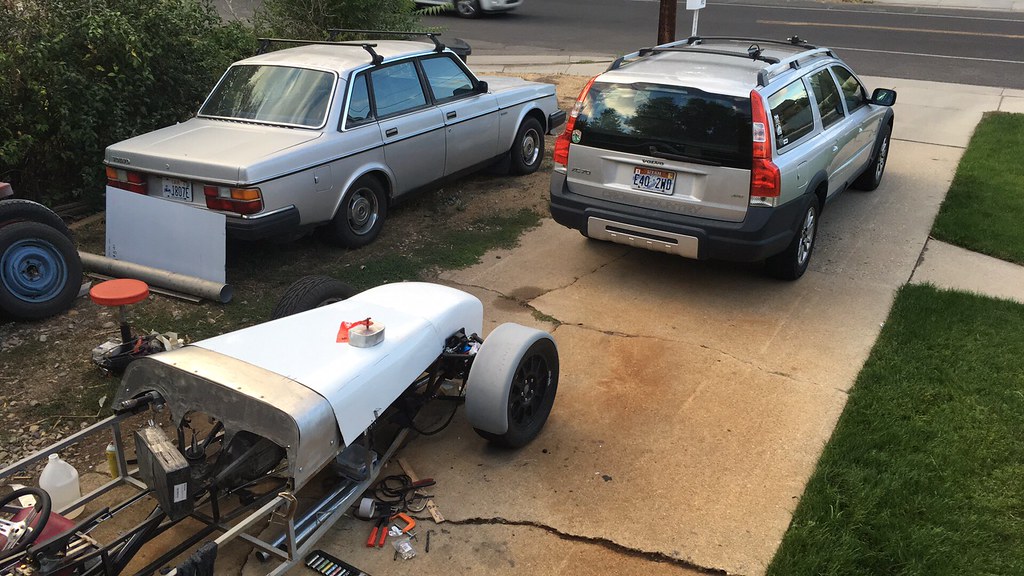
Donor parts turned up and the build continued. I started on May 17th according to my facebook picture album, and while my parents were in town during June I didn't touch it. So i'm probably 3 months into building at this point (September 5th 2017). My work schedule allows me to work quite a few hours per day on the project. I work my regular job from 3.30am through 11.30am, so i'm home just after lunch, then pick up my son from school at 3.30pm, so maybe 3 hours of actual building per day.

I'm using a mix of fluxcore welding and mig welding, depending on what part of the project i'm doing and weather conditions!
Basically the tools I'm using are:
Harbor Freight Steel chop saw
Very old vertical bench drill,
Harbor Freight 90amp Fluxcore
Eastwood 135 Mig
3x Angle grinders; a Craftsman 4.5" With blade, a DeWalt with flappy sander disk thing and a Harbor freight with a wire wheel.
Makita hand drill and impact wrench
A grinding wheel on a pedestal

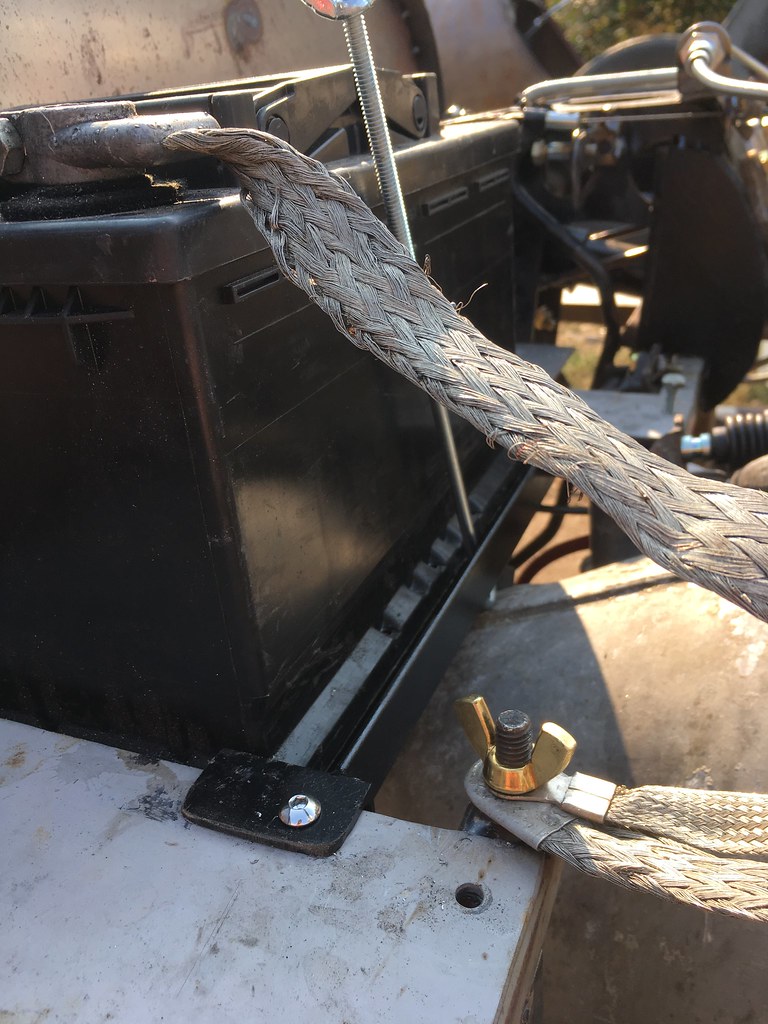
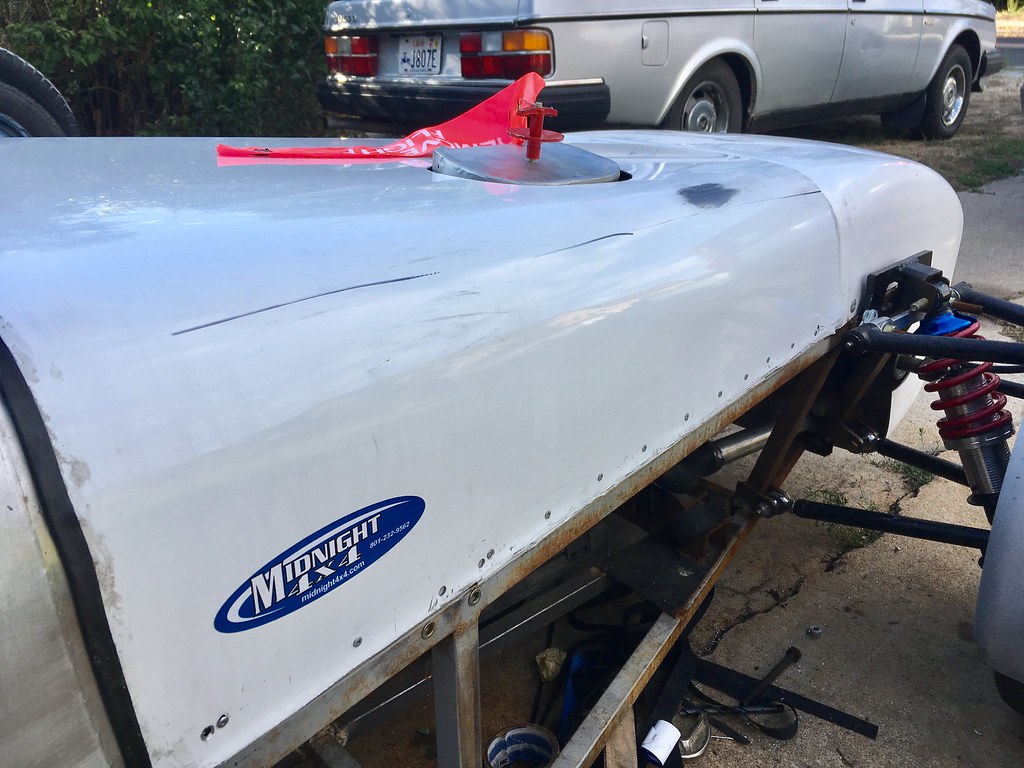
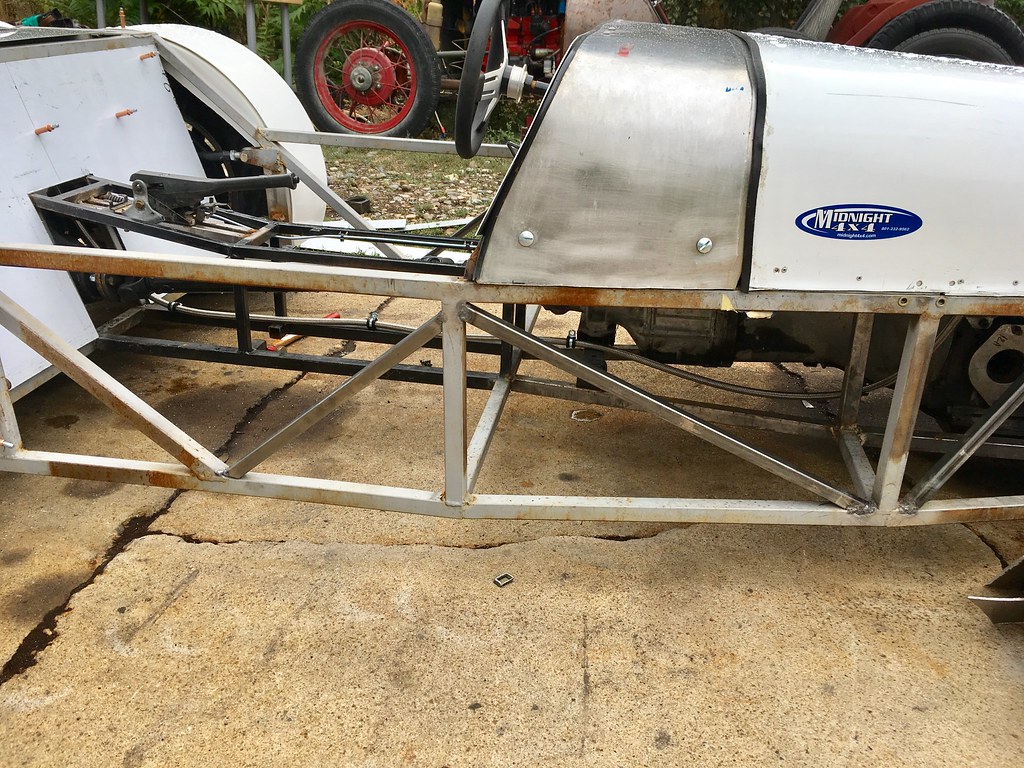
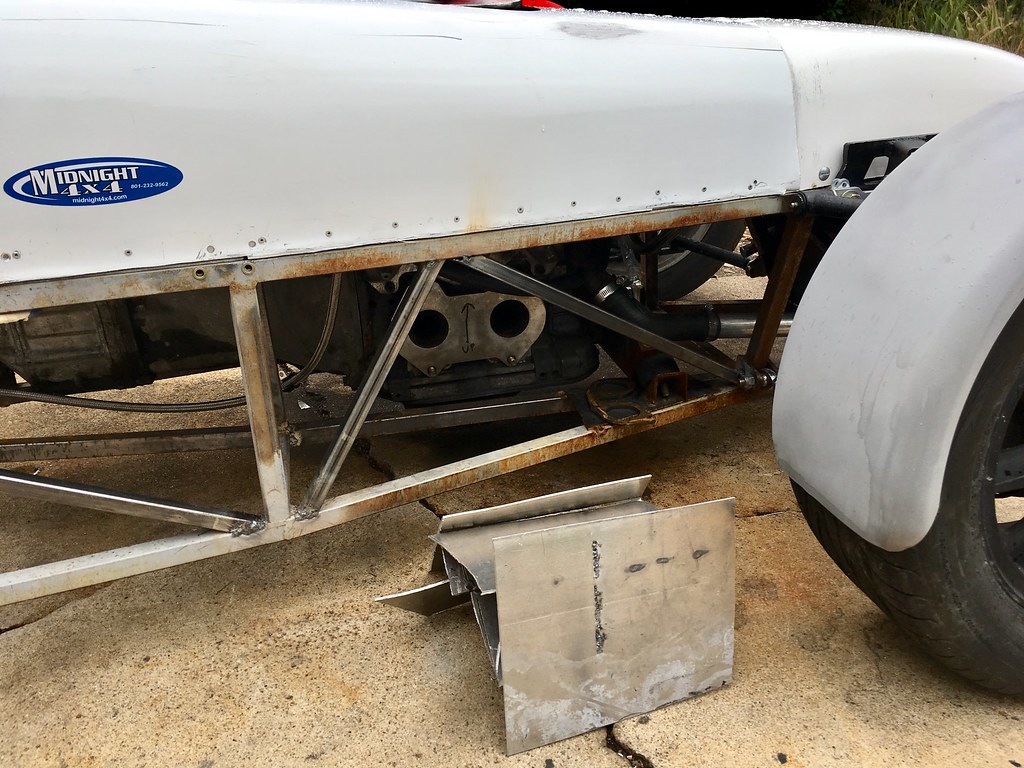
All my heim joints (rose joints for us Brits) and weld inserts, tabs etc come locally from my local 4 wheeler rock crawler guys at Midnight 4x4. Nice little basement walk in store with a plethora of parts and super friendly staff. They also do DOM tubing cut to the foot so that's super useful too.

So back to the build:

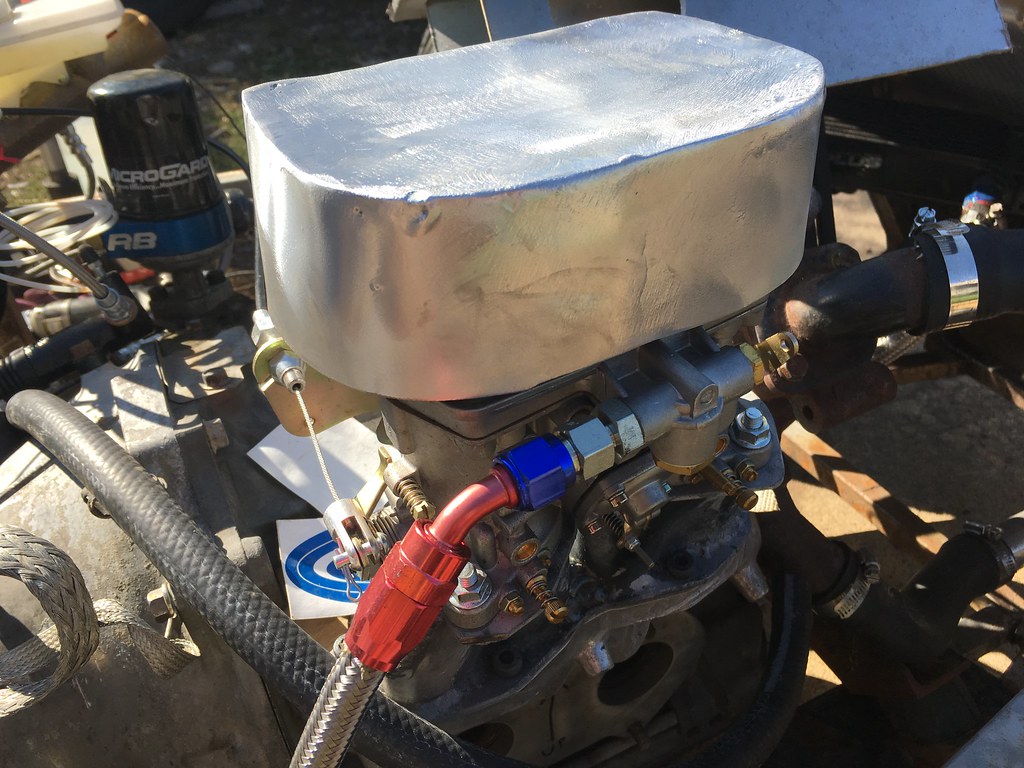
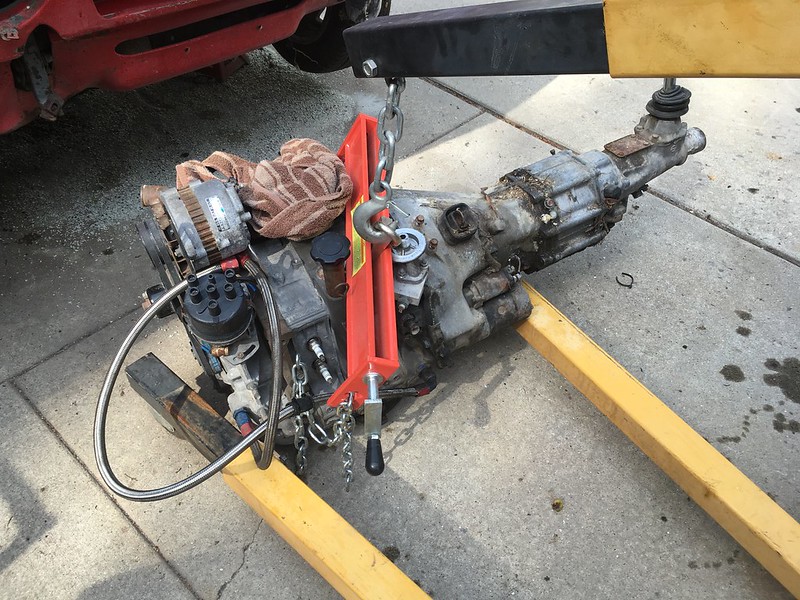
A friend of mine had spoken to me about a 'spare' Mazda rotary engine he had that he would sell me for a couple of hundred bucks....deal!! Later he said he would trade it for a bit of welding work on one of his cars. Well a few conversations later we loaded up the carb-less 12a Rotary into the back of my Volvo wagon XC70 and drove it home:

Image

I had no experience with rotarty's but figured I'd make it work, it fit like a glove. I played around with a few Mukini motorcycle carbs and finally settled on actually buying a cheap knock off Weber IDF off of ebay. Then I built an intake manifold (which I still have to rebuild) And with very simple wiring got it to run. Hopefully this URL with show 10 seconds of it running:

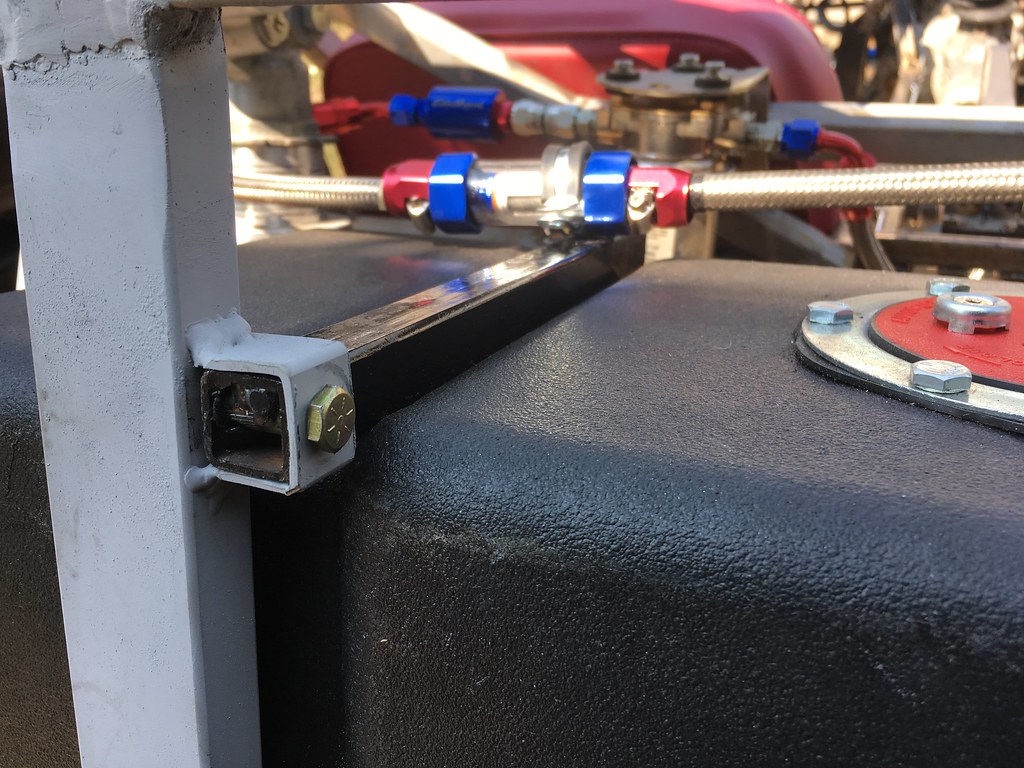
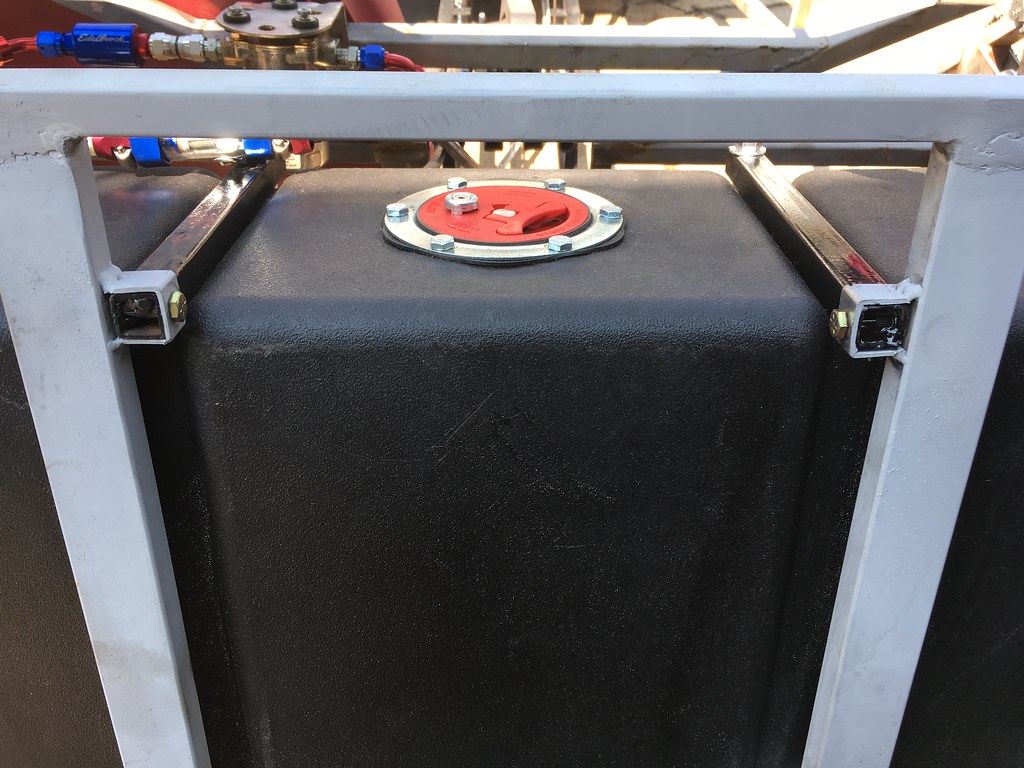
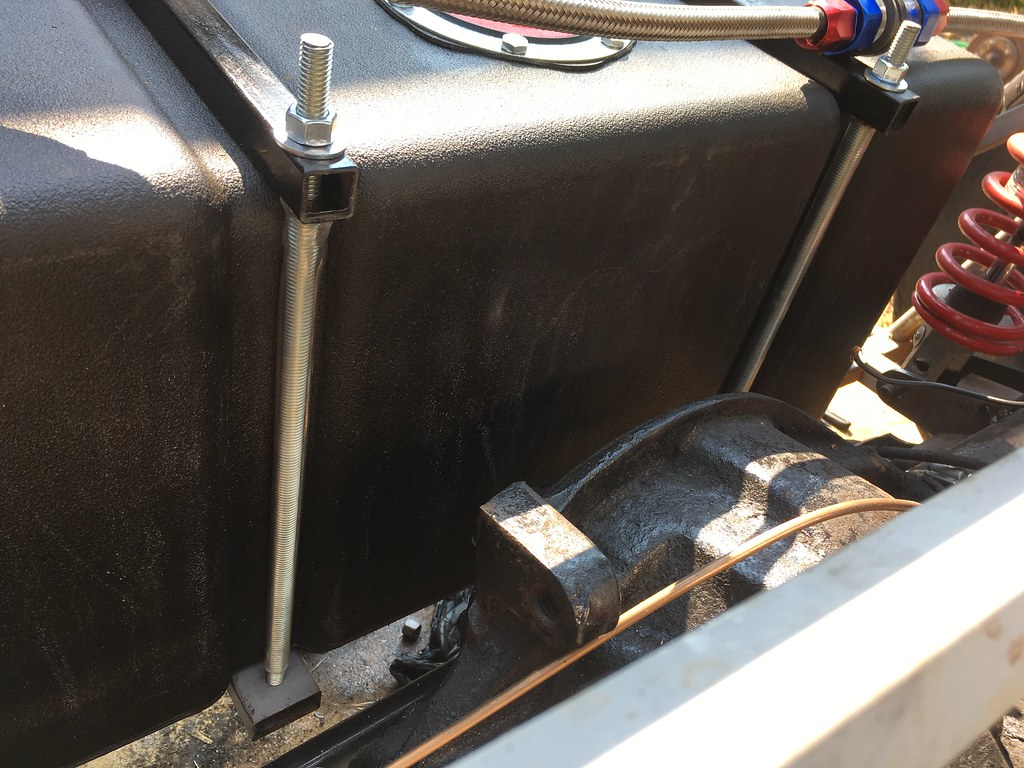
https://video-ort2-1.xx.fbcdn.net/v/t43 ... e=59AEC082

Anyway, after the success of the first run, that then allowed me to focus on radiator, oil cooling, fuel pump etc.

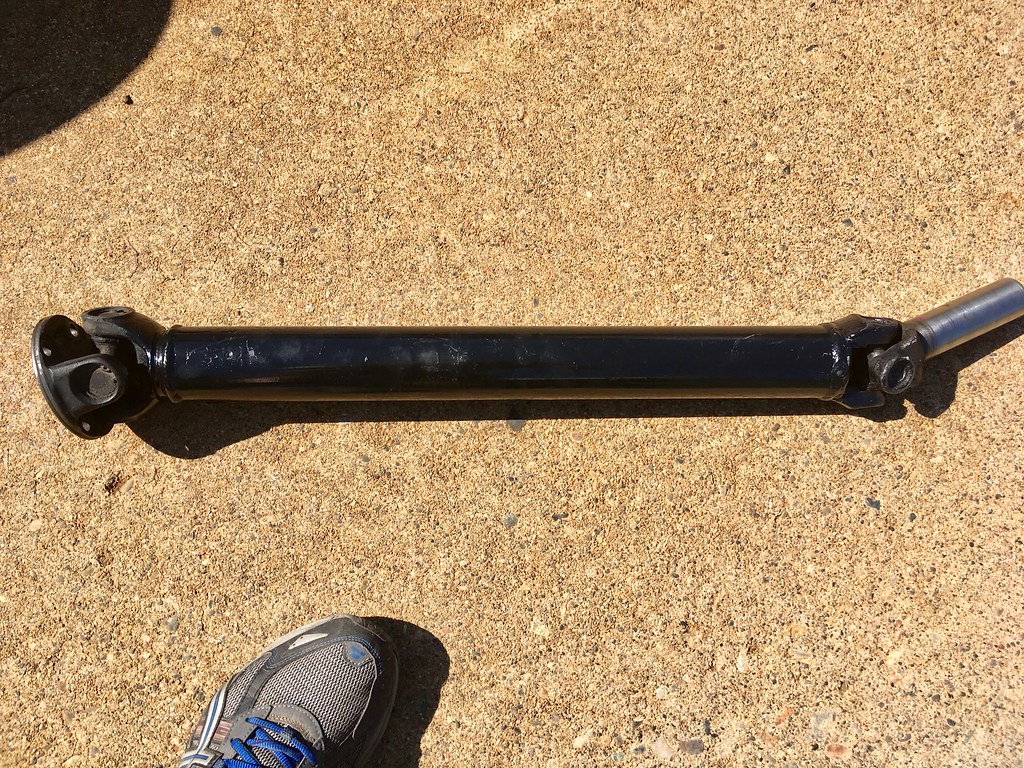
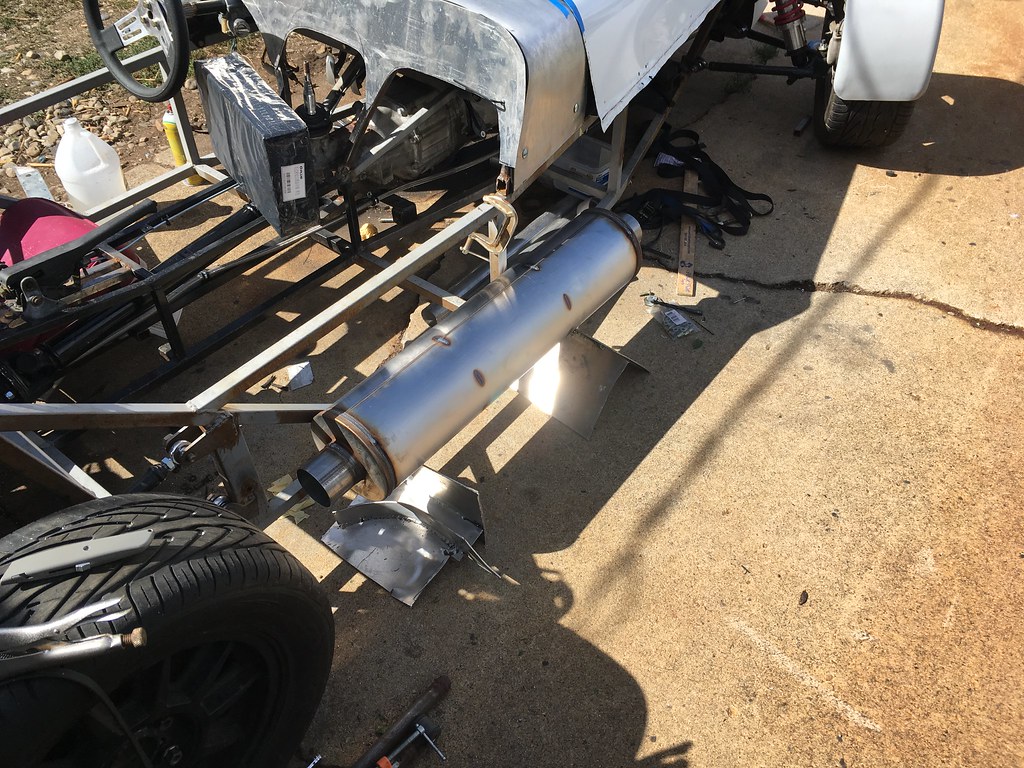
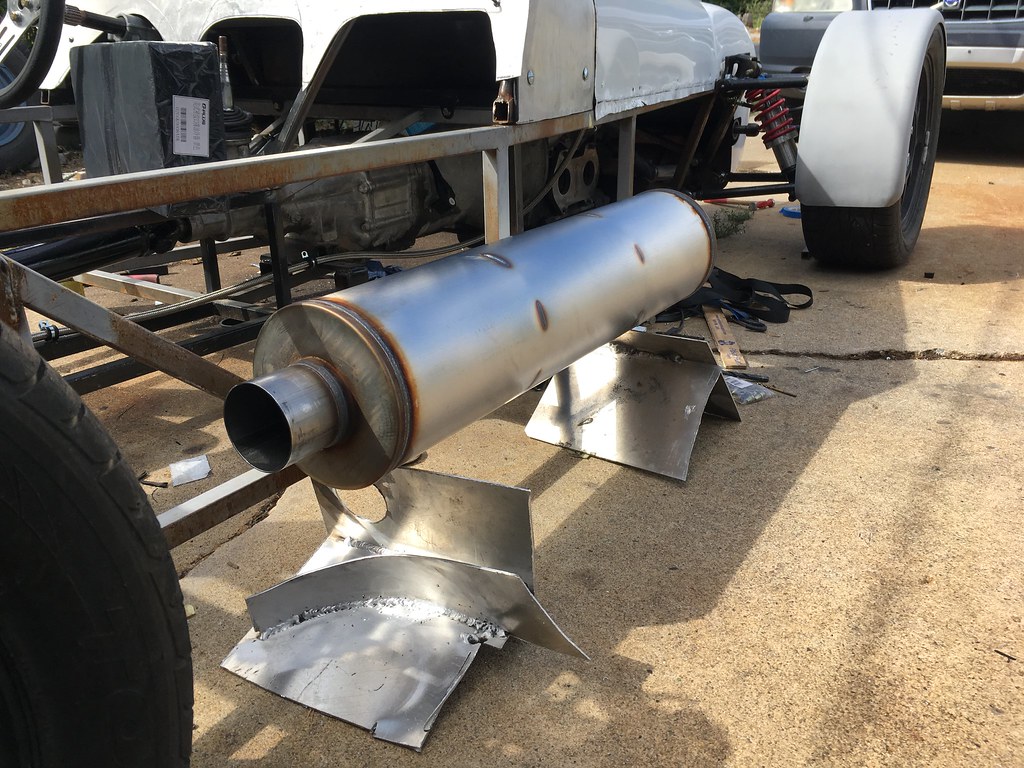
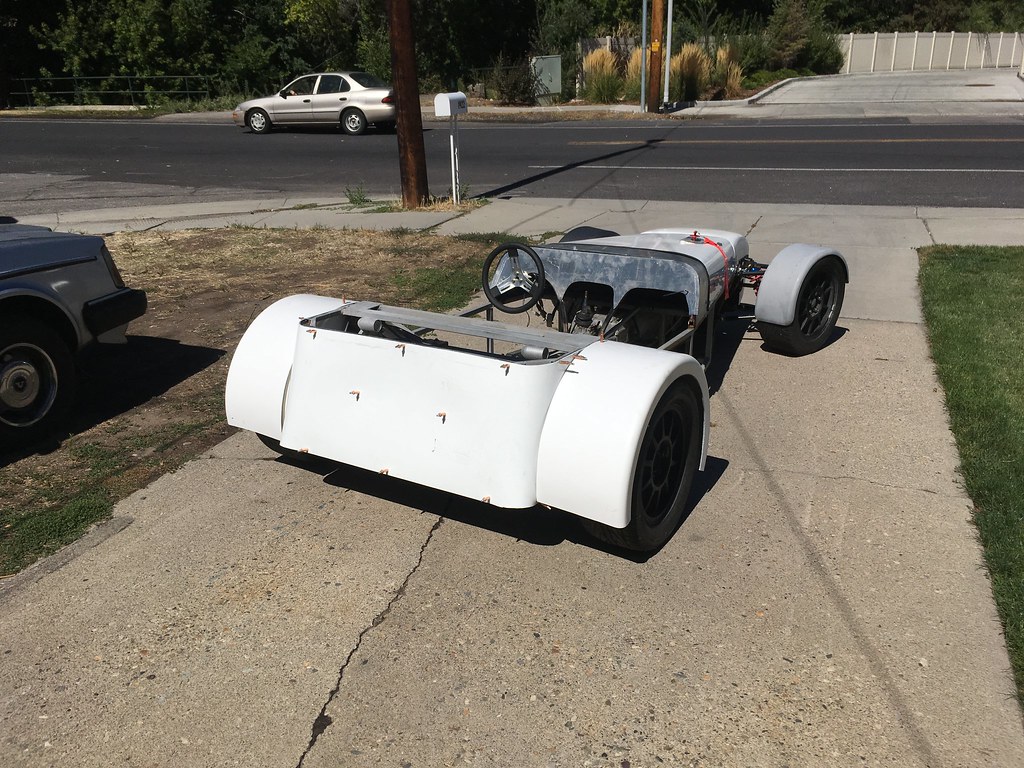
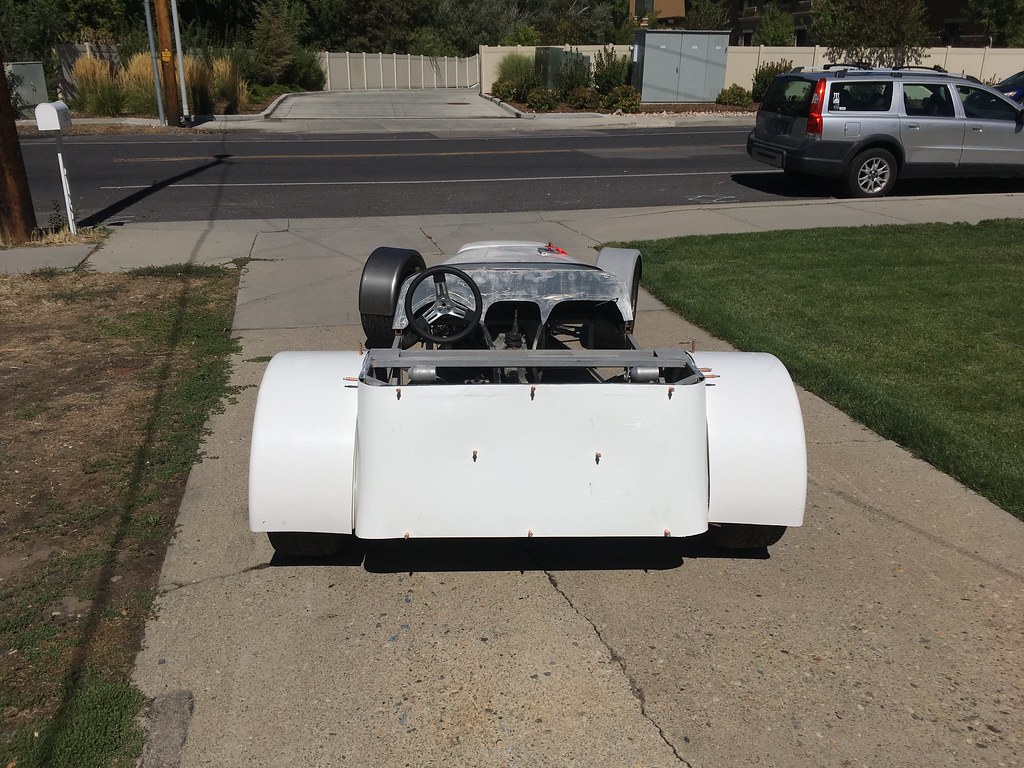
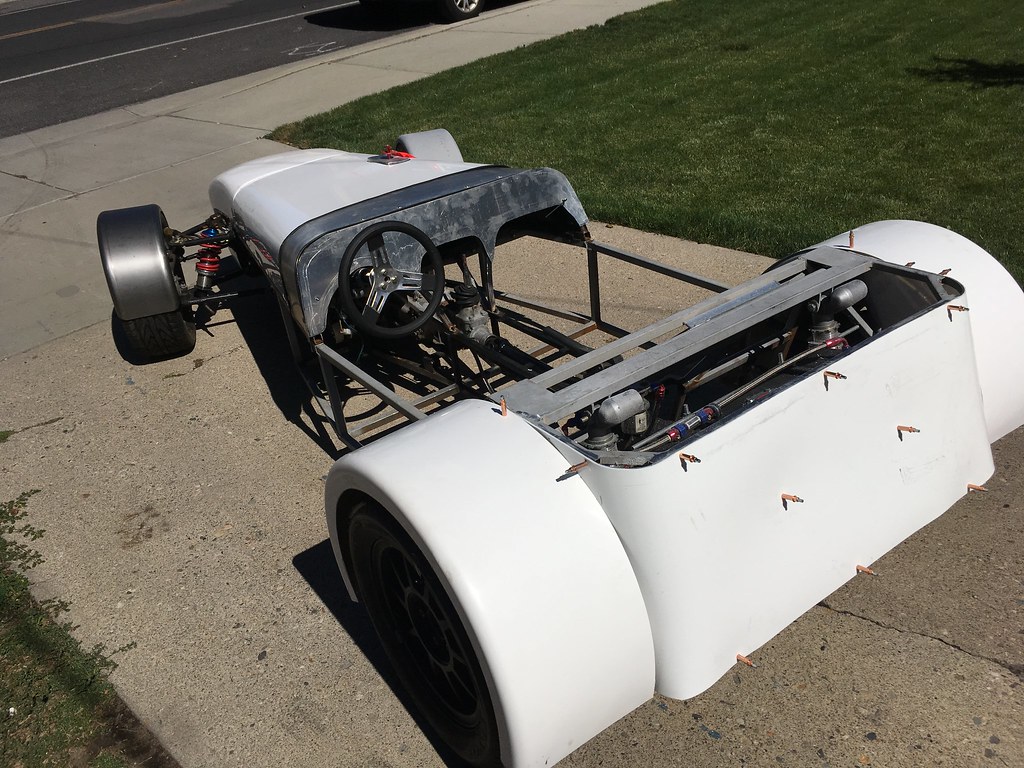
I went to get my driveshaft ordered up and when my driveshaft guy (Dale at Drivelines Utah) said I should go with a larger diameter I went to change the input flange on my rear axle I realized that it was the only thing holding the diff together! So I ended up swapping for a different rear axle/diff that I had on another one of my cars. The downside to this was the axle is 6" or so wider so this made the book frame look pretty narrow, but i'll work with it. On the good side, the new rear axle has disc brakes (opposed to drum) and a different wheel stud pattern which allowed me to run the wider wheels that I actually wanted. I did have to buy adapters to change the front stud pattern, but I think it's worth it.

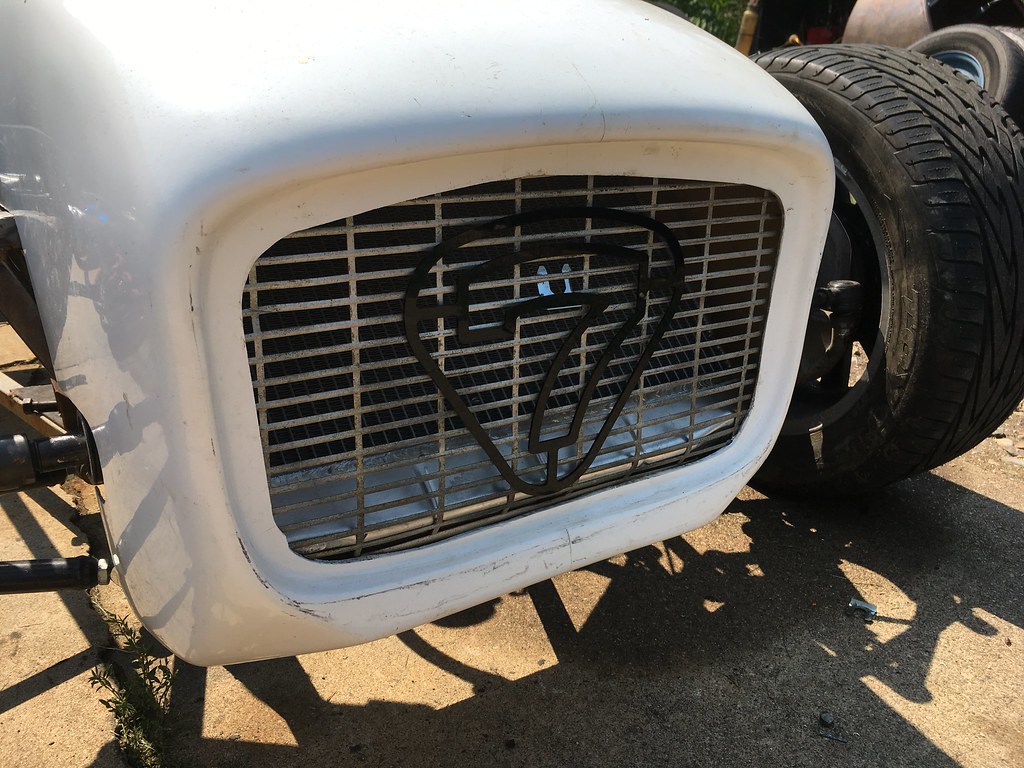
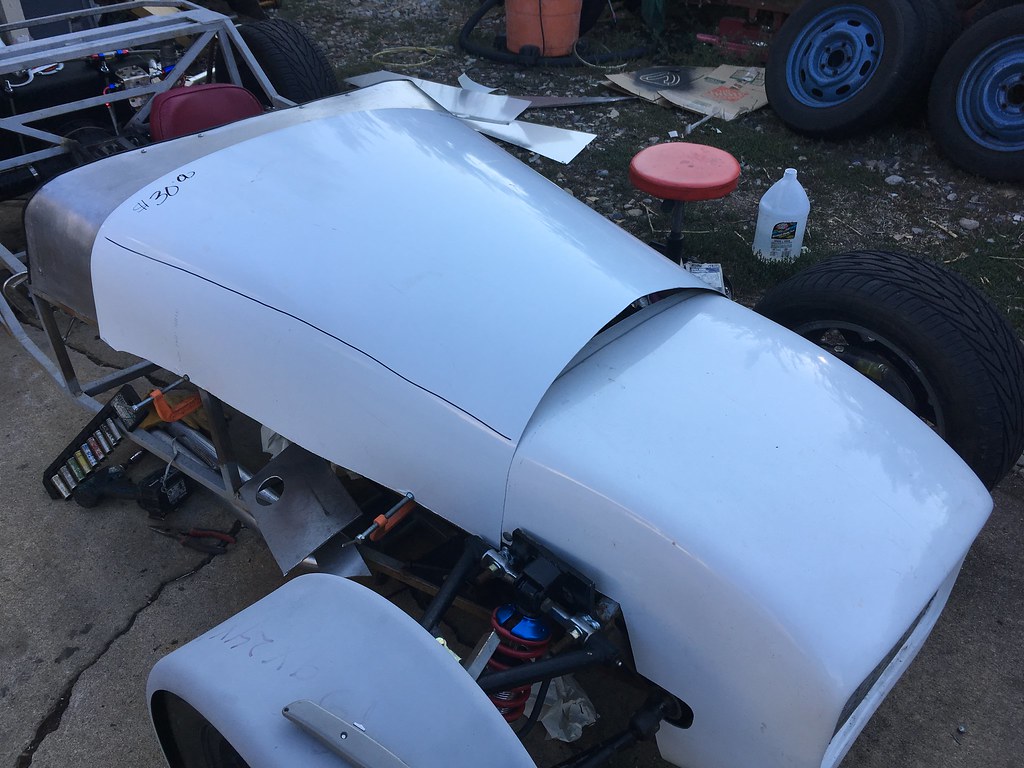
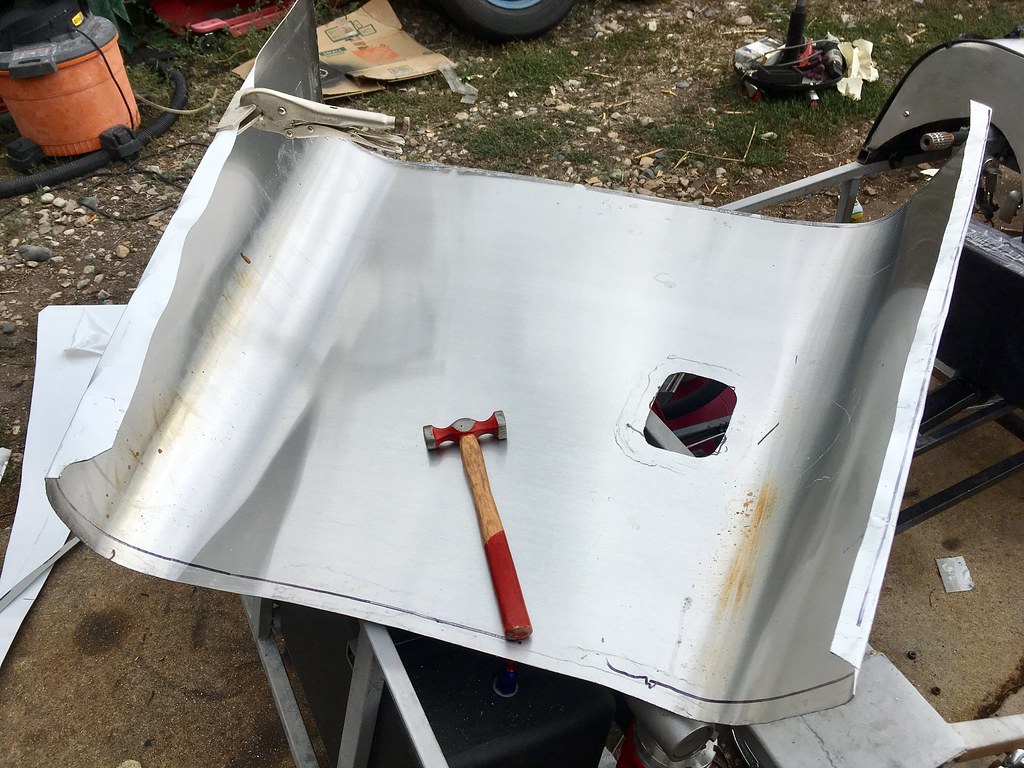
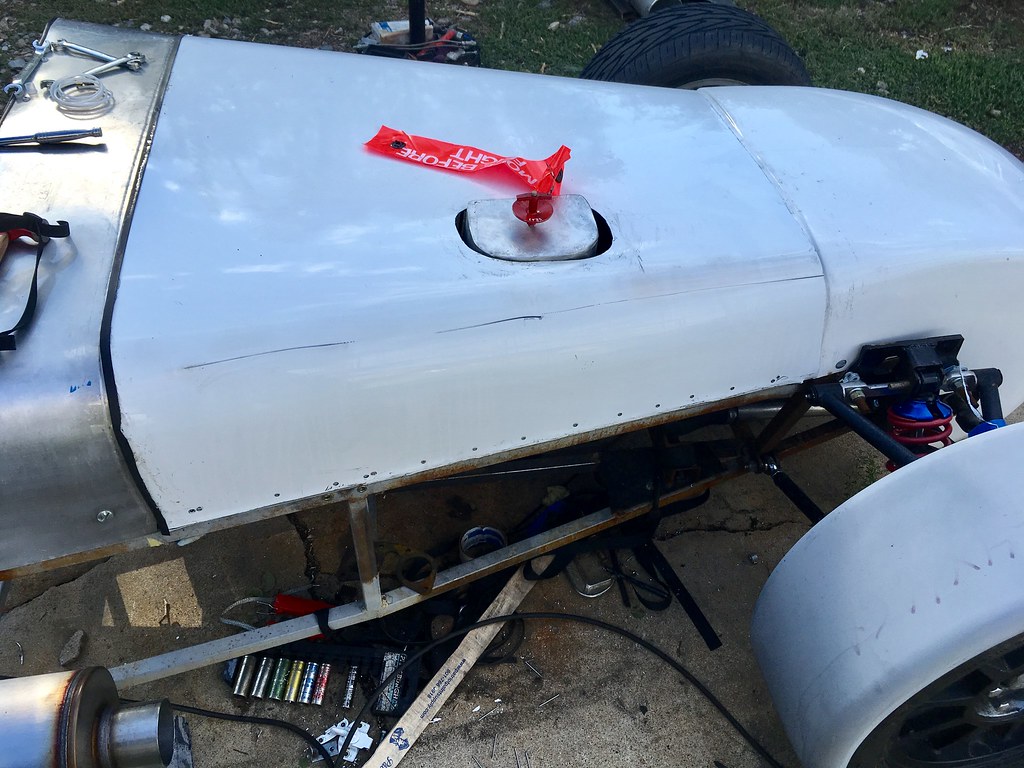
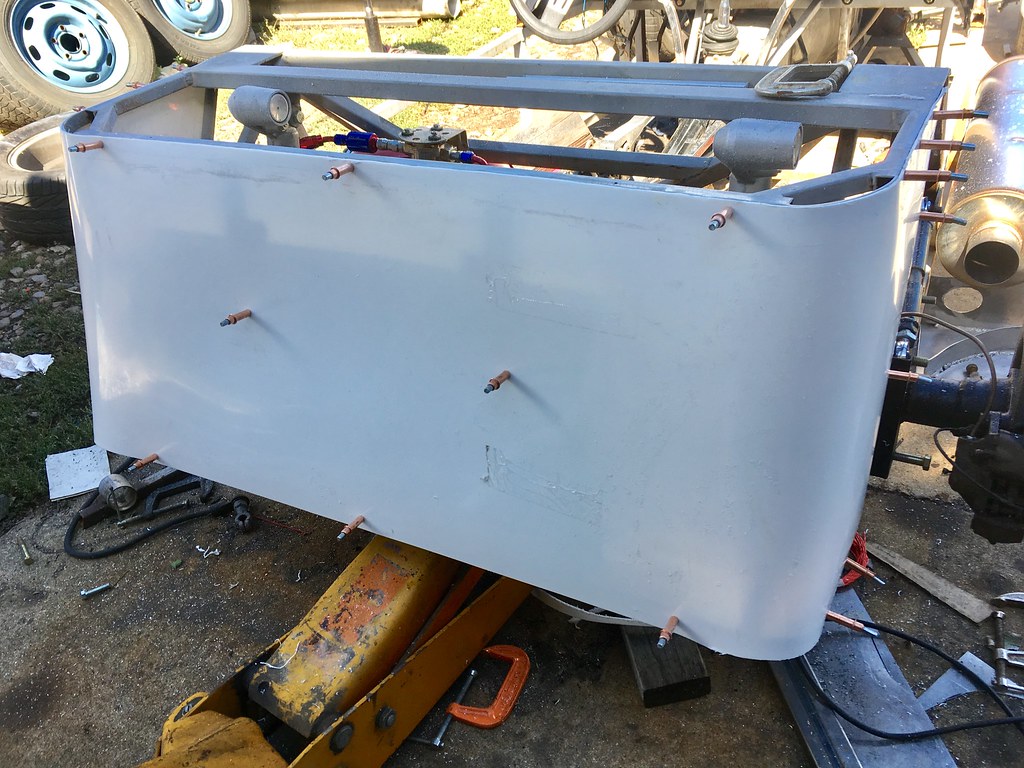
That's about where i'm up to. Driveshaft will be ordered up this week (finance depending) and i'm hoping for the rear fenders at some point soon. With this being an outside build I really want to get a lot of this buttoned up before the cold attacks, Winter is coming!! I will get the hood built this month, racing starts in the spring and I don't want to loose my momentum on the build.


Top
 Profile  
Reply with quote  
 Post subject: Re: Rolvotus Se7en
PostPosted: September 5, 2017, 7:13 pm 
Offline

Joined: May 22, 2017, 7:36 am
Posts: 163
Today I got a '7' laser cut from acrylic, this is short term fix I think.

Super cool machine:


Image

Image

Big ass lazer....

Image

Finished product:

Image
Image
Image

Then today I finished the Gas Tank straps/tie down system. Used 3/4 Square tube, and 3/8 all thread covered in rubber tubing to prevent chaffing.

Image
Image

From the back/differential side:


Image


Today I also made a start on the battery tray and fitted an accelerator spring and stop.

Image

Image


Today was a good day. Tomorrow I'm hiking with the wife, so thats good too.


Top
 Profile  
Reply with quote  
 Post subject: Re: Rolvotus Se7en
PostPosted: September 12, 2017, 8:50 am 
Offline

Joined: May 22, 2017, 7:36 am
Posts: 163
Picked up my driveshaft:

Image

Also I got a good deal on some aluminum. I really wanted to wait until later to do the hood, and use thicker gauge but weather is starting to happen, and with this being an outside project I need to start protecting the engine bay and carbs, so I also made a carb cap. I ran out of propane mid fab so I will finish that this week.

Image

Image

Image

Remove before flight:

Image


Top
 Profile  
Reply with quote  
 Post subject: Re: Rolvotus Se7en
PostPosted: September 14, 2017, 10:21 am 
Offline

Joined: May 22, 2017, 7:36 am
Posts: 163
Hood progress:

Image

Image

Image

Image

Stainless Exhaust Parts ready for pre-fab:

Image


Top
 Profile  
Reply with quote  
 Post subject: Re: Rolvotus Se7en
PostPosted: September 15, 2017, 5:47 am 
Offline

Joined: May 22, 2017, 7:36 am
Posts: 163
My muffler turned up, it's a bit of a big beast 30" long, 7" in diameter with 3" inlet/outlet. 8Eight Fabrication will be doing the finish work on the exhaust system for me, I'm just going to be tacking it all together and making the cuts etc. Goggles for size reference.

I am waiting for my rear fenders to turn up so that I can build the system from the back forward so to speak. Then once the exhaust is done I can add cross braces where needed at the front, and start the tear down in prep for underbody welding and floors etc. Still tonnes to do, but hopefully by winter I will have a driver of sorts.

Image

Image

Image

Image


Top
 Profile  
Reply with quote  
 Post subject: Re: Rolvotus Se7en
PostPosted: September 15, 2017, 7:12 am 
Offline
We are Slotus!
User avatar

Joined: October 6, 2009, 9:29 am
Posts: 7651
Location: Tallahassee, FL (The Center of the Known Universe)
Yup, dat's a moofler all right...

Josh will make it all look good, no worries.

:cheers:

_________________
JD, father of Quinn, Son of a... Build Log
Quinn the Slotus:Ford 302 Powered, Mallock-Inspired, Tube Frame, Hillclimb Special
"Gonzo and friends: Last night must have been quite a night. Camelot moments, mechanical marvels, Rustoleum launches, flying squirrels, fru-fru tea cuppers, V8 envy, Ensure catch cans -- and it wasn't even a full moon." -- SeattleTom


Top
 Profile  
Reply with quote  
 Post subject: Re: Rolvotus Se7en
PostPosted: September 15, 2017, 3:49 pm 
Offline
User avatar

Joined: July 4, 2006, 5:40 pm
Posts: 1994
Location: Novato, CA
You can't have too big a muffler on these things. It looks fine.


Top
 Profile  
Reply with quote  
 Post subject: Re: Rolvotus Se7en
PostPosted: September 15, 2017, 4:32 pm 
Offline
User avatar

Joined: May 27, 2006, 9:46 pm
Posts: 1954
Location: BC, Canada. eh?
"Moofler"? Keeps cattle quiet? :lol: :cheers:

Heck, I have a giraffe whistle on my motorcycle. It's 100% effective, too - I've NEVER had to veer around a giraffe on my bike! :roll:

_________________
Scratch building, at continental-drift speed, a custom McSoreley-design framed, dual-Weber 45DCOE carburated, Zetec-engined, ridiculously fast money pit.

http://zetec7.webs.com/


Top
 Profile  
Reply with quote  
 Post subject: Re: Rolvotus Se7en
PostPosted: September 16, 2017, 7:49 am 
Offline
We are Slotus!
User avatar

Joined: October 6, 2009, 9:29 am
Posts: 7651
Location: Tallahassee, FL (The Center of the Known Universe)
zetec7 wrote:
"Moofler"? Keeps cattle quiet? :lol: :cheers:

Oi vas speaking Svedish...


You do not have the required permissions to view the files attached to this post.

_________________
JD, father of Quinn, Son of a... Build Log
Quinn the Slotus:Ford 302 Powered, Mallock-Inspired, Tube Frame, Hillclimb Special
"Gonzo and friends: Last night must have been quite a night. Camelot moments, mechanical marvels, Rustoleum launches, flying squirrels, fru-fru tea cuppers, V8 envy, Ensure catch cans -- and it wasn't even a full moon." -- SeattleTom


Top
 Profile  
Reply with quote  
 Post subject: Re: Rolvotus Se7en
PostPosted: September 18, 2017, 7:17 am 
Offline

Joined: May 22, 2017, 7:36 am
Posts: 163
I'm looking for some advice, I've decided i'm going with a steel floor, however what gauge steel would you recommend? Also for skinning the frame, I came across a thread that uses plastic sheeting, this stuff:

https://www.speedwaymotors.com/Colored- ... 910041-WHT

Any thoughts?


Top
 Profile  
Reply with quote  
 Post subject: Re: Rolvotus Se7en
PostPosted: September 19, 2017, 8:53 pm 
Offline

Joined: May 22, 2017, 7:36 am
Posts: 163
Today's Progress, hood locating pins, wrapping up the hood a little and then steam rollers turned up from Kinetic, and man! Are they woke or what?!?! Fenders are loosely mounted and not cut at all.

Image

Image

Image

Image

Image

Image

Image

Image


Top
 Profile  
Reply with quote  
 Post subject: Re: Rolvotus Se7en
PostPosted: September 21, 2017, 6:04 am 
Offline

Joined: May 22, 2017, 7:36 am
Posts: 163
Got Jacks Steamroller rear fenders mounted. I really love the quality of his products. Currently the only cutting done is the overhang which I cut down to 2.5". The fender mounting flanges are mounted using 1/4" nuts and bolts and tech screws. I haven't fully decided on the best method yet, i'm thinking I may mount them with welded on nuts and 1/4" bolts with loctite. The rear tub is made using 1/8" plastic sheeting from speedway. The stuff cuts really easily with a jigsaw and course blade then I used a flappy paddle sanding disc on the grinder. Currently held in place with clecos. (You can never have enough clecos) I ran out after using 50 clecos. The rear panel will be finally mounted using 3/16" wide head painted rivets. I have not decided on the mounting of the steamrollers to the flanges, but will probably be rivets.

Then I rolled the car forward so could clean underneath it on the driveway, I love having the car rolled forward, on the 'cleaner' part of the drive and in the sun. I just sat there for an hour and stared at it.

[url=https://flic.kr/p/YV4gER]Image

[url=https://flic.kr/p/YiWVJW]Image

[url=https://flic.kr/p/YCePFY]Image

[url=https://flic.kr/p/YCePFY]Image

[url=https://flic.kr/p/YiWVEh]Image

[url=https://flic.kr/p/XFf2Jx]Image

[url=https://flic.kr/p/YiWVEh]Image

[url=https://flic.kr/p/XFf1Dr]Image

[url=https://flic.kr/p/XFf1vk]Image

[url=https://flic.kr/p/YiWUGA]Image

[url=https://flic.kr/p/YV4fRX]Image

[url=https://flic.kr/p/YiWV6S]Image


Top
 Profile  
Reply with quote  
 Post subject: Re: Rolvotus Se7en
PostPosted: September 21, 2017, 6:13 am 
Offline

Joined: May 22, 2017, 7:36 am
Posts: 163
And to get an even cut line on the rear fenders I marked them using a sharpie and a little setup that worked great.

[url=https://flic.kr/p/YGpMVe]Image

[url=https://flic.kr/p/YCeMH9]Image


Top
 Profile  
Reply with quote  
 Post subject: Re: Rolvotus Se7en
PostPosted: September 22, 2017, 9:52 am 
Offline

Joined: May 22, 2017, 7:36 am
Posts: 163
I was playing around last night in the garage, and I've decided i'm going with a 16ga sheet steel floor that I will plug weld in place. That bought me onto the thought of drilling and de-burring 1.8 billion holes, then I had an idea and pulled out the Harbor Freight air punch flange tool: https://www.harborfreight.com/air-punch ... -1110.html

Punches perfect 1/4" holes in the 16ga. So I will use that.

So just a little psa for anyone that is interested.

Image

Image

Image

Image


Top
 Profile  
Reply with quote  
 Post subject: Re: Rolvotus Se7en
PostPosted: September 22, 2017, 6:11 pm 
Offline

Joined: May 22, 2017, 7:36 am
Posts: 163
More progress, side diagonals and alu back:

Image

Image

Image


Top
 Profile  
Reply with quote  
Display posts from previous:  Sort by  
Post new topic Reply to topic  [ 182 posts ]  Go to page Previous  1, 2, 3, 4, 5, 6 ... 13  Next

All times are UTC - 5 hours [ DST ]


Who is online

Users browsing this forum: No registered users and 35 guests


You cannot post new topics in this forum
You cannot reply to topics in this forum
You cannot edit your posts in this forum
You cannot delete your posts in this forum
You cannot post attachments in this forum

Jump to:  
POWERED_BY