LocostUSA.comLearning how to build Lotus Seven replicas...together! |
| It is currently April 25, 2024, 3:18 pm |
LocostUSA.comLearning how to build Lotus Seven replicas...together! |
| It is currently April 25, 2024, 3:18 pm |
|
All times are UTC - 5 hours [ DST ] |
Moderators: a.moore, JackMcCornack
 
|
Page 1 of 7 |
[ 92 posts ] | Go to page 1, 2, 3, 4, 5 ... 7 Next |
|
| Author | Message | ||||
|---|---|---|---|---|---|
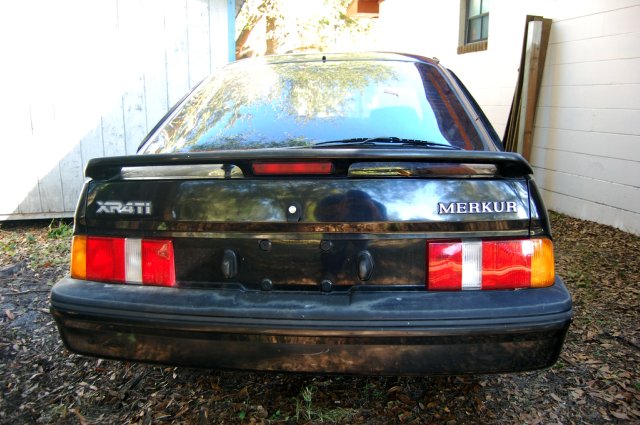
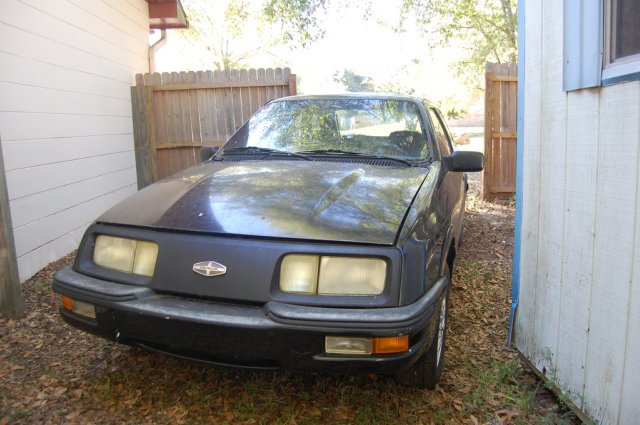
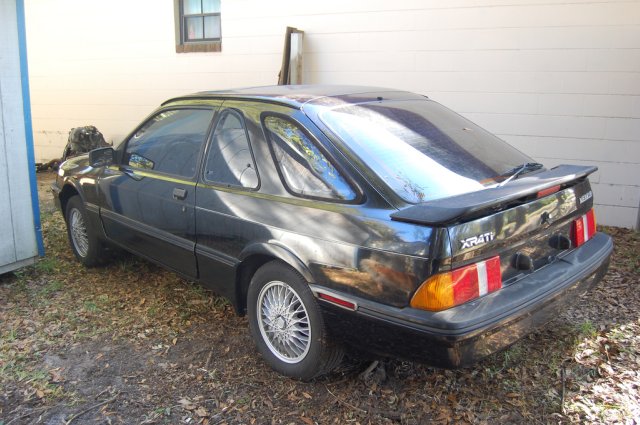
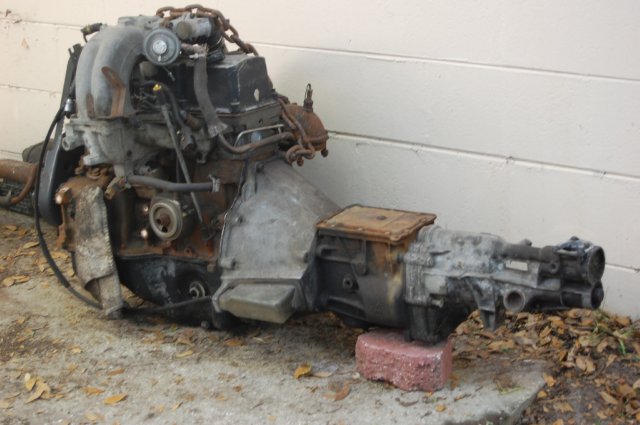
| Tim Taylor |
|
||||
Joined: August 26, 2008, 5:35 pm Posts: 321 Location: Floreeduh |
|
||||
| Top | |||||
| JackMcCornack |
|
||||
Joined: July 29, 2006, 9:10 pm Posts: 3164 Location: Oregon, usually |
|
||||
| Top | |||||
| chetcpo |
|
|||
|
Joined: August 15, 2005, 10:13 pm Posts: 7043 Location: Charleston, WV |
|
|||
| Top | ||||
| Tim Taylor |
|
||||
Joined: August 26, 2008, 5:35 pm Posts: 321 Location: Floreeduh |
|
||||
| Top | |||||
| IndyJoe |
|
||||
Joined: October 2, 2008, 12:37 pm Posts: 191 Location: Indianapolis, IN |
|
||||
| Top | |||||
| Tim Taylor |
|
||||
Joined: August 26, 2008, 5:35 pm Posts: 321 Location: Floreeduh |
|
||||
| Top | |||||
| killernoodle |
|
|||
|
Joined: August 6, 2008, 9:40 am Posts: 532 Location: Greenville/Charlotte NC |
|
|||
| Top | ||||
| Off Road SHO |
|
|||
|
Joined: July 6, 2008, 11:15 am Posts: 1047 Location: Cave Creek, AZ |
|
|||
| Top | ||||
| dhempy |
|
|||||
Joined: February 20, 2006, 11:18 am Posts: 3186 Location: Lexington, KY |
|
|||||
| Top | ||||||
| Tim Taylor |
|
||||
Joined: August 26, 2008, 5:35 pm Posts: 321 Location: Floreeduh |
|
||||
| Top | |||||
| Blackbird |
|
|||||
Joined: March 7, 2006, 6:15 pm Posts: 2401 Location: Northridge, CA |
|
|||||
| Top | ||||||
| Tim Taylor |
|
||||
Joined: August 26, 2008, 5:35 pm Posts: 321 Location: Floreeduh |
|
||||
| Top | |||||
| michmark |
|
||||
|
Joined: November 29, 2008, 8:54 pm Posts: 94 Location: Ada, MI |
|
||||
| Top | |||||
| Miatav8,MstrASE,A&P,F |
|
|||||
Joined: December 22, 2006, 2:05 pm Posts: 8045 |
|
|||||
| Top | ||||||
| Tim Taylor |
|
||||
Joined: August 26, 2008, 5:35 pm Posts: 321 Location: Floreeduh |
|
||||
| Top | |||||
|
|
Page 1 of 7 |
[ 92 posts ] | Go to page 1, 2, 3, 4, 5 ... 7 Next |
|
All times are UTC - 5 hours [ DST ] |
Who is online |
Users browsing this forum: No registered users and 57 guests |
| You cannot post new topics in this forum You cannot reply to topics in this forum You cannot edit your posts in this forum You cannot delete your posts in this forum You cannot post attachments in this forum |