LocostUSA.com

Learning how to build Lotus Seven replicas...together!
It is currently April 16, 2024, 1:37 pm

All times are UTC - 5 hours [ DST ]


Post new topic Reply to topic  [ 457 posts ]  Go to page Previous  1 ... 26, 27, 28, 29, 30, 31  Next
Author Message
PostPosted: February 21, 2016, 9:28 pm 
Offline
User avatar

Joined: March 30, 2011, 7:18 am
Posts: 1615
Location: central Arkansas
BHRmotorsport wrote:
"bIf you warehouse the product in Canada and retail it to Canadians then you have to be labelled in both French and English and show dimensions and weights in metric.


Practically everything in the USA is trilingual English-Spanish-Franch with additional metric measurements.

I picked up a box of Remington ammunition a while back that had only English and French on it. Now *that* was weird... not as weird as the customer-side point-of-sale terminal at the local pharmacy, though. "step 1" is to select the language... I had always assumed the second language was Spanish, until I noticed it was Esperanto.


Top
 Profile  
Reply with quote  
PostPosted: February 21, 2016, 11:22 pm 
Offline

Joined: June 24, 2007, 6:04 pm
Posts: 1521
BHRmotorsport wrote:
"but if there was a company like Speedway in Vancouver they could maybe get things up there a lot cheaper and then use local delivery companies for the final leg of shipping from their business. It could be viable. It's just a thought, anyway."

One big hurdle to the system described above; language and packaging laws. If you warehouse the product in Canada and retail it to Canadians then you have to be labelled in both French and English and show dimensions and weights in metric. You can have Spanish and imperial measurements on the packaging also if you want but they're optional. Packaging is really expensive to change for a market the size of Canada so the best option for Americans is to warehouse in the USA and sell to Canadians (no need for packaging changes then) and to ship groups of small orders across the border in one consolidated shipment (one Customs clearance and one Customs brokerage fee versus multiples) and then drop the individual shipments into a courier system or the Post Office for final delivery. This process works well....I used to make my living providing this service.

Shipping tip for Canadians. Always use United States Postal System for shipping your goods from USA to Canada and have them shipped to a Commerical/Business address instead of a Residential address.....99% of the time the package will be delivered with no fees, duties, or taxes being charged. It works for shipments out of other countries too but not as high a percentage of avoidance, about 90% instead.


Mopac out in Langley is a large outlet for speed equipment and many of their prices are as good as the US prices when exchange and shipping fee, credit card fee etc are added in.
In many cases they are even better, the last Tremec we picked up brand new was almost 175 dollars less than the US price all in.
My Wilwood calipers and brake pads were purchased from them as well, came straight up from the US, no french or other language.
I am not saying that they are cheaper all the time but a lot of the time it is so close that shipping can make the difference, if your item is over $250 the shipping is free, so it is as close to a Speedway Canada has.
Anything performance wise that the US offers they can get. My quick Fuel carb I just bought for my AMX was in stock and priced competitively.
Worth a look for Canadians that are further from the border. Not much french on the packaging either, on that note ever look at items costco sells, I am surprised how many items don't have french on the package, at least around here.
Probably like most things, there are rules and there are rules.

Al

http://www.mopacautosupply.com/Performance_World_1.html
http://www.performance-world.com/

_________________
Super Seven 3.4


Top
 Profile  
Reply with quote  
PostPosted: February 22, 2016, 2:08 am 
Offline
User avatar

Joined: August 27, 2005, 1:04 am
Posts: 1414
Location: Kamloops, BC, Canada
Yup, I've had good luck with MoPac too. I've bought a few things from them in store, as well as mail order. I've never looked to see if the stuff I've got from them has French on the package.
As far as border issues when ordering from the US, it seems that there's an automatic "oh, you're in Canada, x5 (or more) for shipping", then we have taxes to pay. If it's an item made in the US or Mexico we don't have to pay duty, just sales tax and sometimes a brokerage fee, depending on what carrier you're using, how much the item is worth, and the alignment of the moon and planets. As an example, when I bought my wiring harness, Painless was running a promotion where you sent them the UPC and checked off from a list what you would like as a freebie, shipping included. They sent it (box of wire loom) via ups, who wanted something like $90 for a brokerage fee before they would deliver it. Painless was great and resent it USPS (as I had originally asked) for me, and there wasn't any brokerage. I think a lot of it is a "because we can" kind of deal. EBay's global shipping scam has screwed that up for Canadians too, because sellers don't even know they're sending it to Canada. It goes to ebay's shipping center, then probably crosses the border in a mass shipment to reduce the brokerage fee they pay, but probably don't pass the savings on to the customer. If you want a real scare, compare prices between the exact same products on amazon.com and amazon.ca sometime. I've found the exact same product sometimes for many times the price, and conveniently enough, amazon.com won't ship most stuff to Canada.
Kristian

_________________
V6 in a book frame build. Now registered.
viewtopic.php?f=35&t=7587
viewtopic.php?f=33&t=18172


Top
 Profile  
Reply with quote  
PostPosted: March 11, 2016, 7:31 pm 
Offline
User avatar

Joined: August 27, 2005, 1:04 am
Posts: 1414
Location: Kamloops, BC, Canada
Well seeing how there's shiny bits on the way, I better get my butt in gear and do some more work on my car. My heads and valves that I dropped off three weeks ago still aren't done, but I did finally pull the old engine out today. I think I might wheel the thing out in the driveway for a good power wash to clean up the mess while the engine and transmission are out. It's pretty gross in there. I think I'm going to do a bit of welding and some paint touch up too while I have access.

Image

Image

Kristian

_________________
V6 in a book frame build. Now registered.
viewtopic.php?f=35&t=7587
viewtopic.php?f=33&t=18172


Top
 Profile  
Reply with quote  
PostPosted: March 12, 2016, 1:49 pm 
Offline
User avatar

Joined: October 24, 2008, 2:13 pm
Posts: 5326
Location: Carlsbad, California, USA
OMG, your car looks nekked, Kristian!

I guess you don't drive too far on the street, so this may be meaningless if you're basically doing autocross, but how about putting some sheet metal in the tranny tunnel to put something between your legs and the engine/transmission/road? I'm probably a prisoner of the thinking with respect to driving a car down here. With the 85 degree summer air temperature here plus the heat flowing from the engine/transmission and 130 degree asphalt roads, you'd have 2nd degree burns on your legs in about half an hour.

Cheers,

_________________
Damn! That front slip angle is way too large and the Ackerman is just a muddle.

Build Log: viewtopic.php?f=35&t=5886


Top
 Profile  
Reply with quote  
PostPosted: March 12, 2016, 2:13 pm 
Offline
User avatar

Joined: August 27, 2005, 1:04 am
Posts: 1414
Location: Kamloops, BC, Canada
Yup, it's been a while since its been that stripped down. The tunnel isn't too bad, the only open part is the transmission beside my right foot. I don't get any underhood hot air on my feet becuase the whole front of the tunnel is blocked off by the block plate that is sandwiched between the engine and transmission, then bolts across the front of the tunnel as my engine mount. It's going to be a street car for now, I haven't found any auto crosses closer than about 2 hours drive.
Kristian

_________________
V6 in a book frame build. Now registered.
viewtopic.php?f=35&t=7587
viewtopic.php?f=33&t=18172


Top
 Profile  
Reply with quote  
PostPosted: March 13, 2016, 6:44 pm 
Offline

Joined: May 17, 2008, 10:55 pm
Posts: 328
Location: canada
rx7locost wrote:

if they drag their heels on this, they may have to settle on being #52, right after Puerto Rico! :boxing:

But seriously folks, international currencies exchange quite a bit over time. At various times in the past, the C$ was pegged to the US$, but no longer. We are so aligned with Canada in so many ways, it is hard to understand why or rationalize it. Quick, name the single largest exporter of oil to the US...........Canada by almost 3x in 2014! And with the falling oil prices, so goes the C$.

So going back to the issue, the cost of higher automotive parts from the US, is an unintentional consequence of OPEC. Somebody ought to say to them, "Cut it out!" On the other hand, I do love my 1.49 a gallon prices right now.


Canadian and American Dollars have never been pegged to eachother, going back to Breton Woods. (My father was a classmate of a former Prime Minister of Canada in economics and political science classes, so I might have heard more by age 13 across the kitchen table than 99.999% of the bobble head experts on TV have gotten their heads around).

The ability to free float our currency is the thing that keeps Canada a functioning country.

It's frightening to think what would happen if the currencies got pegged.
Pegging of a currency (and nothing else- union and social net bashing were outright lies) destroyed the country of Greece.


Top
 Profile  
Reply with quote  
PostPosted: March 13, 2016, 10:10 pm 
Offline
User avatar

Joined: July 17, 2008, 9:11 am
Posts: 6414
Location: West Chicago,IL
I'll defer to your expertise. I'm no expert. Here is where I got my info: http://www.oanda.com/currency/iso-currency-codes/CAD The underlined emphasis is mine. I've seen the same basic reference in other reference articles. If I got it wrong, I apologize.

Quote:
The Canadian dollar exchange rate was fixed to the US Dollar at 1.1 CAD = 1 USD during the Second World War.

In 1949, use of the British Pound was terminated and the Dollar remained pegged to the USD at 1.1 CAD = 1 USD.

In the 1950s Canada decided to have a floating currency; however, in 1962 the currency became a fixed exchange rate again at 0.925 USD = 1 Canadian Dollar. The peg was kept until 1970.

After 1970, the Canadian dollar became a floating currency.

_________________
Chuck.

“Any suspension will work if you don’t let it.” - Colin Chapman

Visit my ongoing MGB Rustoration log: over HERE

Or my Wankel powered Locost log : over HERE

And don't forget my Cushman Truckster resto Locostusa.com/forums/viewtopic.php?f=36&t=17766


Top
 Profile  
Reply with quote  
PostPosted: March 17, 2016, 12:19 am 
Offline
User avatar

Joined: August 27, 2005, 1:04 am
Posts: 1414
Location: Kamloops, BC, Canada
Well I finally got my heads back from the machine shop today, after they were supposed to be done Feb. 23. Good thing it only took him 4 weeks and a bunch of phone calls from me. He trued them up and did a 3 angle valve job, all for the low price of $250, and he didn't even charge full pop because he and my dad go way back. Turns out I missed cleaning up the exhaust ports on the one head too, so I did that once I got them home, then masked and painted them. I lit a fire in my little wood stove and set the heads on top to bake overnight. Tomorrow I should be able to get them assembled and installed, and hopefully I can finish up the intake ports and get it flanged up too.

Here's what the intake ports on the manifold looked like. The scribed line is the intake gasket, which is how much I opened up the ports in the heads.
Image

Here's looking down into the lower intake. Not real pretty.
Image

Here's the touched up version. Much better. I didn't take the ports all the way out to the scribe lines yet, just in case the lines don't match the ports in the heads.
Image

Image

Here's the valve seats, much nicer than before.
Image

Not quite as fancy as the old oven I had in my old shop for baking paint, but it'll do for now.
Image

And time to shut down for the night. Nothing near at all even close to as fancy as Team Slotus world headquarters, but again, it'll do. It feels good to be making progress on it again.
Image

We've got relatives coming from Norway on April 5, so hopefully I can get it all buttoned up before they go home and take them for rides. I'll have to hustle, because they're showing up the same day I get home from work, and I'm heading back in a few days.

Kristian

_________________
V6 in a book frame build. Now registered.
viewtopic.php?f=35&t=7587
viewtopic.php?f=33&t=18172


Top
 Profile  
Reply with quote  
PostPosted: March 17, 2016, 1:13 am 
Offline
The voice of reason
User avatar

Joined: January 10, 2008, 4:47 pm
Posts: 7652
Location: Massachusetts
Quote:
Nothing near at all even close to as fancy as Team Slotus world headquarters,


Well you have the Northern Lights, they have tiki torches - it's kind of a toss up.

_________________
Marcus Barrow - Car9 an open design community supported sports car for home builders!
SketchUp collection for LocostUSA: "Dream it, Build it, Drive it!"
Car9 Roadster information - models, drawings, resources etc.


Top
 Profile  
Reply with quote  
PostPosted: March 17, 2016, 7:00 am 
Offline
We are Slotus!
User avatar

Joined: October 6, 2009, 9:29 am
Posts: 7651
Location: Tallahassee, FL (The Center of the Known Universe)
Quote:
Nothing near at all even close to as fancy as Team Slotus world headquarters, but again, it'll do.
Oh, I don't know, a few throw pillows, maybe a carpet remnant or two, couple of tiki torches, a pet donkey and you'd be right in there with Team Slotus HQ. :rofl:

Your shop looks great Kristian! Looks like a place where a guy could build a car or something. Cool...

:cheers:
JDK

_________________
JD, father of Quinn, Son of a... Build Log
Quinn the Slotus:Ford 302 Powered, Mallock-Inspired, Tube Frame, Hillclimb Special
"Gonzo and friends: Last night must have been quite a night. Camelot moments, mechanical marvels, Rustoleum launches, flying squirrels, fru-fru tea cuppers, V8 envy, Ensure catch cans -- and it wasn't even a full moon." -- SeattleTom


Top
 Profile  
Reply with quote  
PostPosted: March 17, 2016, 1:32 pm 
Offline
User avatar

Joined: October 24, 2008, 2:13 pm
Posts: 5326
Location: Carlsbad, California, USA
Hey Kristian,

I got some jaw-boning questions about your cylinder head work. What tools did you use for the work? Was it more of a grinding process or sandpaper removal kind of thing? I have a Phase II plan for my build, which is getting the engine horsepower up between 250-300. I keep wondering how much of the engine work I can do myself. The cylinder heads are an excellent candidate because the work is so expensive and it seems do-able with what I have. I have a good compressor (120 lbs. continuous) and some grinding tools, but zero experience.

What did you use and how long did it take you? Ironically, I may have 3 sets of heads (2 split port and one single port) to fiddle with. I can get to 200HP by just using spit port heads and a Windstar intake setup. It's been cheaper to buy whole engines off of Craig's List rather than parts from a junk yard. I have my donor 3.8 and a 2000 Split port Mustang 3.8 now. I'm working a getting an entire Windstar split port 3.8 for a lot less that the Intake and EFI would be from the junk yard. I'm going to have a lot things to practice on [LOL]. The 3.8L heads are aluminum, though. Easier to do maybe, but likely easier to screw up too.

Cheers,

_________________
Damn! That front slip angle is way too large and the Ackerman is just a muddle.

Build Log: viewtopic.php?f=35&t=5886


Top
 Profile  
Reply with quote  
PostPosted: March 18, 2016, 2:17 am 
Offline
User avatar

Joined: August 27, 2005, 1:04 am
Posts: 1414
Location: Kamloops, BC, Canada
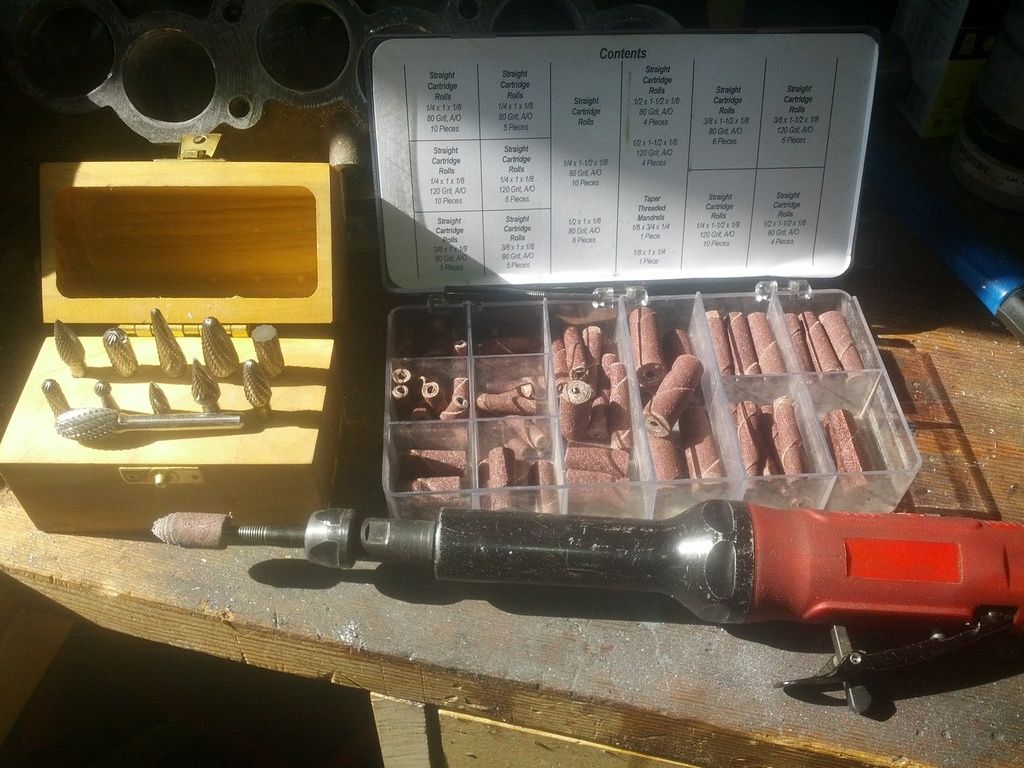
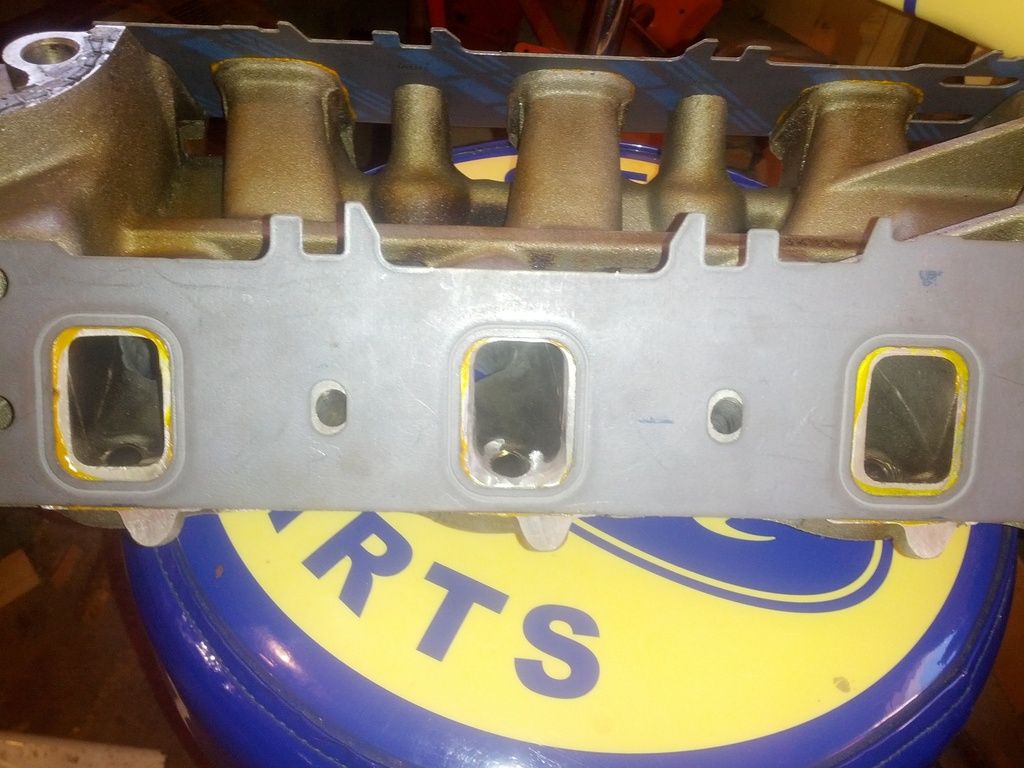
Lonnie, here's what I used for the port work. The long die grinder isn't necessary for reach, but I find I have more control with it because I can hold it with both hands. I use my index finger on the trigger to control the speed and my middle finger under it as a stop. That leaves my left hand to hold the shank, and I rest my elbow on something to steady myself. The carbide burrs are much faster than the sandpaper rolls at removing material, but very easy to take too much too. I like the one laying down because it doesn't have any sharp edges, and with the curve on the back side I can reach around curves in a port. The other one I used is second from the right, back row, a kinda fat, slightly rounded, cone shape. The straight taper works well in a straight port and the radius was a close match to the gasket opening. I used the sandpaper rolls for smoothing things out after the carbide burrs. The burrs I have aren't for aluminum and tend to plug up. They work ok as long as I keep the rpm down and give them a squirt of wd40 once in a while. Coarser ones for non ferrous metals are available, but I don't think I trust myself with something that aggressive, these ones will make a mess fast enough for me. Whoever started the saying "cuts like a hot knife through butter" obviously never tried using a sharp carbide burr in a good die grinder. It's a good idea to practice on a scrap head the first time. I hit a water jacket the first time I was working on ports and turned a perfectly good 460 head into scrap. At least it was just a smogger one, nothing rare.
Image

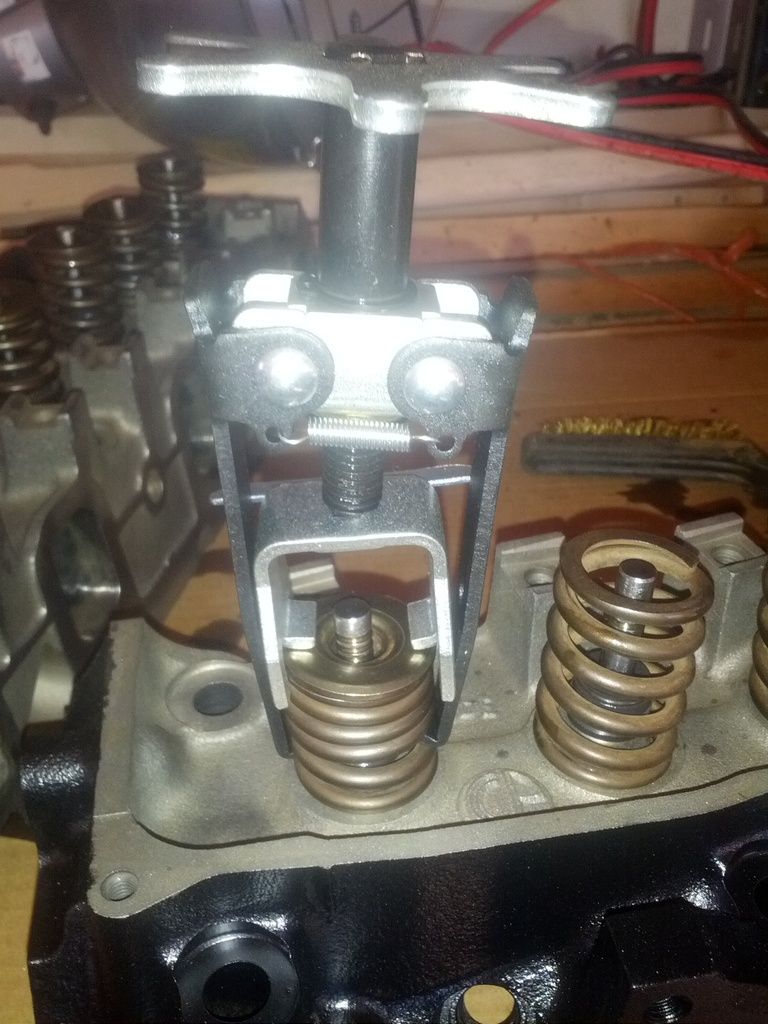
This is the first time I've used this style of spring compressor, and I like it. Once you get the keepers in place, you can lift the spring up against it to keep it in place as you remove the compressor. I didn't have a single one pop out doing it this way.
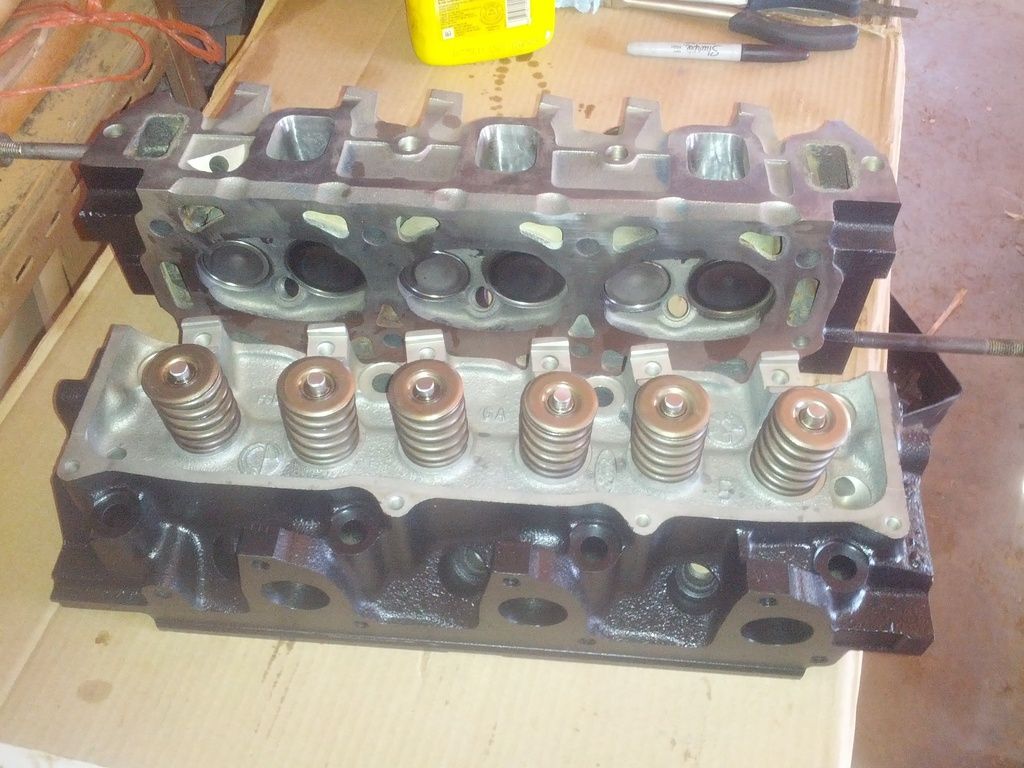
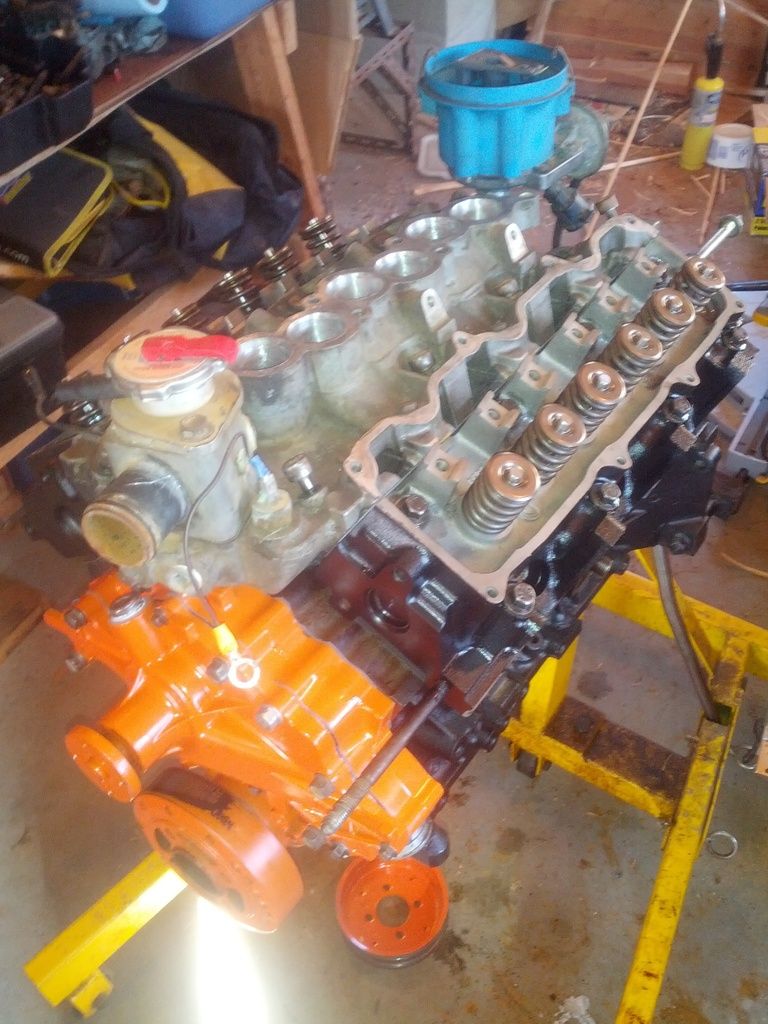
Image

Heads assembled.
Image

Shiny new gaskets. This time the right ones even. Front wheel drive applications have coolant passages at both ends instead of just at the back for rwd ones. The previous engine still has the original head gaskets, at least I've never pulled the heads.
Image

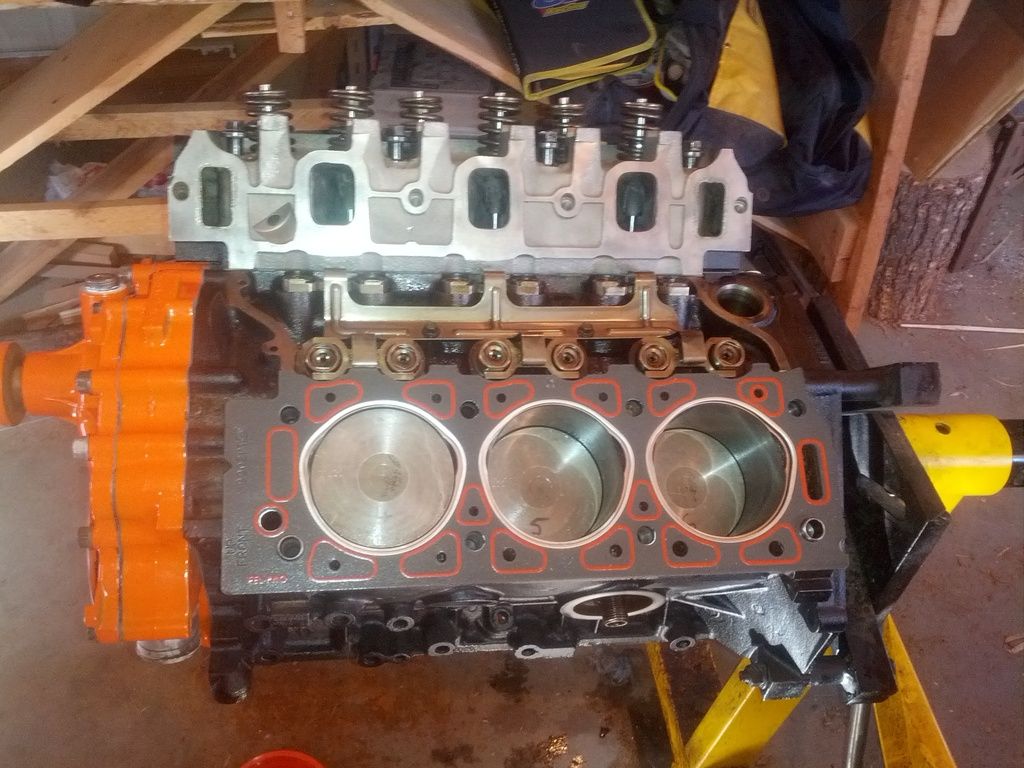
Heads torqued and ready. I lined up the intake manifold gaskets with the ports in the heads, then put some contact cement on the intake and bolted it on. That's how I made sure the ports are lined up between the intake, gaskets, and heads.
Image

Image

Got to love egg cartons for organizing parts. But seeing how I had the heads and valves machined, there wasn't much point to keeping everything sorted out. When I took it apart I wasn't planning on having any machine work done.
Image

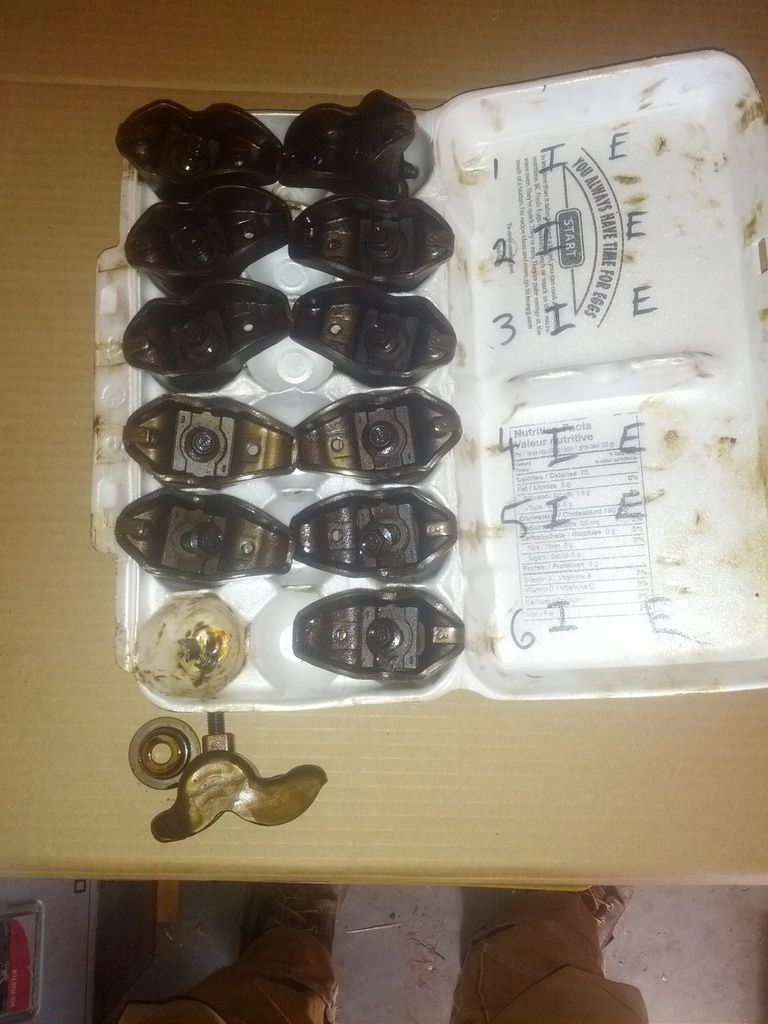
I soda blasted the intake, couldn't bolt that dirty old thing back on the way it was, as well as the rockers and fulcrums. I screwed around with a piece of hose and an air gun like I'd read on the net a bit, but that didn't work very well, so I dumped some baking soda into my siphon feed paint gun and tried that with the fan pattern airflow shut off. Then I had results. Soda blasting is supposed to be delicate enough for carbuerator cleaning, so I'm pretty sure my paint gun will be fine. It cleaned the gunk off pretty good once I got the worst of the oil off with lacquer thinner, but was gentle enough I could hold the rockers with my bare hands and it didn't hurt at all. The mess was something else, definitely and outside job. I almost warranted a selfie, I looked like I'd been rolled in flour and was ready for a hot frying pan. Turns out breathing baking soda stings the sinuses a bit too, so a dust mask would have been a good idea.
Image

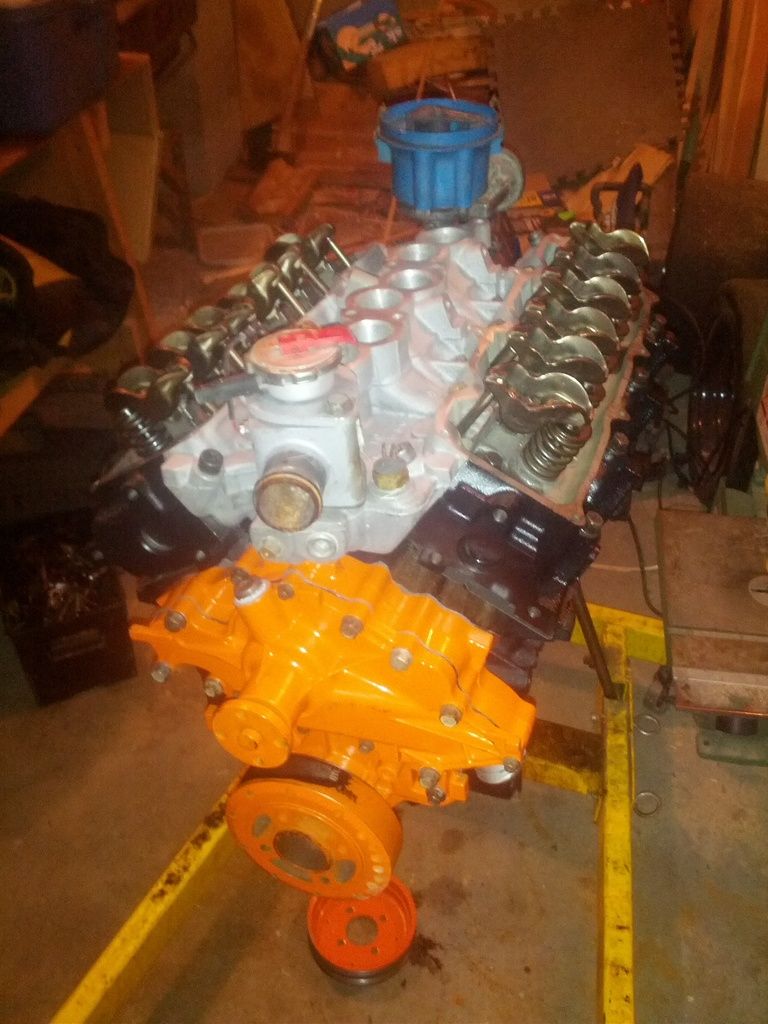
I have to pull the rockers and pushrods back off though and see if the lifters are fully collapsed or not. Hopefully they're stuck partway, because the valve are all open a little bit when they're not supposed to be. There's supposed to be between 2.15 - 4.69mm of clearance when the lifters are fully collapsed and on the base circle, so unless the guy really screwed up the valve job, I should be ok. Scared me when I tightened the rockers down though, and all the valves came off the seats. That's all for now, hopefully tomorrow I can get the rockers figured out, then I can bolt on a pan and oil pump, then a dummy distributor, and spin the pump to make sure I have oil where I should. I forgot about that step when I dropped the distributor in today.
Kristian

_________________
V6 in a book frame build. Now registered.
viewtopic.php?f=35&t=7587
viewtopic.php?f=33&t=18172


Top
 Profile  
Reply with quote  
PostPosted: March 18, 2016, 12:49 pm 
Offline
We are Slotus!
User avatar

Joined: October 6, 2009, 9:29 am
Posts: 7651
Location: Tallahassee, FL (The Center of the Known Universe)
That's some really first-class engine work, Kristian... Well done, Sir!

(You should look in over at Team Slotus... You has been talked about... And you didn't even do anything to deserve it!)

:cheers:
JDK

_________________
JD, father of Quinn, Son of a... Build Log
Quinn the Slotus:Ford 302 Powered, Mallock-Inspired, Tube Frame, Hillclimb Special
"Gonzo and friends: Last night must have been quite a night. Camelot moments, mechanical marvels, Rustoleum launches, flying squirrels, fru-fru tea cuppers, V8 envy, Ensure catch cans -- and it wasn't even a full moon." -- SeattleTom


Top
 Profile  
Reply with quote  
PostPosted: March 18, 2016, 1:43 pm 
Offline
User avatar

Joined: October 24, 2008, 2:13 pm
Posts: 5326
Location: Carlsbad, California, USA
Thank you for the porting info, Kristian.

Cheers,

Lonnie

_________________
Damn! That front slip angle is way too large and the Ackerman is just a muddle.

Build Log: viewtopic.php?f=35&t=5886


Top
 Profile  
Reply with quote  
Display posts from previous:  Sort by  
Post new topic Reply to topic  [ 457 posts ]  Go to page Previous  1 ... 26, 27, 28, 29, 30, 31  Next

All times are UTC - 5 hours [ DST ]


Who is online

Users browsing this forum: No registered users and 18 guests


You cannot post new topics in this forum
You cannot reply to topics in this forum
You cannot edit your posts in this forum
You cannot delete your posts in this forum
You cannot post attachments in this forum

Jump to:  
POWERED_BY