MonkeyNutZ wrote:
tygaboy wrote:
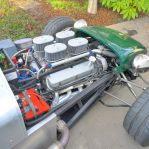
So, I do have to say, having a car dipped is very cool. There is NO rust left on this thing... anywhere. Totally clean and you can see every single little issue it has. What a nice place to start working!
I hope you don't mind me asking but, I'm in the middle of a restoration myself and I was wondering how much the dipping cost you?
I'm happy to share my experience but when it comes to dipping, you have some options so the answer to "what's it cost?" is "It depends...". The place I took it (Nor-Cal Metal Stripping in Windsor, CA) has a "by the part" (and I suspect, 'by the size') pricing model. The chassis was $550, fenders $95 each, etc. I may have made it more expensive by taking it so far apart. For instance, the Metro dash unbolts from the chassis so that made another part ($30) but it may have been 'free' if I'd left it in the car. But that wouldn't have been as nice a job.
They also charge to remove anything you forgot - including bondo, seam sealer, etc. I certainly had that going on... And I have to say, they told me all this up front so there were no surprises but I had assumed the chemicals would take care of all that. Turns out, at least at this place (and maybe it's a CA thing) they don't want all that stuff going into the tanks. Who knew...?
Finally, I also had them do the epoxy priming. In the end, with all the parts I had done, it was just over $2500. Ouch... But there you go. I'm sure I could have done many of the parts for less via some other media blasting but my 'working on the car' time is quite limited and I opted to "just do it" and get to the next stage of the project. In fact, I have other parts (like the gas tank) that I think I'll take in for the same treatment. Pricey? Yes, it seems to be. But the result is really nice.