LocostUSA.com

Learning how to build Lotus Seven replicas...together!
It is currently April 19, 2024, 2:31 am

All times are UTC - 5 hours [ DST ]


Post new topic Reply to topic  [ 26 posts ]  Go to page Previous  1, 2
Author Message
PostPosted: July 21, 2015, 3:35 pm 
Offline
User avatar

Joined: August 10, 2007, 4:38 pm
Posts: 217
Location: Houston, TX
I'm using gas, and you're exactly right about that weld in particular. It needs more heat next time as well as proper wire feed (already fixed). Several of the wishbone chassis brackets need more heat, actually. I plan to re-do all of them that need it. :cheers:

_________________
My Mazda BP-powered Triumph Spitfire project: http://grassrootsmotorsports.com/forum/build-projects-and-project-cars/1976-triumph-spitfire-50-v8-miata-18/54640/page1/


Top
 Profile  
Reply with quote  
PostPosted: July 21, 2015, 3:50 pm 
Offline

Joined: August 19, 2014, 5:17 pm
Posts: 685
Location: England
If you just slow down the wire feed and crank up the amps a bit a mig weld will penetrate rather than sit on top. They are never a thing of beauty, this bit of scrap is welded with 80amps and .6 wire on a bit of un prepped 3mm thick rusty plate. By turning down the wire its a bit like upping the amps.

Bob

Image

_________________
Build Log viewtopic.php?f=35&t=16640&p=187700#p187700

Mancave http://s1116.photobucket.com/user/mypic ... ow/mancave


Top
 Profile  
Reply with quote  
PostPosted: July 21, 2015, 3:55 pm 
Offline
User avatar

Joined: August 10, 2007, 4:38 pm
Posts: 217
Location: Houston, TX
Very nice! Thanks, I'll try that.

_________________
My Mazda BP-powered Triumph Spitfire project: http://grassrootsmotorsports.com/forum/build-projects-and-project-cars/1976-triumph-spitfire-50-v8-miata-18/54640/page1/


Top
 Profile  
Reply with quote  
PostPosted: July 21, 2015, 4:05 pm 
Offline

Joined: August 19, 2014, 5:17 pm
Posts: 685
Location: England
I should have added I also try to organise myself a bit and make sure I can get myself comfy by resting my arm against something solid. If I dont the weld tends to walk a bit :BH:

Bob

_________________
Build Log viewtopic.php?f=35&t=16640&p=187700#p187700

Mancave http://s1116.photobucket.com/user/mypic ... ow/mancave


Top
 Profile  
Reply with quote  
PostPosted: July 21, 2015, 4:16 pm 
Offline
User avatar

Joined: June 12, 2012, 8:40 pm
Posts: 472
Location: Mount Airy, NC
You may have already seen these videos but in case you haven't, check out Project Binky.
www.youtube.com/watch?v=7hCPODjJO7s
They are putting a Celica engine into a Mini. The fabrication skills are incredible and the jokes aren't bad either.

_________________
My car viewtopic.php?f=37&t=16434
1930s Style Sports Car viewtopic.php?f=36&t=16888


Top
 Profile  
Reply with quote  
PostPosted: July 22, 2015, 8:43 am 
Offline
User avatar

Joined: August 10, 2007, 4:38 pm
Posts: 217
Location: Houston, TX
Run87k wrote:
You may have already seen these videos but in case you haven't, check out Project Binky.
http://www.youtube.com/watch?v=7hCPODjJO7s
They are putting a Celica engine into a Mini. The fabrication skills are incredible and the jokes aren't bad either.


I started watching it last night... Great stuff. Thanks for the link!

_________________
My Mazda BP-powered Triumph Spitfire project: http://grassrootsmotorsports.com/forum/build-projects-and-project-cars/1976-triumph-spitfire-50-v8-miata-18/54640/page1/


Top
 Profile  
Reply with quote  
PostPosted: August 8, 2015, 9:42 am 
Offline
User avatar

Joined: August 10, 2007, 4:38 pm
Posts: 217
Location: Houston, TX
Here's the photo album from my visit to Classic Team Lotus, located at the original team workshops in Hethel:

https://flic.kr/s/aHskhdTpFs

For those not familiar, they specialize in restoring, racing, and preserving classic Lotus Formula cars -- both their own and those owned by third parties. I had a near-religious experience visiting their workshops and taking the tour of the current Lotus factory (no pictures allowed!).

They had several amazing cars in various stages (from track-ready to stripped down), but the most interesting to me was the Type 12, which I'll call out specifically:

Image

Nearly bare chassis with radiator and Coventry Climax engine fittted:
Image

A thing of mechanical beauty:
Image

Beautiful. (That's a water pump, not a turbocharger):
Image

A de Dion rear, and shock mounts that I find concerning(!):
Image

_________________
My Mazda BP-powered Triumph Spitfire project: http://grassrootsmotorsports.com/forum/build-projects-and-project-cars/1976-triumph-spitfire-50-v8-miata-18/54640/page1/


Top
 Profile  
Reply with quote  
PostPosted: August 9, 2015, 9:59 pm 
Offline
User avatar

Joined: August 10, 2007, 4:38 pm
Posts: 217
Location: Houston, TX
38 weeks remaining.

Not a lot of photo-worthy stuff this week, but I did spend about 5 hours in the garage between today and yesterday. The heat here has been brutal, with daily highs at 100+ degrees. It started while we were in the U.K., and has just continued. It really limits the amount of time I can spend in the garage, especially doing welding, since I have to cover up (safety first, even if it means heat stroke!).

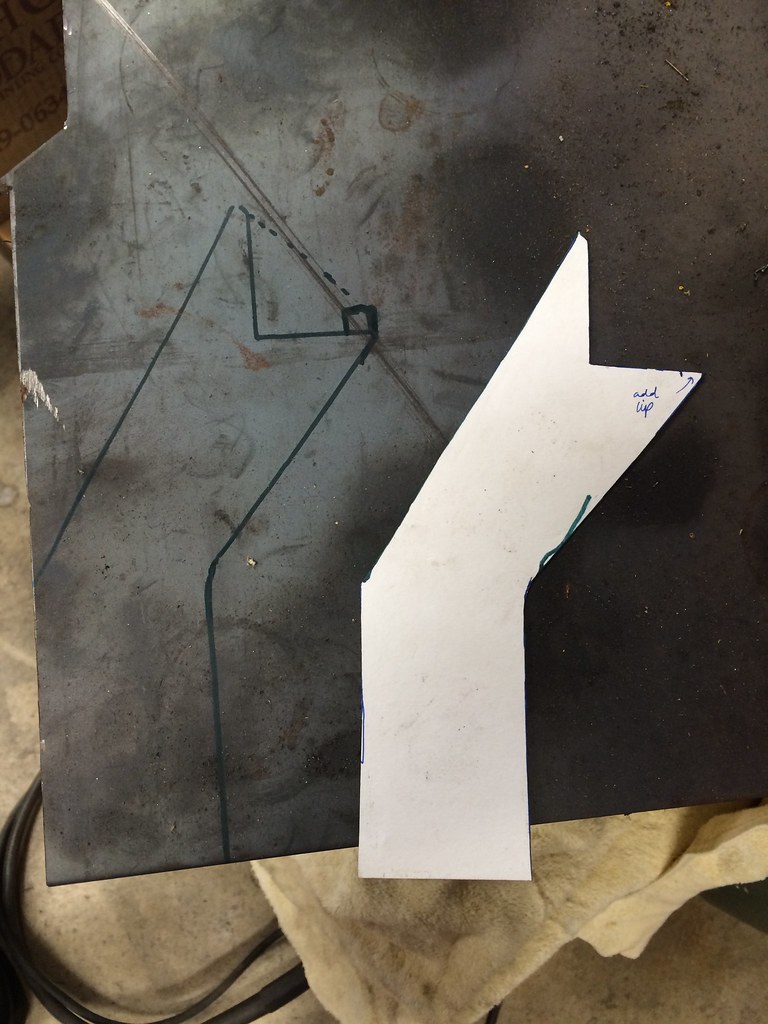
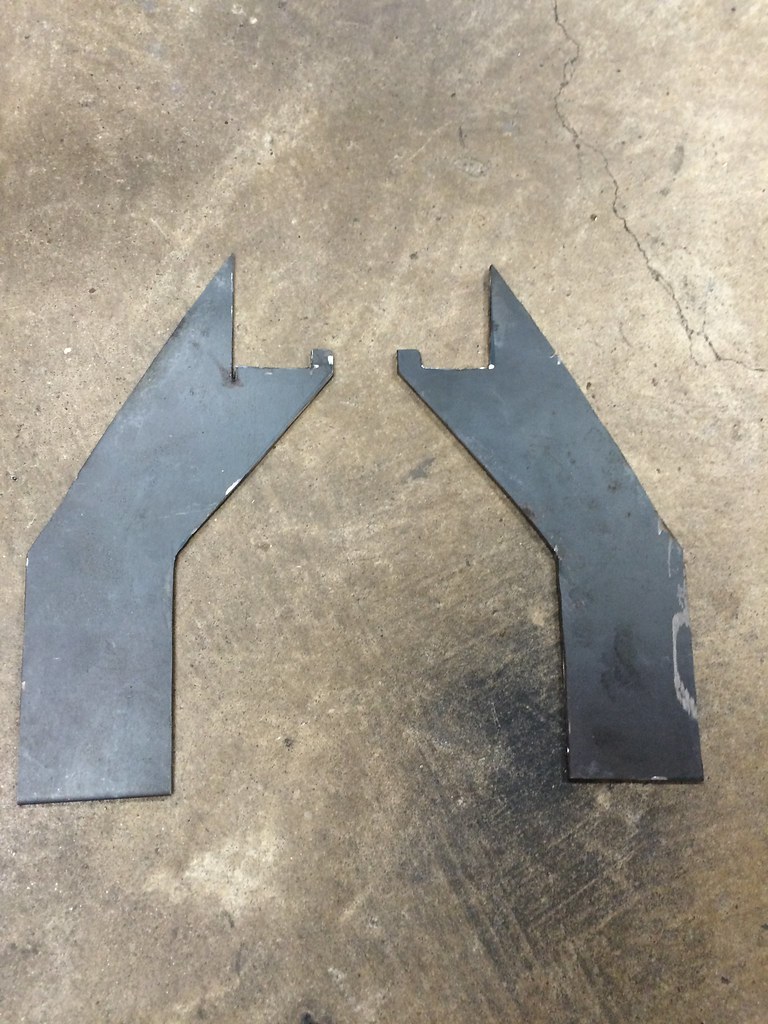
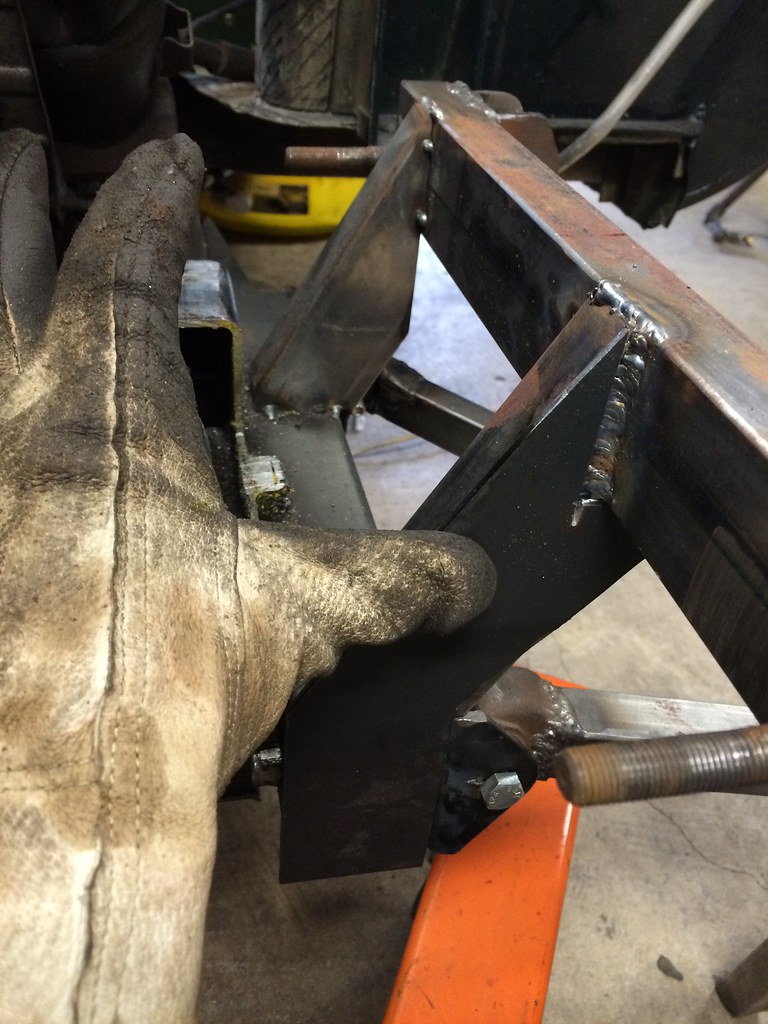
At any rate, I completely finished welding all of the control arms to my satisfaction, strengthening them where I saw potential weakness. I've now started to prep the chassis for some strengthening plates that will hopefully allow it to take the substantial loads coming in from the suspension. These and other upcoming pieces will be more complex shapes, so I need to do some CAD to make sure I get them right. My lovely wife picked up some poster board from the store, which will allow me to get started on the CAD (Cardboard Aided Design) work right away.

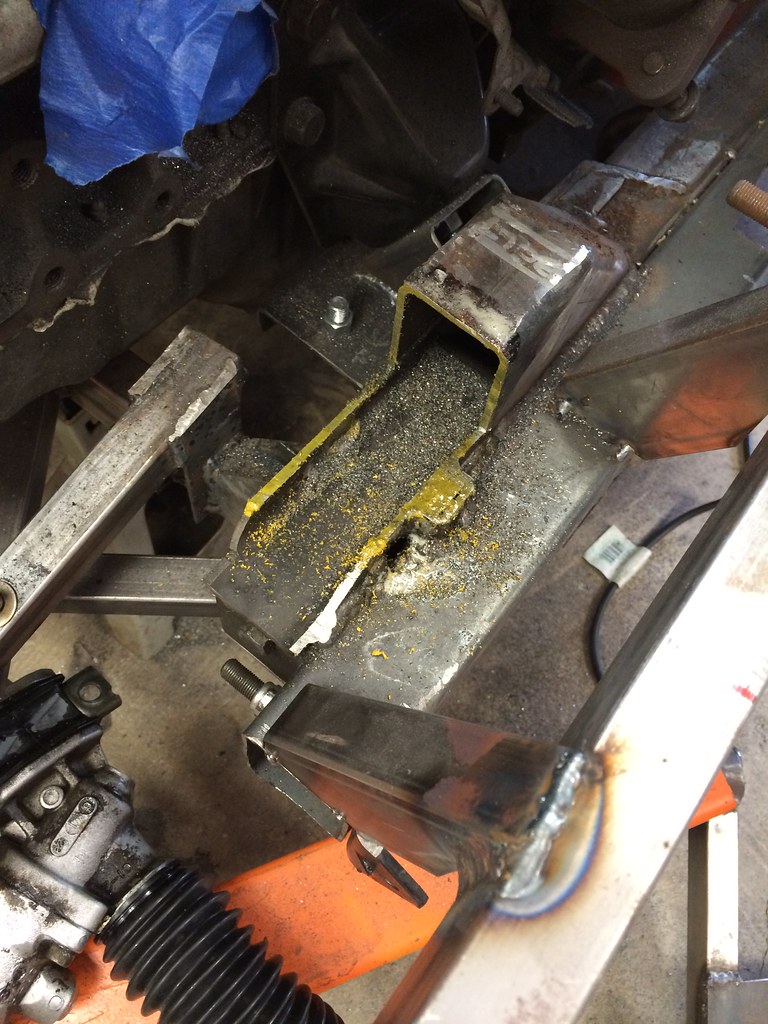
I also had to cut out a little more of the old (unused section of) chassis to make room for the steering rack pinion. I've trimmed this piece so many times, I didn't want to have to do it again -- so cut a huge hunk out. It's ugly. I may make it prettier at some point.

Image
Image


I also removed the Triumph steering column from the car, to be replaced by the Miata column. The stock (at least I believe it's stock) Spitfire column is offset; in other words, the steering wheel doesn't sit directly in front of the driver. Instead, it's slightly off to the right, and the entire column is angled down and toward the right, into steering rack. This means that the steering wheel is not perpendicular to the driver. This bothers me, there's a good chance I'll spend way too much time fixing it when the Miata column goes in.

_________________
My Mazda BP-powered Triumph Spitfire project: http://grassrootsmotorsports.com/forum/build-projects-and-project-cars/1976-triumph-spitfire-50-v8-miata-18/54640/page1/


Top
 Profile  
Reply with quote  
PostPosted: August 16, 2015, 10:51 pm 
Offline
User avatar

Joined: August 10, 2007, 4:38 pm
Posts: 217
Location: Houston, TX
37 weeks remaining.

Spent another half dozen hours in the garage this weekend, and felt like I made some good progress. Between the loads coming in from the upper control arms and (especially) the shocks, I felt that the upper suspension rail (I suppose we'll call it that) needed some reinforcement. I decided that some 11 ga. plate capping off the chassis rail and tying into the suspension rail should do the trick. First, some CAD:

Image

It was actually a bit of a pig getting to this point, mostly due to the little "ears" I put on the ends. A reciprocating saw, grinder w/cutoff wheel, and bench grinder were involved. I really wish I had a plasma cutter.
Image

This is where they go:
Image

They are beefy, but I may yet add reinforcement directly under the shock mount.

I also began design work on the transmission mount. AutoZone produced a GM transmission mount that seemed like it would be easy to use. It also met the 2" vertical dimension limitation, so that the transmission crossmember doesn't hang down any lower than any other part of the drivetrain.
Image

I've already begun working on a design, but it's not finalized yet.

_________________
My Mazda BP-powered Triumph Spitfire project: http://grassrootsmotorsports.com/forum/build-projects-and-project-cars/1976-triumph-spitfire-50-v8-miata-18/54640/page1/


Top
 Profile  
Reply with quote  
PostPosted: August 24, 2015, 2:33 pm 
Offline
User avatar

Joined: August 10, 2007, 4:38 pm
Posts: 217
Location: Houston, TX
36 weeks remaining.

Not many picture-worthy accomplishments this past week, just some more welding on the front suspension, and the beginning fabrication of the transmission support cradle. There is a HUGE potential problem, however, and it could change the direction in which I'm taking the build. If my measurements are accurate, I'm going to have about 5.5" of fender gap at the front wheels. How did this happen? Well, looking back at old pics, I noticed that the LCAs were angled sharply upwards. I failed to rectify this by moving my suspension pick-ups higher in the chassis.

Before I take any further steps, I need to get some assistance in placing the bonnet back on the car to verify that this problem really exists.

_________________
My Mazda BP-powered Triumph Spitfire project: http://grassrootsmotorsports.com/forum/build-projects-and-project-cars/1976-triumph-spitfire-50-v8-miata-18/54640/page1/


Top
 Profile  
Reply with quote  
PostPosted: October 3, 2015, 1:23 pm 
Offline
User avatar

Joined: August 10, 2007, 4:38 pm
Posts: 217
Location: Houston, TX
30 weeks remaining.

Took a bit of a break the past few weeks. Things have been busy at work, so I've had to work some days off here and there. Also, it was brutally hot until recently, so hopefully fall is upon us here in Houston.

Image

Last post, I mentioned that I thought there was a HUGE potential problem. Well, I finally got around to getting help setting the bonnet in place, and confirmed my fears:
Image
Image

I should have foreseen this, with the angle that the control arms had when the car originally came to me and the fact that the custom chassis is dropped about 3" compared to the stock car. Unfortunately, I can't just take the same steps to close the fender gap because the steering rack cradle (and possibly some transmission bits) would tend to occupy the same space as the ground. Fortunately, I have 4 3/4" between the top of the engine and the underside of the hood, so... I can channel and drop the body. There is a transverse cradle that the body rests upon just ahead of the rear trailing arm pick-ups, so my plan is to channel from that point all the way to the front, using that transverse cradle as a pivot.

There's also this little issue, but it's nothing that some small flare extentions can't take care of.
Image

The laser level says that the front track is only about 1" wider than the rear track, which I can fix when I purchase wheels. The rear arches are more heavily flared from the factory, so I don't think I'll need any flare extensions there.

_________________
My Mazda BP-powered Triumph Spitfire project: http://grassrootsmotorsports.com/forum/build-projects-and-project-cars/1976-triumph-spitfire-50-v8-miata-18/54640/page1/


Top
 Profile  
Reply with quote  
Display posts from previous:  Sort by  
Post new topic Reply to topic  [ 26 posts ]  Go to page Previous  1, 2

All times are UTC - 5 hours [ DST ]


Who is online

Users browsing this forum: No registered users and 14 guests


You cannot post new topics in this forum
You cannot reply to topics in this forum
You cannot edit your posts in this forum
You cannot delete your posts in this forum
You cannot post attachments in this forum

Jump to:  
POWERED_BY