LocostUSA.com

Learning how to build Lotus Seven replicas...together!
It is currently April 19, 2024, 5:44 pm

All times are UTC - 5 hours [ DST ]


Post new topic Reply to topic  [ 61 posts ]  Go to page Previous  1, 2, 3, 4, 5  Next
Author Message
 Post subject: Re: My Gazelle build
PostPosted: February 11, 2016, 8:29 am 
Offline
Automotive Encyclopedia
User avatar

Joined: December 22, 2006, 2:05 pm
Posts: 8044
It appears to me that you need to either have the drive shaft and torque tube shortened about 18 inches (complicated and critical) or cut and fiberglass the body to work (messy but easier).
I’d combine stretching the nose at the cowl and moving the rear wheel arch back as necessary, to put the engine where it needs to be in the compartment and relative to the rear axle.


You do not have the required permissions to view the files attached to this post.

_________________
Miata UBJ: ES-2074R('70s maz pickup)
Ford IFS viewtopic.php?f=5&t=13225&p=134742
Simple Spring select viewtopic.php?f=5&t=11815
LxWxHt
360LA 442E: 134.5x46x15
Lotus7:115x39x7.25
Tiger Avon:114x40x13.3-12.6
Champion/Book:114x42x11
Gibbs/Haynes:122x42x14
VoDou:113x44x14
McSorley 442:122x46x14
Collins 241:127x46x12


Top
 Profile  
Reply with quote  
 Post subject: Re: My Gazelle build
PostPosted: February 11, 2016, 4:04 pm 
Offline
User avatar

Joined: April 12, 2010, 5:40 pm
Posts: 2081
Location: san francisco bay area
The torque tube itself is easy, in fact there's a company (I have to look up the name...) that replaces them with large diameter tubing back east.
The prop shaft itself is more of an issue. I've seen guys cut and reweld them but it puts in a hard spot which isn't a good thing. You need some ability for the shaft to twist so it doesn't shatter under load.
Attachment:
DSC04889.JPG

I looked up the bearings, it's Black Sea R&D http://www.blackseard.com/site/ that makes them but they aren't the ones that do the outer tube. Luckily all the outer tube does is torque transfer (just like the arm from the rear of the trans to the diff on a miata) so you don't have to worry about balancing the outer tube.
What I remember of it is, you cut out the excess from one end and weld the end mounting plate back on.


You do not have the required permissions to view the files attached to this post.

_________________
"There are times when a broken tool is better than a sound one, or a twisted personality more useful than a whole one.
For instance, a whole beer bottle isn't half the weapon that half a beer bottle is ..." Randall Garrett


Top
 Profile  
Reply with quote  
 Post subject: Re: My Gazelle build
PostPosted: February 11, 2016, 4:28 pm 
Offline
User avatar

Joined: July 17, 2008, 9:11 am
Posts: 6416
Location: West Chicago,IL
Instead of welding, couldn't you just cut the shaft to size and have someone re-spline it? it is done all the time on IRS axles.

_________________
Chuck.

“Any suspension will work if you don’t let it.” - Colin Chapman

Visit my ongoing MGB Rustoration log: over HERE

Or my Wankel powered Locost log : over HERE

And don't forget my Cushman Truckster resto Locostusa.com/forums/viewtopic.php?f=36&t=17766


Top
 Profile  
Reply with quote  
 Post subject: Re: My Gazelle build
PostPosted: February 11, 2016, 6:30 pm 
Offline
Automotive Encyclopedia
User avatar

Joined: December 22, 2006, 2:05 pm
Posts: 8044
That is a great idea Chuck, and completely slipped my mind and I agree, the torque tube is easy.

I'd definitely go that route versus reworking the glass.

_________________
Miata UBJ: ES-2074R('70s maz pickup)
Ford IFS viewtopic.php?f=5&t=13225&p=134742
Simple Spring select viewtopic.php?f=5&t=11815
LxWxHt
360LA 442E: 134.5x46x15
Lotus7:115x39x7.25
Tiger Avon:114x40x13.3-12.6
Champion/Book:114x42x11
Gibbs/Haynes:122x42x14
VoDou:113x44x14
McSorley 442:122x46x14
Collins 241:127x46x12


Top
 Profile  
Reply with quote  
 Post subject: Re: My Gazelle build
PostPosted: February 11, 2016, 7:18 pm 
Offline
User avatar

Joined: July 17, 2008, 9:11 am
Posts: 6416
Location: West Chicago,IL
Even though I cut, sleeved and welded my axles, I think, considering driveshaft speeds vs. axle speeds, I would recommend the re-splining.

_________________
Chuck.

“Any suspension will work if you don’t let it.” - Colin Chapman

Visit my ongoing MGB Rustoration log: over HERE

Or my Wankel powered Locost log : over HERE

And don't forget my Cushman Truckster resto Locostusa.com/forums/viewtopic.php?f=36&t=17766


Top
 Profile  
Reply with quote  
 Post subject: Re: My Gazelle build
PostPosted: February 12, 2016, 12:32 pm 
Offline

Joined: April 16, 2014, 11:19 am
Posts: 83
Miatav8,MstrASE,A&P,F wrote:
It appears to me that you need to either have the drive shaft and torque tube shortened about 18 inches (complicated and critical) or cut and fiberglass the body to work (messy but easier).
I’d combine stretching the nose at the cowl and moving the rear wheel arch back as necessary, to put the engine where it needs to be in the compartment and relative to the rear axle.


Just curious how you got that particular measurement? I was looking at it the other night when I was aligning the transmission with where the rear subframe was sitting and it looked like the transmission needed to move forward which would've moved the entire motor forward also

I love the idea of chopping down the torque tube and doing a re-spline, but thats definitely something I would need to outsource, so thank you for the link. I already plan on changing the way the ass end looks because I dont like the lack of flow that back end has in relation to everything else. I dont think I want to do much more fiberglassing than that, so I appreciate the ideas you guys are adding.

I was looking for a different picture online and found this one of another custom frame built for a gazelle. I am simply leaving it here to assist in some on my planning, I expect mine to be different when Im all done.

Image

The picture I was looking for was from the gazelle instructions and it shows the beetle body overlay VS the gazelle body and I was hoping to put that here and get another similar picture with a 944 in comparison with the gazelle/ beetle just to get an idea of where the motor sat in a 944 in comparison to the front wheels, so that I could compare it with the gazelle body

_________________
Simon
"Form follows Function"
Current Cars:
-1988 BMW 325i -the daily
-1968 Datsun Fairlady Roadster - the weekend canyon car


Top
 Profile  
Reply with quote  
 Post subject: Re: My Gazelle build
PostPosted: February 12, 2016, 6:58 pm 
Offline
Automotive Encyclopedia
User avatar

Joined: December 22, 2006, 2:05 pm
Posts: 8044
Remove the torque tube and driveshaft entirely.
The body is tapered. Slide the engine so far back that it clears the body with at least an inch on each side. This may put the engine behind the fiberglass bulkhead at the cowl, which is okay.
Align the transaxle cv flange centers with the rear hubs in the overhead view.
Align the hubs in the overhead view in the body/fenders.
Measure from the torque tube mating surface on the engine to the torque tube mating surface on the transaxle.
This is how long the tube should be.
The driveshaft should be shortened the same amount and resplined.
If the splined area is larger than the shaft od, you probably should have a new shaft made.
Once you know exactly how much shorter the tube needs to be, Cook's Machine Works in LA can probably do the work for you, but it will cost $$$. It's not too late to go with an aircooled vw driveline.

Pete Gossett was building a locost with this drivetrain and shortened his own torque tube before selling the project. He might do the work for you.

You asked about a gasket on the tube end. There is no gasket.

_________________
Miata UBJ: ES-2074R('70s maz pickup)
Ford IFS viewtopic.php?f=5&t=13225&p=134742
Simple Spring select viewtopic.php?f=5&t=11815
LxWxHt
360LA 442E: 134.5x46x15
Lotus7:115x39x7.25
Tiger Avon:114x40x13.3-12.6
Champion/Book:114x42x11
Gibbs/Haynes:122x42x14
VoDou:113x44x14
McSorley 442:122x46x14
Collins 241:127x46x12


Top
 Profile  
Reply with quote  
 Post subject: Re: My Gazelle build
PostPosted: March 19, 2016, 6:53 pm 
Offline

Joined: April 16, 2014, 11:19 am
Posts: 83
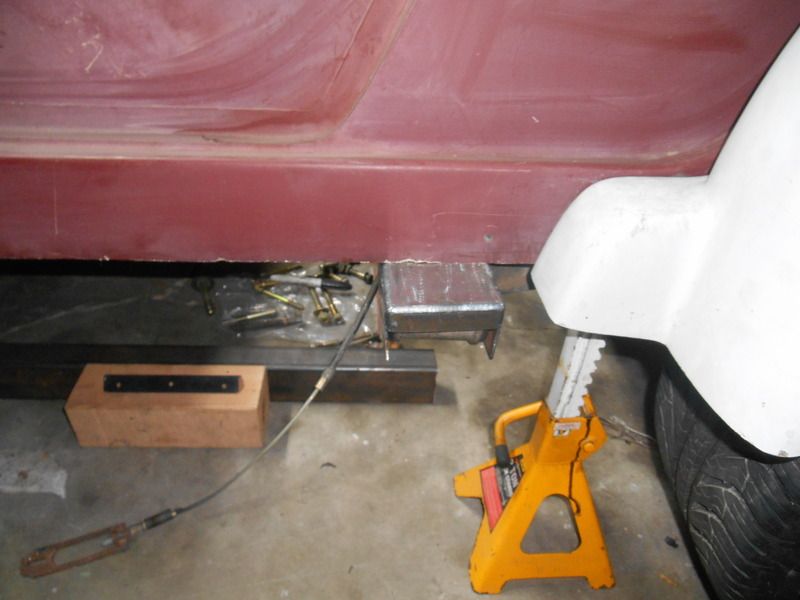
Finally got a chance to get some more time in the garage with the gazelle. I had a few goals today and I pretty much took care of everything, though I am still a little nervous about these frame rails. Im a little torn as to whether I should try to take small notches out to have the frame rail bend along with the shape of the body, which would be badass but complete foreign territory in addition to potentially making the rail weaker (no proof, just paranoia). The other option is to just leave the rail straight but it would have a gap between the body and the rail.

Heres a pic of a bottom side view to give you an idea
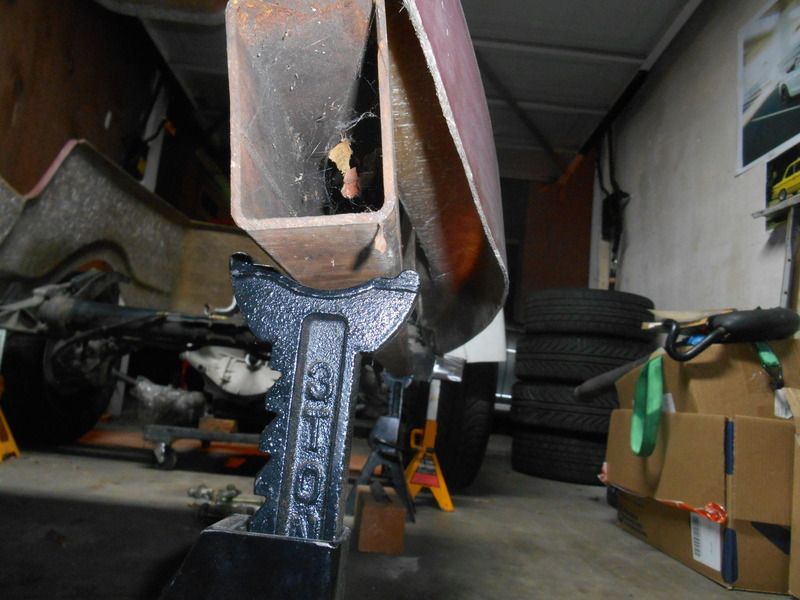
Image

Thoughts??

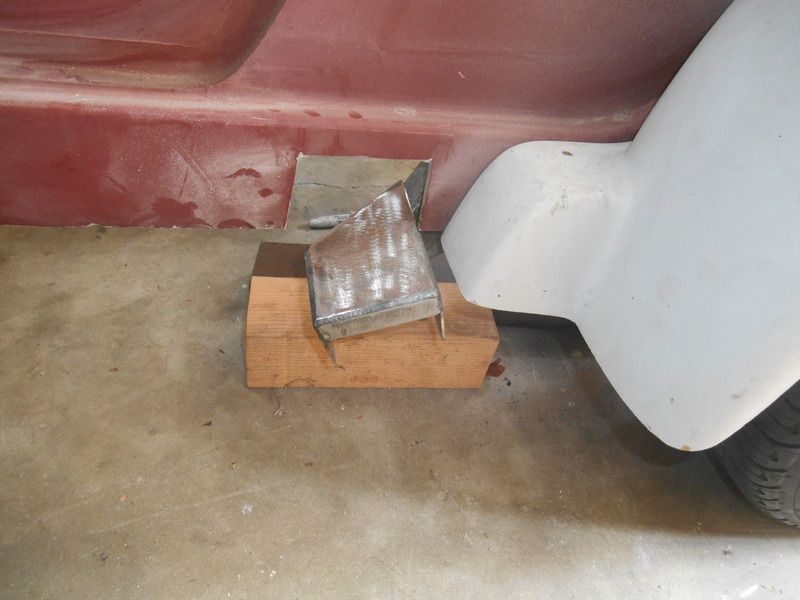
Anyways, heres what I did get done. I needed to make a notch in the body to fit the rear subframe mount. The beetles torsion beam is very similar to the 944 torsion beam with the exception of the additional subframe mount.

BEFORE
Image

AFTER
Image

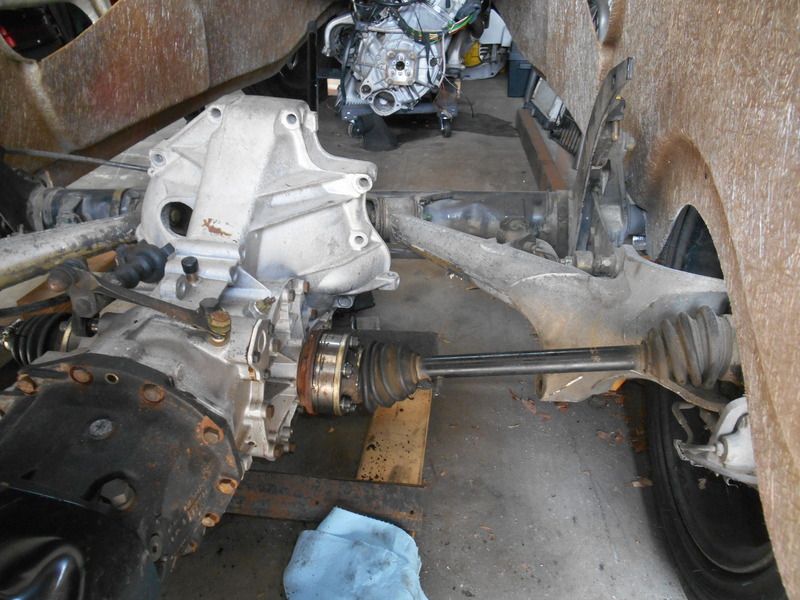
Then, I decided to mount the axles to the transmission. Very premature, but I want to start planning things around the mounting of the transmission and the entire rear end. Obviously with the transmission hooked up to the axles, the joy of seeing how it will be balanced with the rest of the car put a smile on my face.

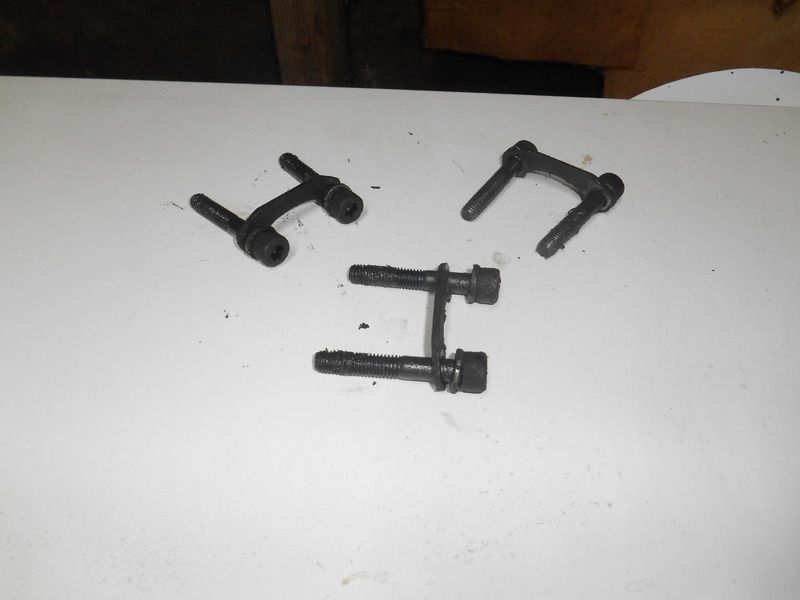
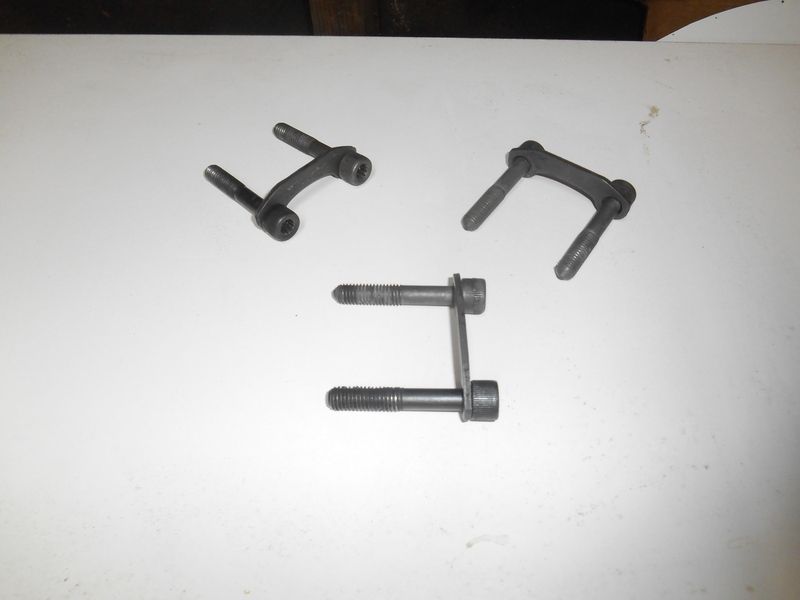
While doing this, my OCD kicked in and I removed all of the axle bolts and washers. Sat there and gave them a degreaser bath and cleaned each one individually... then I took some nice before and after pics. Some may get it, and I think you guys are the ones who would get it.
BEFORE & AFTER
Image

Image

Image

Image
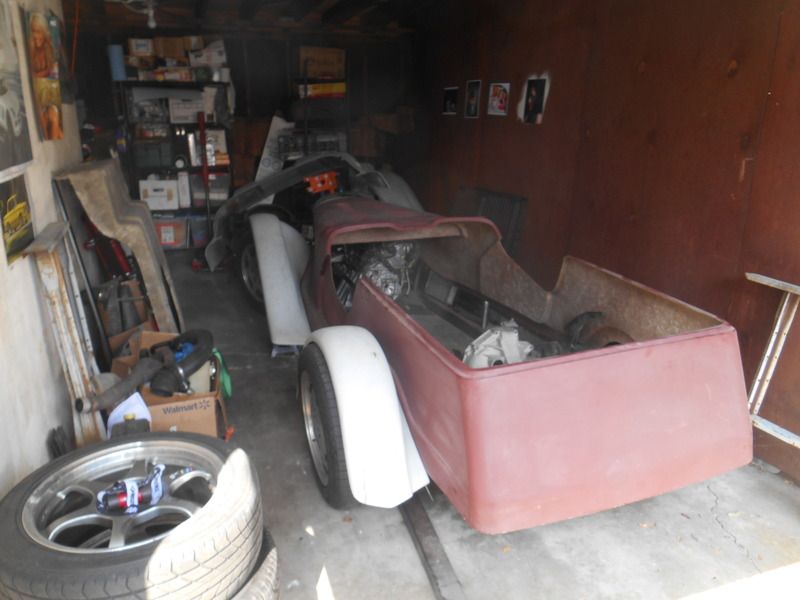
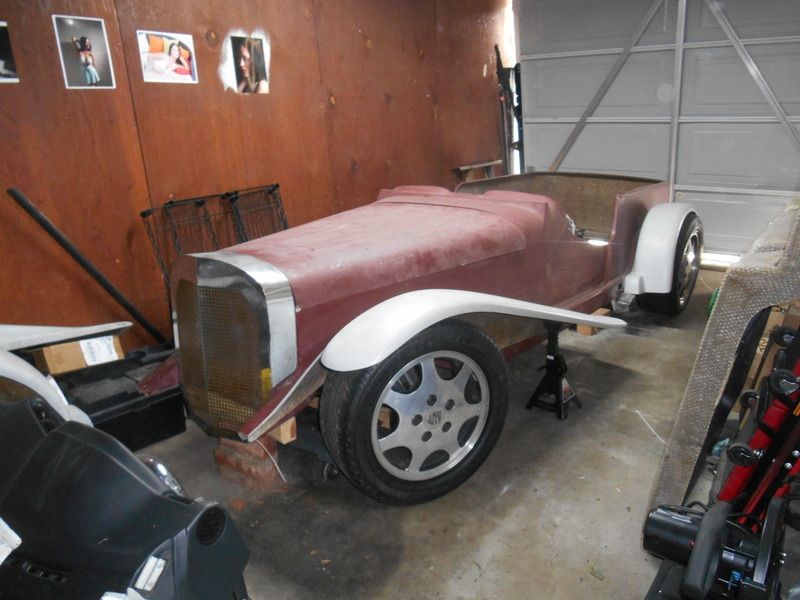
and finally, I decided to take a few pics that I thought were cool and help to keep me motivated. I hate how long it took to get back into the garage, so hopefully looking at these pics will motivate me.

Image

Image

Image

_________________
Simon
"Form follows Function"
Current Cars:
-1988 BMW 325i -the daily
-1968 Datsun Fairlady Roadster - the weekend canyon car


Top
 Profile  
Reply with quote  
 Post subject: Re: My Gazelle build
PostPosted: March 19, 2016, 10:23 pm 
Offline

Joined: December 16, 2015, 5:31 pm
Posts: 86
I seem to recall an article in street rodder magazine back in the 90s on building frame rails from tubing. They used a cutoff saw to make a slit on the inside surface hooked a come along to both ends put tension on it which curved it closed the slits which were then welded. Hope that helps.


Top
 Profile  
Reply with quote  
 Post subject: Re: My Gazelle build
PostPosted: March 20, 2016, 6:21 am 
Offline
Automotive Encyclopedia
User avatar

Joined: December 22, 2006, 2:05 pm
Posts: 8044
6 point to 12 point. Now that's clean!

I'm with Joe, only I'd use a handheld bandsaw. Chop saws are deafening and throw a lot of nasty particles into the air to inhale. The relief for the rail looks to be a long straight section followed by a short curved section. The rail supports the body but it does not have to hug the skirt perfectly.

You may want to jig everything into place first. Scrap 2x4s with 3 inch deck screws will get you close enough to shim.

_________________
Miata UBJ: ES-2074R('70s maz pickup)
Ford IFS viewtopic.php?f=5&t=13225&p=134742
Simple Spring select viewtopic.php?f=5&t=11815
LxWxHt
360LA 442E: 134.5x46x15
Lotus7:115x39x7.25
Tiger Avon:114x40x13.3-12.6
Champion/Book:114x42x11
Gibbs/Haynes:122x42x14
VoDou:113x44x14
McSorley 442:122x46x14
Collins 241:127x46x12


Top
 Profile  
Reply with quote  
 Post subject: Re: My Gazelle build
PostPosted: March 20, 2016, 11:58 am 
Offline

Joined: March 28, 2012, 5:29 pm
Posts: 316
Location: East Lansing, MI
Simon,
First consideration for me would be is the frame rail visible when the car is finished. If it's NO then leave it straight. Second consideration is if left straight, will that affect foot room. If that's also a NO, then leave it straight.
If the body is curved front to back, and the frame is visible, in my opinion it needs to follow the body outline. I have built a lot of Hot Rod frames using 2"x3" and 2"x4" .125 wall and shaped the rails to the body. Absolutely it is more work, but the finished thing is so worth it.
Check my build thread to see how I did it with my bottom frame rails. I know these were only 1"x3" .064 wall, but the principal and method is still the same. I use a thin cutting disc in my angle grinder, and make more frequent cuts, as opposed to using a chop saw. It has been my experience that chop saw cuts are ok if you want one single bend point, but if you want a curve, using a cutting disc in the angle grinder is best. Lots of clamps holding the rail to the wooden former, and welding only 1/2" beads at atime. Take your time, be patient, and you will get very little twist or distortion.
Cheers,
Stewart.


Top
 Profile  
Reply with quote  
 Post subject: Re: My Gazelle build
PostPosted: March 20, 2016, 12:21 pm 
Offline

Joined: March 28, 2012, 5:29 pm
Posts: 316
Location: East Lansing, MI
Simon,
Some thoughts on the body.
In my opinion the reason some of these replicars look a little "off" is proportion and needing to make the chosen running gear and/or suspension fit.
Most cars of the era the gazelle is trying to mimic had their grille shell on the front axle line, or slightly in front or behind it. It looks like the gazelle pushed it forward to hide the VW torsion bar front with trailing arms. If you can design your wishbones to put the axle line in the middle of the grille, I think it would look better. The alternative is to shorten the hood, and bring the grille shell back.
I also think the rear over hang is too long. Again this was to hide the air-cooled engine behind the axle line. You don't need that space, so I would bring the back of the body closer to the rear axle. This would mean cutting several inches out of the body and then re-glassing it back together.
The wheel/tyre overall diameter also comes into play. The bigger you make the body, the larger diameter the tyre has to be to keep things in proportion. Finding good, tall, modern tyres isn't as easy as looking on tyre rack.com, but they can be found, and don't have to cost much more either.
All of the above is my gospel according to Stewart on the aesthetics of modern interpretations of old cars. Not saying anything else is wrong, just my opinion. Play in Photoshop, or do like I do and start with some photocopies of the side profile, some scissors and scotch tape!
Cheers,
Stewart.


Top
 Profile  
Reply with quote  
 Post subject: Re: My Gazelle build
PostPosted: March 20, 2016, 1:06 pm 
Offline

Joined: April 16, 2014, 11:19 am
Posts: 83
Miatav8,MstrASE,A&P,F wrote:
6 point to 12 point. Now that's clean!.


:oops: didnt think anyone would notice haha They bolts were 12pt on one side and 6 on the other. I took the clean pics first than realized it would be more helpful to have the dirty pic also. Still, you get it.

Re: Stewart. Thanks for the input on both items. I will have to take a good a closer look at both. I love what you are doing on your build. I watch it pretty closely

_________________
Simon
"Form follows Function"
Current Cars:
-1988 BMW 325i -the daily
-1968 Datsun Fairlady Roadster - the weekend canyon car


Top
 Profile  
Reply with quote  
 Post subject: Re: My Gazelle build
PostPosted: March 20, 2016, 3:24 pm 
Offline

Joined: January 1, 2015, 1:55 pm
Posts: 327
I like your project a lot. I'm following your build. Have fun.


Top
 Profile  
Reply with quote  
 Post subject: Re: My Gazelle build
PostPosted: March 22, 2016, 10:05 pm 
Offline
User avatar

Joined: April 12, 2010, 5:40 pm
Posts: 2081
Location: san francisco bay area
pinching the frame rails was a pretty common thing when my dad was a young man (it was the 30's) so it can't be too hard to do.
Try looking for information on pinching 32 rails to fit an A, it should point you in the right direction.
Can't be too hard to do if you aren't taking up much, rectangular sure likes to bend if you leave it laying around half supported.

_________________
"There are times when a broken tool is better than a sound one, or a twisted personality more useful than a whole one.
For instance, a whole beer bottle isn't half the weapon that half a beer bottle is ..." Randall Garrett


Top
 Profile  
Reply with quote  
Display posts from previous:  Sort by  
Post new topic Reply to topic  [ 61 posts ]  Go to page Previous  1, 2, 3, 4, 5  Next

All times are UTC - 5 hours [ DST ]


Who is online

Users browsing this forum: No registered users and 12 guests


You cannot post new topics in this forum
You cannot reply to topics in this forum
You cannot edit your posts in this forum
You cannot delete your posts in this forum
You cannot post attachments in this forum

Jump to:  
POWERED_BY