LocostUSA.com

Learning how to build Lotus Seven replicas...together!
It is currently April 19, 2024, 4:10 pm

All times are UTC - 5 hours [ DST ]


Post new topic Reply to topic  [ 221 posts ]  Go to page Previous  1, 2, 3, 4, 5, 6, 7 ... 15  Next
Author Message
 Post subject: Re: The Gecko Project
PostPosted: May 12, 2010, 4:40 am 
Offline
User avatar

Joined: November 12, 2008, 6:29 am
Posts: 3567
Yeah, first half Mornington Vic, 2nd half Beenleigh/Logan area.

From VB to XXXX :cheers:

Car looking the goods (this place needs a thumbs up icon and more thong piccys).

Image


Top
 Profile  
Reply with quote  
 Post subject: Re: The Gecko Project
PostPosted: May 12, 2010, 6:36 am 
Offline
Locostering Information Liaison
User avatar

Joined: August 17, 2005, 1:30 am
Posts: 2397
Location: So CALIFORNIA
As requested....

Image
Image

You Aussies are weird :lol: :cheers:

_________________
I'll keep an eye out for you!

To err is human...
I am more human than most.


Top
 Profile  
Reply with quote  
 Post subject: Re: The Gecko Project
PostPosted: May 14, 2010, 1:58 am 
Offline
User avatar

Joined: November 12, 2008, 6:29 am
Posts: 3567
NOT THOSE THONGS!! :BH:

LMAO!


Top
 Profile  
Reply with quote  
 Post subject: Re: The Gecko Project
PostPosted: May 27, 2010, 5:47 am 
Offline

Joined: February 1, 2006, 3:02 am
Posts: 319
In a desperate attempt to get this back on topic :roll: I'll add a brief update about engine mounts and wishbones.

The OEM mounts are huge and, not surprisingly, designed to bolt to the engine bay of a Lancer, NOT my chassis. Many Australian builders use "universal" machinery mounts but I've also heard some tales about them failing. Since my mounts need to be both engine and gearbox mounts I want something more robust. One local builder mentioned that he had used Toyota Hilux shackle bushes as engine mounts. I got the chance to look at his car a week or so later and agreed that they work very nicely indeed. I started looking at aftermarket bushes and found that Nolathane make a Hilux part but, at almost the same size, they also make these:
Image
which also include a crush tube. At $32 for a kit of two (i.e. $64 for all I need) I'm more than happy. I bought a bit of 1" nominal bore pipe and had a light cut taken inside to make some bush tubes. All I need to do now is weld these onto short risers in the appropriate spots. Even better, it turns out that the Nolathane bushes are the right size to go straight into the factory mounts at the front and rear of the engine (just need some 4mm small spacers for the rear) - see pics. This saves me making mounting paltes to fit the odd bolt patterns on the engine and gearbox in those locations.

Image
ImageImage

After getting the bush tubes cut and bored, I also had two mounting rings made for my front lower ball joints, having finally decide to go with the OEM Gemini (Chevette) press-in part. This makes for a much neater wishbone and is really the "right" part to use in this application. This show the ring upside down - the flash makes the inner bore look a lot coarser than it actually is.
Image

Once I get the plates cut for the rear ball joints (hopefully this weekend) I'll have all of the pieces to make all of my wishbones. Busy laying out wishbone jigs right now. More news once I've cut some more metal.

Dominic


Top
 Profile  
Reply with quote  
 Post subject: Re: The Gecko Project
PostPosted: May 27, 2010, 10:36 am 
Offline
Databases fear me
User avatar

Joined: June 21, 2006, 7:02 pm
Posts: 890
Location: Lethbridge Alberta
OzGecko wrote:
Once I get the plates cut for the rear ball joints (hopefully this weekend) I'll have all of the pieces to make all of my wishbones. Busy laying out wishbone jigs right now. More news once I've cut some more metal.

Dominic


I did my first set of wishbones the same way (press in ball joint) but the welding warped the ring I machined up and and made it impossible to fit the balljoint. you might want to press in an old one for welding then remove it and press in the new after paint?

_________________
Pictures of just a few of my projects


Top
 Profile  
Reply with quote  
 Post subject: Re: The Gecko Project
PostPosted: May 27, 2010, 7:25 pm 
Offline

Joined: February 1, 2006, 3:02 am
Posts: 319
violentblue wrote:
I did my first set of wishbones the same way (press in ball joint) but the welding warped the ring I machined up and and made it impossible to fit the balljoint. you might want to press in an old one for welding then remove it and press in the new after paint?

Yeah, my machinist (who will also be doing the final TIG welding of the wishbones because he's a professional and I'm an amateur :) ) has already said that he'll machine up a brass plug to go into the ring during welding for exactly that reason. I suppose the other option would have been to make them under size and then machine to final fit after welding. However, jigging a whole wishbone square and flat on the mill table would be a pain in the arse.

Thanks for the heads up though.

Dominic


Top
 Profile  
Reply with quote  
PostPosted: March 5, 2011, 4:59 am 
Offline

Joined: February 8, 2011, 2:54 pm
Posts: 32
Err... I ment of the Geko project... :oops:

I'm currently in the process of designing my own locost midi frame, but I'm keeping as close to the McSorley +442E plans as possible. Would it be possible for you to share some more screen shots of your frame so I can get a rough idea of how to design the rear end of the vehicle? Thanks in advance :cheers:

Regards,
Hans.

P.S. I've attached the suggested floor plan below for your scrutiny. I've also started a thread here http://www.locostusa.com/forums/viewtopic.php?f=18&t=12028


You do not have the required permissions to view the files attached to this post.

_________________
Old age really creeps up on you like a leech...
First you forget names, then you forget faces,
then you forget to pull your zipper up and finally you forget to pull it down...


Top
 Profile  
Reply with quote  
PostPosted: March 5, 2011, 7:50 am 
Offline
User avatar

Joined: November 12, 2008, 6:29 am
Posts: 3567
psych0hans wrote:
Err... I ment of the Geko project... :oops:

I'm currently in the process of designing my own locost midi frame, but I'm keeping as close to the McSorley +442E plans as possible. [/url]


Better to lay out all your running gear first then design the frame, with all due respect and not knowing your skills you are basically doing the process backwards.


Top
 Profile  
Reply with quote  
PostPosted: March 5, 2011, 3:18 pm 
Offline

Joined: February 8, 2011, 2:54 pm
Posts: 32
cheapracer wrote:
psych0hans wrote:
Err... I ment of the Gecko project... :oops:

I'm currently in the process of designing my own locost midi frame, but I'm keeping as close to the McSorley +442E plans as possible. [/url]


Better to lay out all your running gear first then design the frame, with all due respect and not knowing your skills you are basically doing the process backwards.


No Offence Taked M8Y!!! Kurt(of midlana fame) also told me pretty much the same thing in my other thread... Thanks for the Positive Criticism :) Much appreciated.

Now the problem for me is I haven't really picked a donor... Maybe I'll buy the donor first and then get started on the drawing/building... This way I'll know exactly where and how everything needs to go... Also, I can get started on de-construction asap... I planning on starting everything this coming week... Wish me luck :cheers:

p.s. as far as my skills are considered, They don't really exist... :BH:

_________________
Old age really creeps up on you like a leech...
First you forget names, then you forget faces,
then you forget to pull your zipper up and finally you forget to pull it down...


Last edited by psych0hans on March 7, 2011, 5:42 am, edited 1 time in total.

Top
 Profile  
Reply with quote  
PostPosted: March 5, 2011, 4:33 pm 
Offline
Mid-Engined Maniac

Joined: April 23, 2006, 8:26 pm
Posts: 6420
Location: SoCal
psych0hans wrote:
[... I planning on starting everything this coming week...

Rushing is not allowed.

It's like rushing through drawing up plans for a building, hurrying through the process can cause all sorts of future problems. At this point you have to focus on getting the foundation right, as everything literally rides on it. A mistake at this point can doom the entire project because you may get to some point and realize a huge fundamental design flaw requires starting all over again. If only you'd have thought through the project at the start... which is right now - don't hurry!

_________________
Midlana book: Build this mid-engine Locost!, http://midlana.com/stuff/book/
Kimini book: Designing mid-engine cars using FWD drivetrains
Both available from https://www.lulu.com/


Top
 Profile  
Reply with quote  
 Post subject: Re: The Gecko Project
PostPosted: March 6, 2011, 11:38 pm 
Offline

Joined: February 1, 2006, 3:02 am
Posts: 319
Hans,

I've been out of town for a few days so only just getting a proper look at your original post and this just now. I hate to sound like I'm joining a chorus but I agree wholeheartedly with what's already been said: Get your components sorted out first and then design a chassis to suit them. I believe it was Colin Chapman who described a chassis as "a big bracket that holds everything else in place". Start with your suspension, then the drivetrain (although, for a middy, those two may influence each other quite a bit), then work out your seating position and body work requirements (if any!). Then (and only then) you can start making chassis drawings.

For example, I chose to use strut rear suspension because I believed (and still do) that it was a pragmatic design decision that allowed me to reuse a lot of donor parts. If I had chosen a wishbone rear or a de Dion layout, the rear of my chassis would be very different. In my case, I ended up taking a lot of inspiration from the layout of the Lancia Stratos engine bay - another transverse middy with struts.

Find your donor(s) first - remember you'll need front uprights too - get all of the parts laid out on a flat surface and start drawing some chalk or tape lines around them. And, as Kurt very wisely says, NO RUSHING! This will take a long time - be realistic about your goals and timeframes.

Best of luck with your project, and look forward to seeing updates.

Dominic

P.S. It's Gecko, not Geko - the car is named after the lizards because they're small, quick, and have sticky feet. :)


Top
 Profile  
Reply with quote  
 Post subject: Re: The Gecko Project
PostPosted: March 7, 2011, 10:20 am 
Offline
User avatar

Joined: November 12, 2008, 6:29 am
Posts: 3567
OzGecko wrote:
For example, I chose to use strut rear suspension because I believed (and still do) that it was a pragmatic design decision that allowed me to reuse a lot of donor parts. .


And a very sensible decision. :cheers:


Top
 Profile  
Reply with quote  
 Post subject: Re: The Gecko Project
PostPosted: April 5, 2011, 8:23 am 
Offline

Joined: February 1, 2006, 3:02 am
Posts: 319
First update for a while - been busy, busy with day job so not much workshop time/energy.

Front wishbone - top:
ImageImage

Front wishbone - bottom:
ImageImage

Wishbone bracket alignment jig
ImageImage
Image

After lots of trial and error, final design for the rear wishbone balljoint plates. Here they are CNC cut with slight grooves to assist vise bending; and one folded and bolted into the wishbone jig.
ImageImage

Final product all TIG welded then painted; showing the underside of the folded part; and with the ball joint mounted.
Image
Image
Image

Plus, I'm on 4-weeks of leave starting this weekend, intending to just work on the car - SWMBO is only off work for the last 4 days of it. The intent, by the end of that time, is to get to:

    - chassis fully welded, including all brackets etc (95% done already anyway)
    - suspension all fitted and car on the ground on its wheels (front is mostly done - rear remains to complete)
    - all major fixed panels fitted (i.e. firewall, scuttle ring, floor pan, sides etc)
    - beam and torsion tests (chassis structural tests, required for registration here)
    - brakes & clutch plumbed
    - engine mounted and plumbed (but probably not wired - dealing with the horrifying loom may need 4 weeks all on it's own! :blink: )

Look forward to some updates over the next month...

Dominic


Top
 Profile  
Reply with quote  
 Post subject: Re: The Gecko Project
PostPosted: April 16, 2011, 10:42 pm 
Offline
User avatar

Joined: March 30, 2011, 7:18 am
Posts: 1615
Location: central Arkansas
OzGecko wrote:
Two sample wishbone plates, test cut in 3mm MDF
Image


That has to be one of the neatest things I've ever seen! Even if you just bandsaw it and groove it with a cutoff wheel, it's still a nice trick.


Top
 Profile  
Reply with quote  
 Post subject: Re: The Gecko Project
PostPosted: April 17, 2011, 10:24 am 
Offline

Joined: February 1, 2006, 3:02 am
Posts: 319
TRX wrote:
That has to be one of the neatest things I've ever seen! Even if you just bandsaw it and groove it with a cutoff wheel, it's still a nice trick.


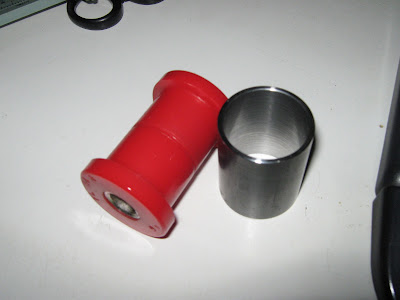
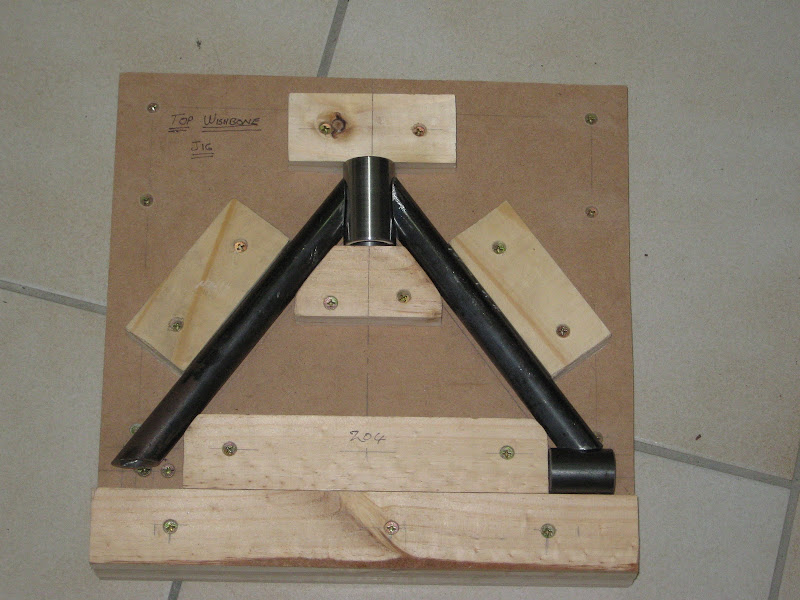
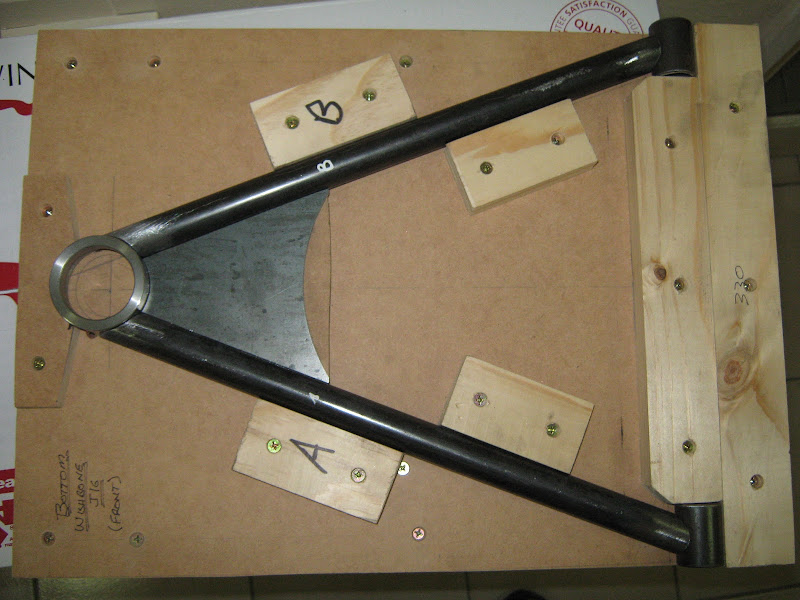
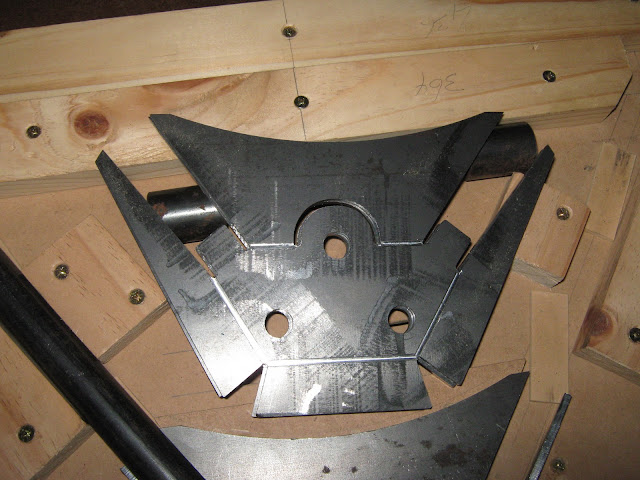
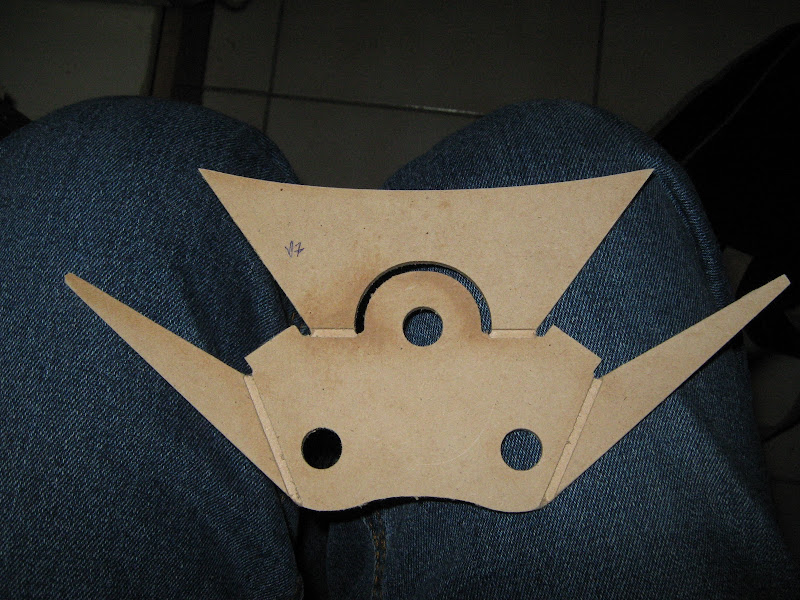
TRX, I was happy with the way it worked in steel even though the slots are very shallow - i.e. the steel I'm using is about 3.5mm (a little bit over 1/8") and those slots were cut 0.5mm deep (near enough to 0.020" ). I'd be reluctant to cut much deeper than that for fear of making a potential failure point. For that reason, I'd also be wary of trying to cut them by hand with a cutoff wheel. It was easy enough by CNC though :)


While I'm here, some progress updates. Since I'm on leave now and supposedly working on the car, some friends have been coming around to assist. This is great because it breaks me out of my usual "Paralysis by Analysis" where I spend hours deliberating over things.

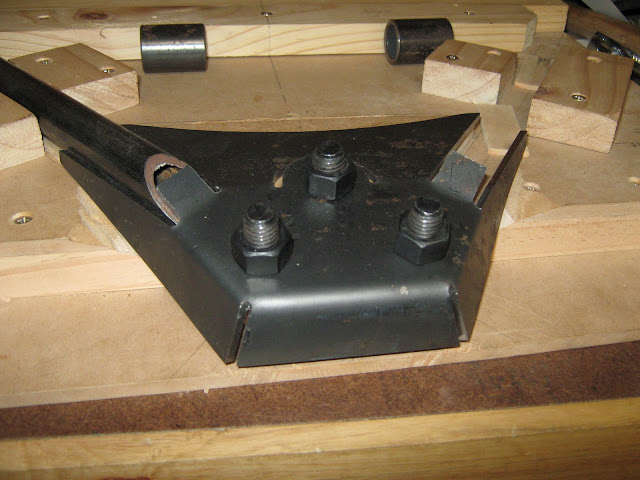
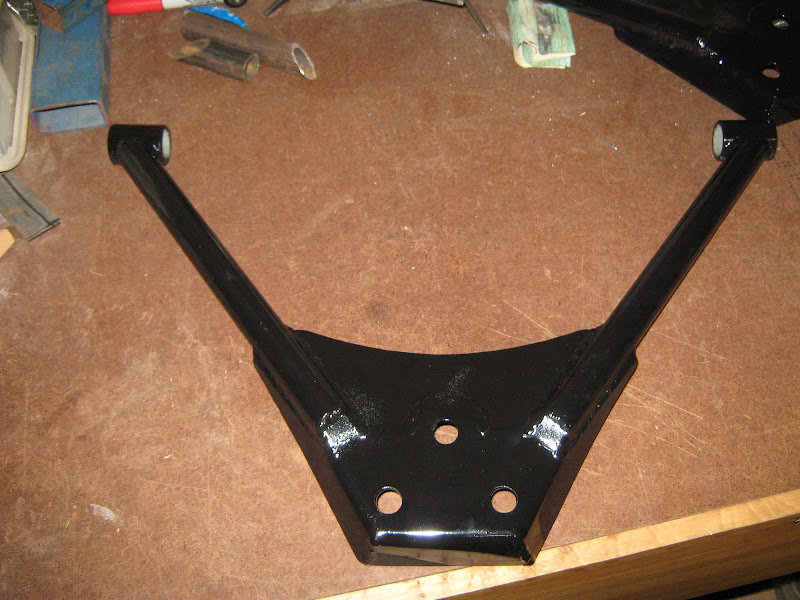
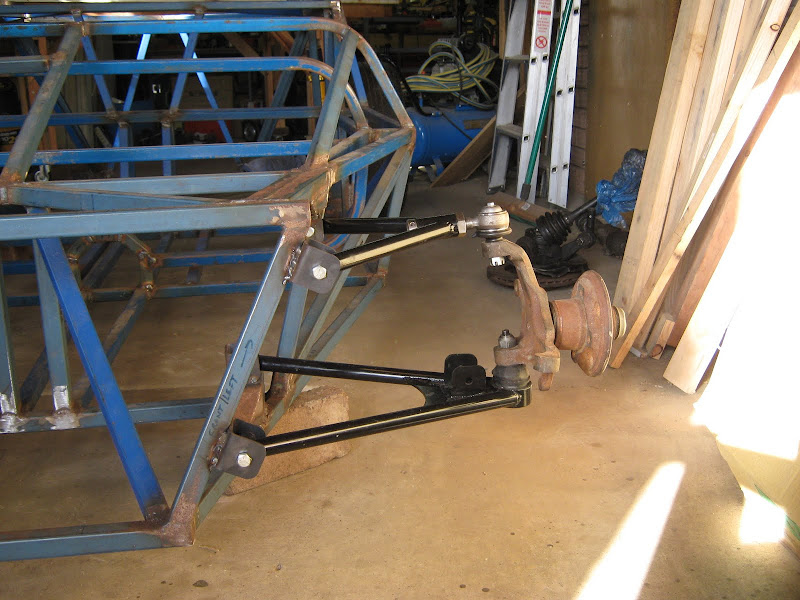
So, in result, rear suspension brackets now aligned and fully welded. Toe links still to come.
Image
Image

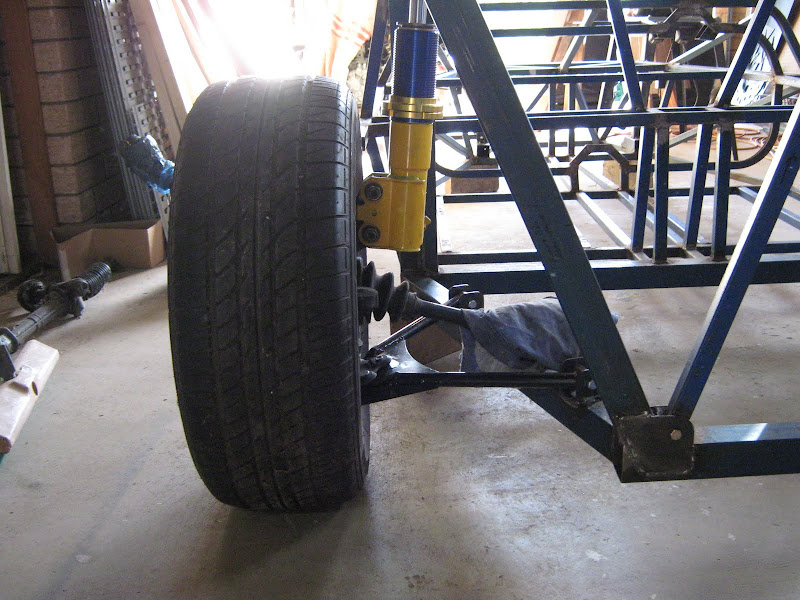
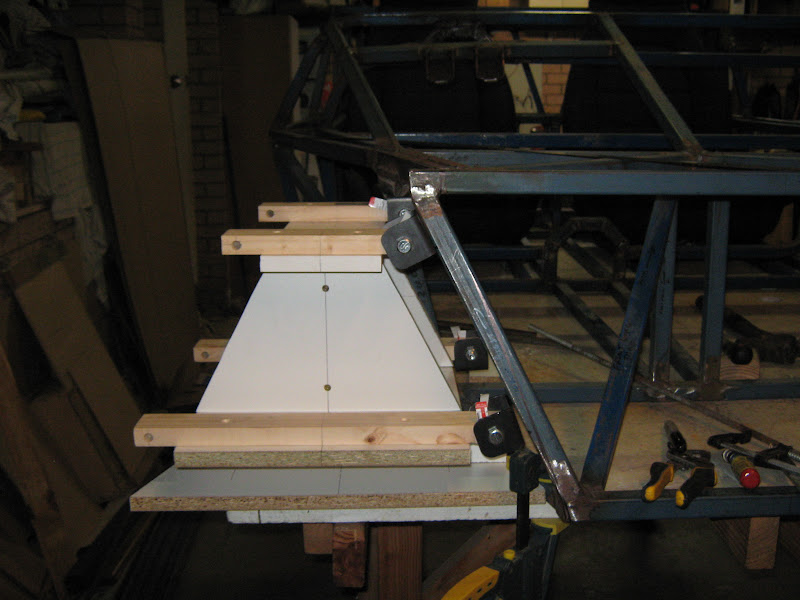
Plus, some front suspension stuck on too. Don't look too closely at the welding on those brackets. Need grinding out and redoing with the chassis at a more workable angle :oops:
Image

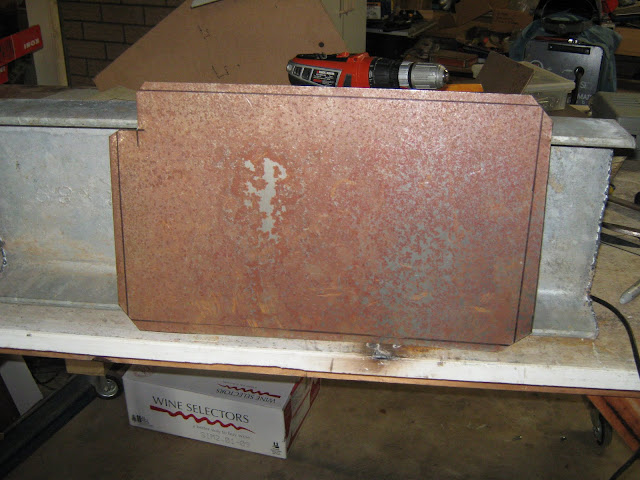
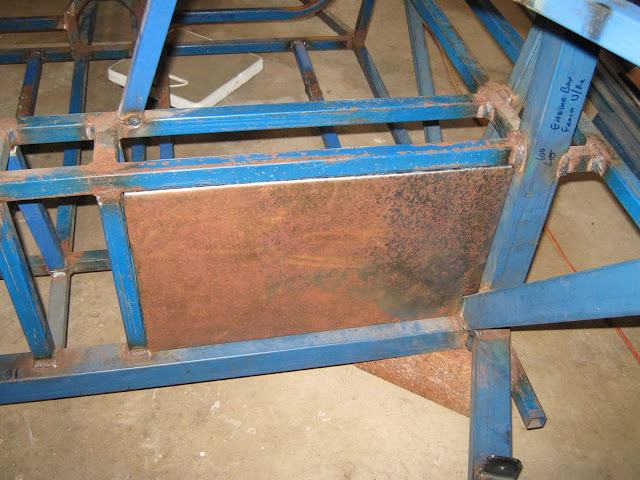
Following day and a different friend to help - we cut, folded, and fitted two of the three fixed firewall panels. Not welded yet. Made from 1mm steel, with a 10mm lip folded round the edge to make welding easier. Would be fair to say the second one was easier and a better result than the first.
ImageImage

Also played another round of "Stop Dominic over-analysing solutions to non-existent problems" which means that something I'd been fussing about possible solutions to for 12+ months was solved today by simply not doing it! Was quite liberating once I got used to the idea :BH:

Tomorrow (Monday) I'm ordering the roll bar and braces, which will be fully welded into the chassis. Hopefully they'll be made before the Easter weekend. More updates soon....

Dominic


Top
 Profile  
Reply with quote  
Display posts from previous:  Sort by  
Post new topic Reply to topic  [ 221 posts ]  Go to page Previous  1, 2, 3, 4, 5, 6, 7 ... 15  Next

All times are UTC - 5 hours [ DST ]


Who is online

Users browsing this forum: No registered users and 28 guests


You cannot post new topics in this forum
You cannot reply to topics in this forum
You cannot edit your posts in this forum
You cannot delete your posts in this forum
You cannot post attachments in this forum

Jump to:  
POWERED_BY