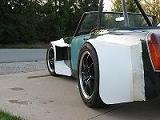
Made some progress. Lets see.. Since the last update life got busy again and about half the summer has already flown by. But I'm back at it again with some progress. I did some work on the front uprights to finalize the plan for the miata uprights. I basically went as far as I needed to to ensure that my plan would work. The actual modifications to the front are minor so I only fabed what I needed to to more final mockup the 1 side and then I then moved to the back.
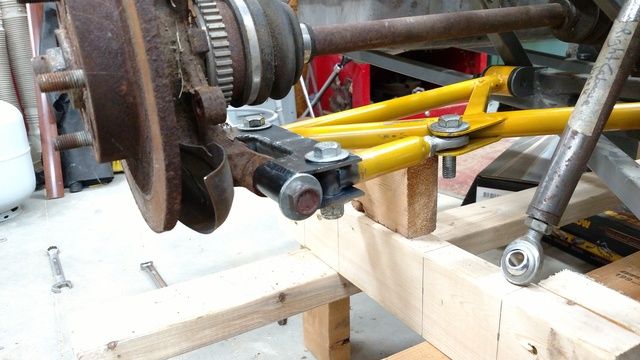
As most of you know the Miata uses a ~8" long 14mm OD bolt for the lower ball joints. That sucks because it doesn't fit SAE dimensioned rod ends and you can't just slam a 1/2" bolt through the upright as it's ~.550" ID. My A-arms were built around 1/2" rod ends. The actual pickup points for the lower were nto in bad spots and the lengths were very close. I looked at several options, I thought about building .025" wall sleeves, Cutting out the bushings from the stock Miata A-arms, using the "no bushing" approach and just couldn't come up with something I liked. Then I had a breakthrough. The stock bolt is .550" OD. I'm using 1"x.120 wall (.760 ID) tube for the A-arms and have some left over. I looked at 4130 tube and found that you can readily get 3/4" OD x .095 wall (.560 ID) seamless for $12 for 5'. I decided to build sleeves out of the 3/4" 4130 and just use lots of grease on the ID of the 1" tubes. I built an adapter that lets me keep toe adjustment and welded bungs onto the end of the A-arms I built. This lets me adjust toe by loosening the 1/2" bolts and I get to use the stock Miata lower bolt. The sleeves are slightly longer than the bracket so the Miata bolt bottoms on the sleeves puting no compression on the adapter. Now for pictures.
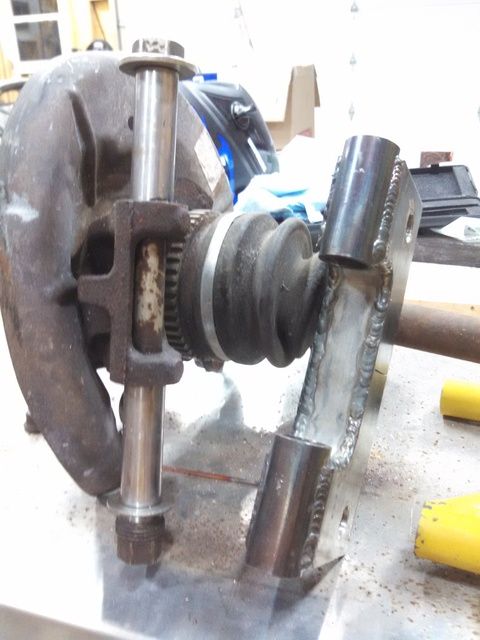
Bracket with sleeves. I used equal length sleeves to center the bolt. The 15" rims give enough clearance that you could offset if you wanted to.
The bracket warped after welding so I cut it to straighten it and then added a reinforcement plate on the open side of the bracket. It moves very smoothly after adjusting the alignment of the two 1" tube sections.
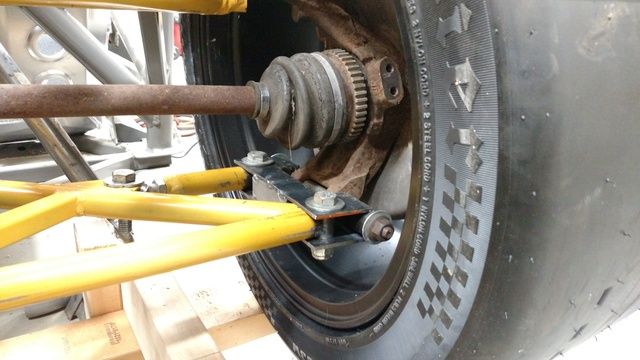
And IT WORKS!
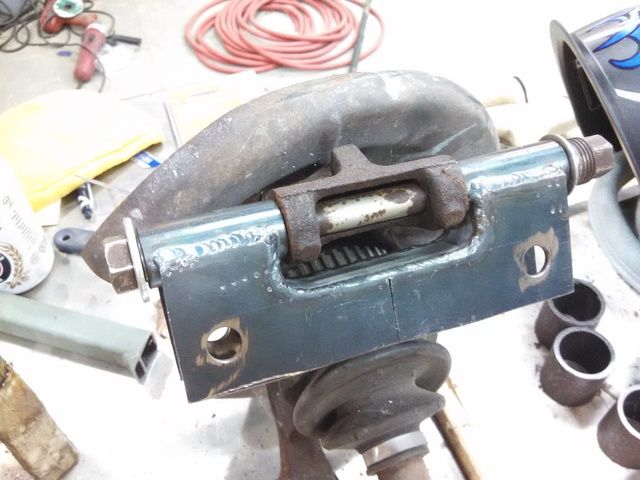
I'm going to load my pushrod into the top of the adapter behind the toe link. I probably could have left a rod end on the toe link but I like the rigidity it ads to use a piece of tubing welded perpendicular to the toe link. It sucks because I lose granularity on the Toe adjustment as I can only go Half turns but I will trade that off for the rigidity due to the shock loading.
The tube-in tube bushings on the lowers seem like a good solution for the Miata uprights. I looked around a bit with the Miata upright builds and was suprised I haven't seen it yet. The only real disadvantages I see is it weighs a bit extra. Otherwise the bushings are long enough I don't anticipate wear of the steel on steel will be a concern. I will just take it apart every now and again and neversieze the crap out of the bolt and the sleeves.
So that's all I've done. Next time I get out there I tackle the Rear upper. I have a good idea of what I'm going to do. Iv'e also cut duplicates of everything along the way so it won't take much to pound out the 2nd set of lowers for the other side. I'm going to get the upper and the pushrod done first then do the other side.
Thanks for anyone still following along. I'm going to see this through. My family has committed to ensuring I get time in the garage to hopefully have this thing at and event before the end of this autox season and then have the bodywork done next season to take it to 2016 SCCA autox nationals. It's a goal I hope I meet.