LocostUSA.com

Learning how to build Lotus Seven replicas...together!
It is currently April 18, 2024, 12:03 am

All times are UTC - 5 hours [ DST ]


Post new topic Reply to topic  [ 195 posts ]  Go to page Previous  1, 2, 3, 4, 5, 6, 7 ... 13  Next
Author Message
PostPosted: September 14, 2009, 10:03 am 
Offline
The voice of reason
User avatar

Joined: January 10, 2008, 4:47 pm
Posts: 7652
Location: Massachusetts
Wow, that's a beautiful joint! Did you have to cut off a couple of the notch sides to fit those pieces or was it just an issue of the order you fitted an welded them? That one picture is an inspiration!
.

_________________
Marcus Barrow - Car9 an open design community supported sports car for home builders!
SketchUp collection for LocostUSA: "Dream it, Build it, Drive it!"
Car9 Roadster information - models, drawings, resources etc.


Top
 Profile  
Reply with quote  
PostPosted: September 14, 2009, 1:56 pm 
Offline
User avatar

Joined: July 22, 2007, 10:58 pm
Posts: 388
Location: Zagreb, Croatia
:) thx...

these seven are all fully welded, one at a time... so first it was two, only notched to fit each other, fully welded them, and then added the third, etc.. each new tube was notched taking into account all the tubes already welded.. if you understand what I mean.. If I was to cut trough the joint you'd see lots of welds inside the joint..
there were some funky cuts nedeed..
Image

but since I use solidworks to virtually notch the tubing it is not a problem.. it does need some fine tuning before welding, partially because I have to file off the part of the tubing that goes over the existing weld...

This joint is in fact a upper joint right behind the driver,... it will get an eight tube.. the roll bar.. :)

One of the things I wanted to accomplish was to have all the tubes going into common points, to minimize the tube bending.. That is why my frame is so time consuming..

_________________
Building a single seater middy BEC with GSXR 1000 power :)
build log: http://locostusa.com/forums/viewtopic.php?f=36&t=5899

day job: http://smg.photobucket.com/albums/v723/turbolimac/portfolio/


Top
 Profile  
Reply with quote  
PostPosted: September 18, 2009, 3:55 am 
Offline
User avatar

Joined: November 12, 2008, 6:29 am
Posts: 3567
horizenjob wrote:
Wow, that's a beautiful joint!
.


Hmmm, I've heard that before somewhere.....


Top
 Profile  
Reply with quote  
PostPosted: September 24, 2009, 5:15 pm 
Offline
User avatar

Joined: July 22, 2007, 10:58 pm
Posts: 388
Location: Zagreb, Croatia
welded the side triangle on the other side of the frame finally. It really bores me to do identical things twice. I ended up concluding that I'd like the triangles to stic kout at least 5cm more but I can not be bothered to do it all over again.. Have to connect the side triangle to the front of the driver compartment opening, to provide stiffness next.. and then it is onto the front and rear parts of the frame with suspension mounts..

but I first wanted to see how the engine would fit. For modeling I used a hayabusa model I found online + a simeple gsxr1000 engine model I made by myself.. This packaging dictated the distance between the bulkhead and the first tube of the rear "clip". I was happy to see that the model was right and I could maybe shorten the distance by 1cm...

Image

I still need to decide on one thing.. How deep do I want my sump to be. Dry sump is out of the question for now , as it is too much money. I will make a sump baffle for the engine but I do not want to use the original deep sump... So I am thinking of making a sump of my own, at about 4 cm depth with some added oil volume. It seams that the problem with GSXR's is oil pressure under braking.. as the oil rushes forward and goes up into the cylinder block..

Image

_________________
Building a single seater middy BEC with GSXR 1000 power :)
build log: http://locostusa.com/forums/viewtopic.php?f=36&t=5899

day job: http://smg.photobucket.com/albums/v723/turbolimac/portfolio/


Top
 Profile  
Reply with quote  
PostPosted: October 10, 2009, 11:17 am 
Offline
User avatar

Joined: July 22, 2007, 10:58 pm
Posts: 388
Location: Zagreb, Croatia
took the racing seat out of my mitsubishi a couple months ago and made a quick mold of the back side..
Image

the idea was not to make a final seat for the car but rather to have something to play around and cut and modify to fit the intended use.. and later on make a mold for the final seat from that..

so, yesterday I added a couple of layers of matt so that I can actually sit in it..
Image

Image

had a bit of a test, and it fits fine.. will not have to alter it that much..

If I get a bit of free time in the next three weeks, which is unlikely, I will finish the front of the frame.. I was just making some jigs for the welding, but more of that later..

_________________
Building a single seater middy BEC with GSXR 1000 power :)
build log: http://locostusa.com/forums/viewtopic.php?f=36&t=5899

day job: http://smg.photobucket.com/albums/v723/turbolimac/portfolio/


Top
 Profile  
Reply with quote  
PostPosted: October 10, 2009, 11:29 am 
Offline
User avatar

Joined: July 22, 2007, 10:58 pm
Posts: 388
Location: Zagreb, Croatia
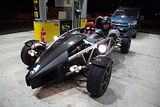
Doing what I do, means I get to play with some nice toys from time to time..

last week I spent a day with an At-om, complete with it's 2 litre honda supercharged engine.. It is also the only At-om in the world that I know of that has a NOS system.. did not switch that one ON... no need really
Image

Image

Image

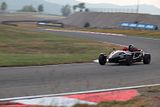
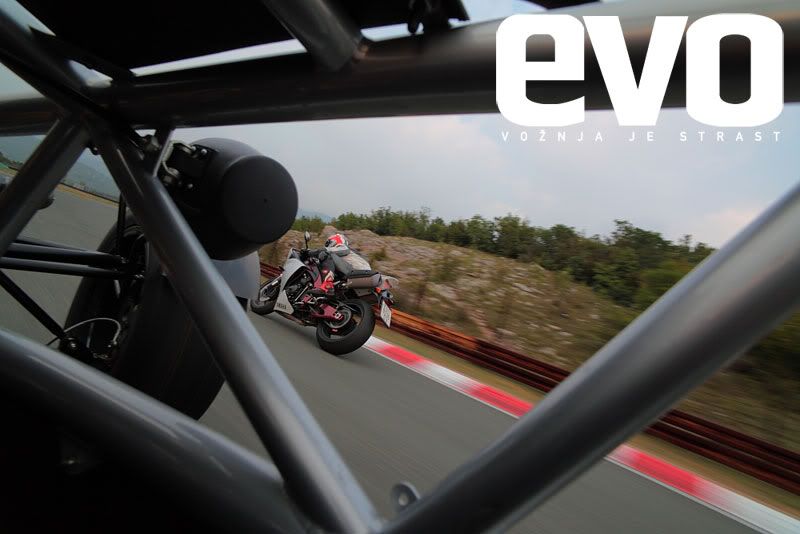
We got to play on the track, a high speed motorcycle one at that.. and did about 300 miles on the highway, due to the mechanical problems with the porsche turbo that forced it to use Atoms trailer to get home.. oh well .. :)

I noticed a couple of things..
1. At-om is really nicely balanced machine, very nice to drive and very nicely made..
2. It has the best control weight I have ever experienced and the best brake feel, EVER.. brakes are just soooo progressive..
3. it doesn't accelerate... it just goes trough the gears.. :) the throttle response is just explosive, yet very finely controlled.. however, even with all that power and 185 section rubber it doesn't have much traction problems.. I am starting to think about a supercharger kit for my gsxR 1000 engine. .:)
4. Engine is very elastic.. but, once you get to 160 - 180 km/h it just stops accelerating I remember following it on the track in my mitsubishi and it would gain 3 lengths after a corner almost instantly, but after 170 I'd start gaining back FAST..
5. Wind buffeting on the sides is very nicely controlled, but the space around the helmet is really BAD.. you can not look left or right after 130 km/h as it wants to rip your head off, and highway driving above 140 km/h is a chore..

all in all If you ever get a chance to try one... do it.. it is a blast..

_________________
Building a single seater middy BEC with GSXR 1000 power :)
build log: http://locostusa.com/forums/viewtopic.php?f=36&t=5899

day job: http://smg.photobucket.com/albums/v723/turbolimac/portfolio/


Top
 Profile  
Reply with quote  
PostPosted: October 11, 2009, 11:55 am 
Offline
User avatar

Joined: November 12, 2008, 6:29 am
Posts: 3567
Nice pics, nice writeup - hope you don't mind....


You do not have the required permissions to view the files attached to this post.


Top
 Profile  
Reply with quote  
PostPosted: October 11, 2009, 2:21 pm 
Offline
User avatar

Joined: July 22, 2007, 10:58 pm
Posts: 388
Location: Zagreb, Croatia
Image

Image


Want more pics.. ? :) or more text.. :)

in all honesty, I did expect it to be fast, I was driven in this same car about a year ago and on the road it is ballistic.. but I did not expect it to be so good to drive.. the balance is just perfect.. It is not mega fast on fast tracks, I was more than 10 sec per lap faster in a 1/2 power and same weight formula BMW, but that had aero.. but the way it can be driven is just too much fun..

since you are building a similar car.. :) may I suggest you pay particular attention to some sort of a wind deflector before the driver as the At-om is really bad in that compartment.. Surprisingly, there is no wind coming in from the sides.. open sides work perfectly..

also, if you need any additional detail pics or measurements, just say so, I will see the car again on the 30th... probably..

_________________
Building a single seater middy BEC with GSXR 1000 power :)
build log: http://locostusa.com/forums/viewtopic.php?f=36&t=5899

day job: http://smg.photobucket.com/albums/v723/turbolimac/portfolio/


Top
 Profile  
Reply with quote  
PostPosted: October 11, 2009, 11:01 pm 
Offline
User avatar

Joined: November 12, 2008, 6:29 am
Posts: 3567
kikiturbo wrote:

since you are building a similar car.. :) may I suggest you pay particular attention to some sort of a wind deflector before the driver as the At-om is really bad in that compartment.. .


Again nice shots!

The reason for my twin head 'bubbles' is to help run air around the occupant's heads.

Having never not owned a big bike for the last 30 years I know what it's like to turn your head sideways at 120 mph etc. and hoping that style design will aid things. My mate has ridden in SLR's and they have the same prob as the At-om, turn your head a little and 'snap'! Something thats not on the brochure for either, I'm sure your 300 miles was exciting as I'm sure you wouldn't want to do it everyday!


Top
 Profile  
Reply with quote  
PostPosted: October 12, 2009, 1:16 am 
Offline
User avatar

Joined: September 17, 2007, 10:36 pm
Posts: 209
Location: Montreal, Canada
Just a suggestion for you (both). A vertical 'fence' at the front edge of the cockpit opening will reduce the buffeting around the driver's head without too much effect on drag. Anywhere between 15-30 mm should be enough... making it adjustable could be beneficial as well.

BTW, kiki... those mitres are beautiful. I will be using them to show the new members of our Formula SAE team how tubes should be prepared for welding.

_________________
Concordia University FSAE - Chassis
00 Impreza OBS - RIP
81 Rabbit 1.6D
95 525i


Top
 Profile  
Reply with quote  
PostPosted: October 12, 2009, 2:36 am 
Offline
User avatar

Joined: July 22, 2007, 10:58 pm
Posts: 388
Location: Zagreb, Croatia
cheapracer wrote:
Having never not owned a big bike for the last 30 years I know what it's like to turn your head sideways at 120 mph etc. and hoping that style design will aid things. My mate has ridden in SLR's and they have the same prob as the At-om, turn your head a little and 'snap'! Something thats not on the brochure for either, I'm sure your 300 miles was exciting as I'm sure you wouldn't want to do it everyday!


yes, "snap!" ... :)... also, the helmet wants to fly off above 70 mph.. :)

AK Seven wrote:
Just a suggestion for you (both). A vertical 'fence' at the front edge of the cockpit opening will reduce the buffeting around the driver's head without too much effect on drag. Anywhere between 15-30 mm should be enough... making it adjustable could be beneficial as well.

BTW, kiki... those mitres are beautiful. I will be using them to show the new members of our Formula SAE team how tubes should be prepared for welding.


I was thinking about doing a 5 cm aero lip or in front of the cockpit... something like they use on caterham R's.. big pic:
http://www.drivebulletin.com/uploaded_i ... 726913.jpg

ahh, mitres.. :) thx.. you really should try the cut sticker method if you do not have laser cutting available,... it really is much simpler than it looks..

I will have a nice example in the next week, front end finally coming along.. if only my day to day work doensn't exhaust me too much..

_________________
Building a single seater middy BEC with GSXR 1000 power :)
build log: http://locostusa.com/forums/viewtopic.php?f=36&t=5899

day job: http://smg.photobucket.com/albums/v723/turbolimac/portfolio/


Top
 Profile  
Reply with quote  
PostPosted: November 24, 2009, 1:55 pm 
Offline
User avatar

Joined: July 22, 2007, 10:58 pm
Posts: 388
Location: Zagreb, Croatia
Glen wrote:
I like how you are connecting the inboard suspension points from one side of that chassis to the other with straight horizontal tubes, eliminating "suspension brackets" altogether. I was going to try to use that concept where possible also, but I have only ever seen it done with square tubing, I'm interested to see how are you going to capture the rod end inside the round tube? (if that's not jumping too far ahead)


well, took me a while to answer.... :)

here it is..

I had these weld in adapters made, 18 mm outside diam, made for 12 mm bolt... lower one has a M12 thread. In between I left space for the rod end (do not have them yet) and two 3 mm thick spacers.... so that I can adjust the geometry a bit.. maybe..

Image Image

I had to drill the holes in the tubes precisely, so I made my stickers from the solidworks file... I even simulated the cutouts needed for the tube to clear the A arms.

Image Image

Making 18 mm holes in the tubes was a pain.. Originally I intended to use a stepping drill, and that worked fine for about 8 holes after which the drill overheated and broke.. Bought a new one and that lasted for just one hole... After that I made my stickers with not just the fine mark for the centre hole but with the 18 mm cutout.. used 12 mm drill + carbide bit in the grinder and it worked like a charm.

Since the bolts go from above, they go trough the diagonal tubes going from the lower suspension pickups to the upper ones..
Image

If I just drilled the tubes it would have ended up being a trap for moisture and I wanted to make a nice feature, so I made a hole for a 25mm tube that would go trough the diagonal and isolate the inside of that tube from the elements..

Image Image Image

just need to trim it a bit, check the fitup in the geometry jig and do the final welding..
Image

The plan is to make the front box and weld it up completely before attaching it to the centre section of the frame....

I used the rest of the little time I have for the project to finish the welding on the centre section and add side braces for the cockpit..

_________________
Building a single seater middy BEC with GSXR 1000 power :)
build log: http://locostusa.com/forums/viewtopic.php?f=36&t=5899

day job: http://smg.photobucket.com/albums/v723/turbolimac/portfolio/


Top
 Profile  
Reply with quote  
PostPosted: December 6, 2009, 8:25 pm 
Offline
User avatar

Joined: July 22, 2007, 10:58 pm
Posts: 388
Location: Zagreb, Croatia
finally got around to doing a jig for the suspension frames..
Image

the idea was to align the top and bottom tube in a frame, thus making life easier when doing the final fitup of the connecting tubes.. Also, this way I could install the "dummy" adapters and measure the exact distance between the four of them... Now I knot that the geometry, for this frame, is OK..

Image

_________________
Building a single seater middy BEC with GSXR 1000 power :)
build log: http://locostusa.com/forums/viewtopic.php?f=36&t=5899

day job: http://smg.photobucket.com/albums/v723/turbolimac/portfolio/


Top
 Profile  
Reply with quote  
PostPosted: January 12, 2010, 8:58 am 
Offline
User avatar

Joined: November 12, 2008, 6:29 am
Posts: 3567
Looks great Kiki, keep at it!


Top
 Profile  
Reply with quote  
PostPosted: January 26, 2010, 8:10 am 
Offline
User avatar

Joined: January 22, 2010, 4:03 pm
Posts: 80
Location: Barnum, MN
VERY nice work!!! Only thing I don't like is the mitered (angle cut) joints. I prefer fishmouthing (coping) the tube. In my mind, it's stronger. Could be a wash, could be stronger your way, don't know for sure. But, other than that, really looking forward to updates.


Top
 Profile  
Reply with quote  
Display posts from previous:  Sort by  
Post new topic Reply to topic  [ 195 posts ]  Go to page Previous  1, 2, 3, 4, 5, 6, 7 ... 13  Next

All times are UTC - 5 hours [ DST ]


Who is online

Users browsing this forum: No registered users and 14 guests


You cannot post new topics in this forum
You cannot reply to topics in this forum
You cannot edit your posts in this forum
You cannot delete your posts in this forum
You cannot post attachments in this forum

Jump to:  
POWERED_BY