LocostUSA.com

Learning how to build Lotus Seven replicas...together!
It is currently April 18, 2024, 2:28 am

All times are UTC - 5 hours [ DST ]


Post new topic Reply to topic  [ 212 posts ]  Go to page 1, 2, 3, 4, 5 ... 15  Next
Author Message
PostPosted: September 27, 2013, 11:00 pm 
Offline
User avatar

Joined: February 18, 2013, 10:57 pm
Posts: 231
Location: Cumming, Ga
Completed Car:

Image

Build Log:

I've been posting this over on the Haynes Forum, but thought I should bring this over state side as well since it might be useful to someone... and I like positive reinforcement.

Project Outline:
Start Date: May 7, 2013

Build Plan: Haynes Roadster with Saturn Modifications

Donor: Mazda MX5/Miata (on this side of the pond)
Image

Slideshow: http://s125.photobucket.com/user/xcritic/slideshow/Lotus%207

Engine: Cleaned up, painted and supercharged 1.6
Image

Seats: Lotus Exige
Image

Rear End:
Torsen Limited Slip Diff
Image

_________________
Up to date build information can be found here:
https://allthingsspeed.com/projects/


Last edited by DaveStruve on July 21, 2014, 11:59 am, edited 2 times in total.

Top
 Profile  
Reply with quote  
PostPosted: September 27, 2013, 11:00 pm 
Offline
User avatar

Joined: February 18, 2013, 10:57 pm
Posts: 231
Location: Cumming, Ga
Image
Image
Image

September 10th

Image
Image
Image
Image

_________________
Up to date build information can be found here:
https://allthingsspeed.com/projects/


Last edited by DaveStruve on July 31, 2014, 9:03 am, edited 1 time in total.

Top
 Profile  
Reply with quote  
PostPosted: September 27, 2013, 11:01 pm 
Offline
User avatar

Joined: February 18, 2013, 10:57 pm
Posts: 231
Location: Cumming, Ga
September 16th, 2013

So I readjusted the ride height this past week and got the motor in place. This weeks goal is to get the motor mounts made and get the steering rack shortened. As you can see below, I'm going to more than likely have to make a custom hood to clear the supercharger.

Image
Image
Image
Image

_________________
Up to date build information can be found here:
https://allthingsspeed.com/projects/


Top
 Profile  
Reply with quote  
PostPosted: September 27, 2013, 11:02 pm 
Offline
User avatar

Joined: February 18, 2013, 10:57 pm
Posts: 231
Location: Cumming, Ga
September 27 Update:

Fairly Productive 2 weeks:
•*Fabricated engine and transmission mounts
• Finished Painting Chassis - used truck bed liner that I used on the floors to coat the entire undercarriage in a nice thick rubberized coating. This should help with vibration noise, and give me a nice durable rust proof finish. I figure this is more or less what they use on regular cars, so it should work well here too.
• Reassembled chassis
• Received delivery from kitcardirect.co.uk Neil is a top notch guy, I originally contacted him wanting to order carbon fiber caterham csr fenders, CF naca ducts, and CF winglets. I mentioned that I was having trouble sourcing haynes body work from the UK fiberglass companies, and he was nice enough to order them from equinox for me and ship them my way. I ordered a nose to begin with to verify it wouldn't get destroyed in the process. And am now ordering the the scuttle and rear wings. Not the cheapest or easiest way of doing this, but really no more expensive than ordering from the only company here in the states. This way I get exactly what I want.
• Trimmed nose for openings and suspension bolts. Next will be trimming for duct work.
• Good News clearance of supercharger is better than expected and may only require minor hood modifications to fit.

Image

Image

Image

Image

_________________
Up to date build information can be found here:
https://allthingsspeed.com/projects/


Top
 Profile  
Reply with quote  
PostPosted: September 27, 2013, 11:03 pm 
Offline
User avatar

Joined: February 18, 2013, 10:57 pm
Posts: 231
Location: Cumming, Ga
Image

Image

Image

_________________
Up to date build information can be found here:
https://allthingsspeed.com/projects/


Top
 Profile  
Reply with quote  
PostPosted: September 29, 2013, 7:47 am 
Offline
Automotive Encyclopedia
User avatar

Joined: December 22, 2006, 2:05 pm
Posts: 8042
Yeah, not much you can do about the supercharger manifold that would have no down side. Even the original cars had bolt-on bulges for clearance. Don't forget to add an inch or so for the engine rocking back when you let off to shift. Checkout some videos on miata dyno pulls and see how much the engine moves. You may want to add limiting straps.

Where did you get your red wrinkle? I bought mine through O'Reilly Auto, VHT SP204 for $9.99. None of the local parts stores stock red wrinkle.


Top
 Profile  
Reply with quote  
PostPosted: September 29, 2013, 8:17 am 
Offline
User avatar

Joined: February 18, 2013, 10:57 pm
Posts: 231
Location: Cumming, Ga
Miatav8,MstrASE,A&P,F wrote:
Yeah, not much you can do about the supercharger manifold that would have no down side. Even the original cars had bolt-on bulges for clearance. Don't forget to add an inch or so for the engine rocking back when you let off to shift. Checkout some videos on miata dyno pulls and see how much the engine moves. You may want to add limiting straps.

Where did you get your red wrinkle? I bought mine through O'Reilly Auto, VHT SP204 for $9.99. None of the local parts stores stock red wrinkle.


Yeah ill be curious to see how much the jaguar engine mounts allow for movement. But i dont expect as much as the stock miata mounts.

Im using the vht red and black as well. Got it from amazon, think it was $8 with free shipping.

_________________
Up to date build information can be found here:
https://allthingsspeed.com/projects/


Top
 Profile  
Reply with quote  
PostPosted: October 3, 2013, 7:22 pm 
Offline
User avatar

Joined: February 18, 2013, 10:57 pm
Posts: 231
Location: Cumming, Ga
Good progress this week.

Got the drive shaft shortened, balanced, installed.

Started and finished the fuel system.

Used a walbro 255 fuel pump, made a bunch of AN lines and fittings and adapters to connect it all together. Ran a pair of 3/8" aluminum racing hard lines to the front and connected them via some fuel injection line. My only concern at this point is the fuel filter, I'm currently using a small russell filter. I'll probably use another in front of the pump to filter the initial garbage from the fuel cell. But that can be dealt with later, as I'm tired of spending money on AN fittings, That stuff really added up quickly, but I'm very happy with how professional looking it all turned out.

Image

Image

Image

Image

Image

_________________
Up to date build information can be found here:
https://allthingsspeed.com/projects/


Top
 Profile  
Reply with quote  
PostPosted: October 4, 2013, 4:20 am 
Offline

Joined: April 16, 2010, 12:19 pm
Posts: 462
Location: Meridian, Idaho
Did you use the stock Lotus seat sliders? Did you modify them at all?

_________________
Steve


Top
 Profile  
Reply with quote  
PostPosted: October 4, 2013, 6:52 am 
Offline
User avatar

Joined: February 18, 2013, 10:57 pm
Posts: 231
Location: Cumming, Ga
skou wrote:
Did you use the stock Lotus seat sliders? Did you modify them at all?

Yes, driver was used as is. Passenger was fine on one side, but needed to be squared off on the other. It was a very simple job, took maybe an hour to do since the passenger seat bracket was a fixed unit.

_________________
Up to date build information can be found here:
https://allthingsspeed.com/projects/


Top
 Profile  
Reply with quote  
PostPosted: October 4, 2013, 7:06 am 
Offline
Automotive Encyclopedia
User avatar

Joined: December 22, 2006, 2:05 pm
Posts: 8042
You know how the vht instructions have you make three coats to get a really thick layer inorder to have enough paint to wrinkle?

I wish I'd put a bit less on. After a week of drying, my wrinkle looks more like shag carpet in some places, but overall it looks good.


Top
 Profile  
Reply with quote  
PostPosted: October 4, 2013, 7:56 am 
Offline
User avatar

Joined: February 18, 2013, 10:57 pm
Posts: 231
Location: Cumming, Ga
Miatav8,MstrASE,A&P,F wrote:
You know how the vht instructions have you make three coats to get a really thick layer inorder to have enough paint to wrinkle?

I wish I'd put a bit less on. After a week of drying, my wrinkle looks more like shag carpet in some places, but overall it looks good.


Did you use a heat gun? Makes it wrinkle up in about 2 min and much easier to control.

_________________
Up to date build information can be found here:
https://allthingsspeed.com/projects/


Top
 Profile  
Reply with quote  
PostPosted: October 5, 2013, 11:51 am 
Offline
Automotive Encyclopedia
User avatar

Joined: December 22, 2006, 2:05 pm
Posts: 8042
No. Good tip though. I actually had a few runs too. Good enough for the wifes car, as is the chinese stainless header for $115 on Ebay. Said all 304 stainless but it looks like the flanges are rusty inside and the transition is shite, with protruding cracked tubing inside. Can be fixed with a carbide rotary file and still worth $115 shipped IMHO.


Top
 Profile  
Reply with quote  
PostPosted: October 11, 2013, 11:11 pm 
Offline
User avatar

Joined: February 18, 2013, 10:57 pm
Posts: 231
Location: Cumming, Ga
Week of October 11 Update

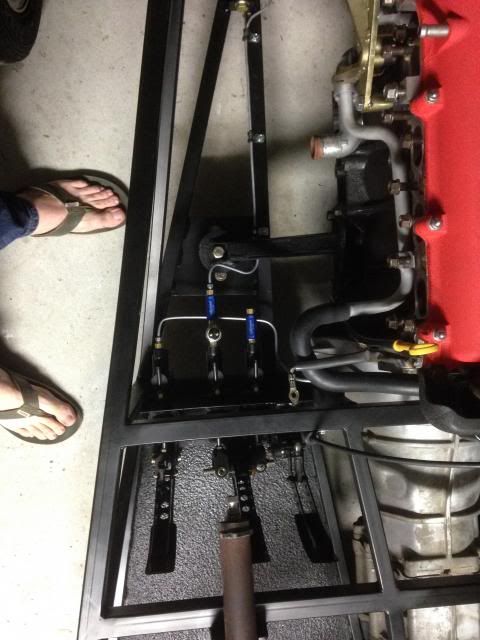
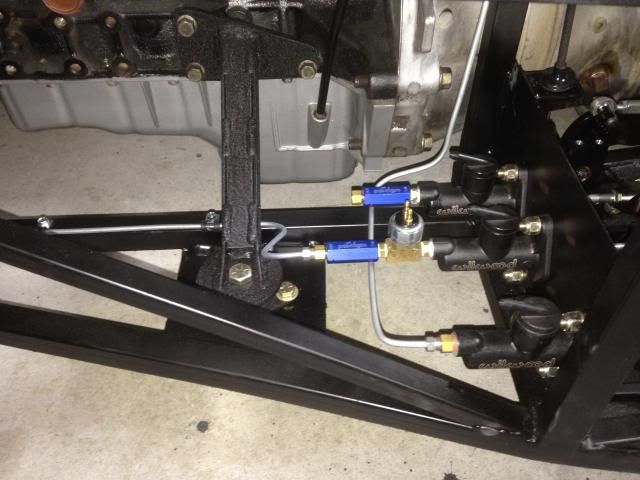
This week I finished assembling the pedal box with the appropriate fittings, and hydraulic brake light switch.

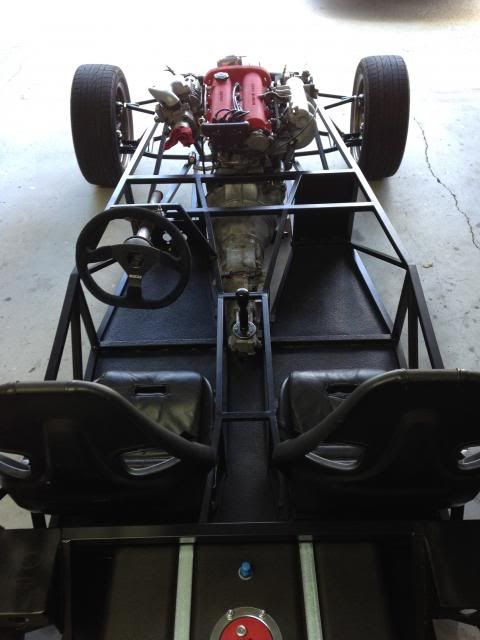
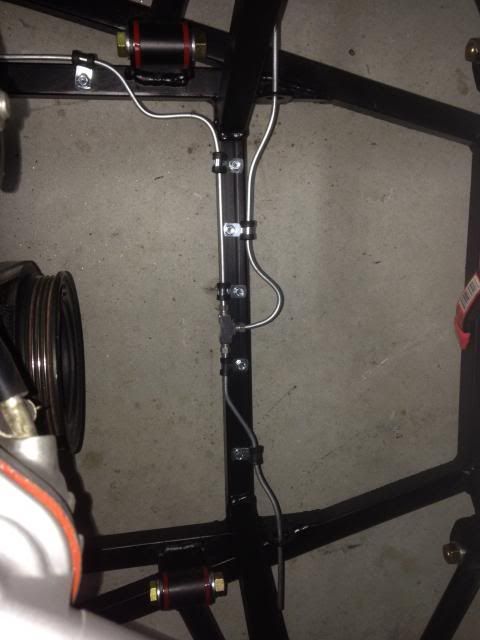
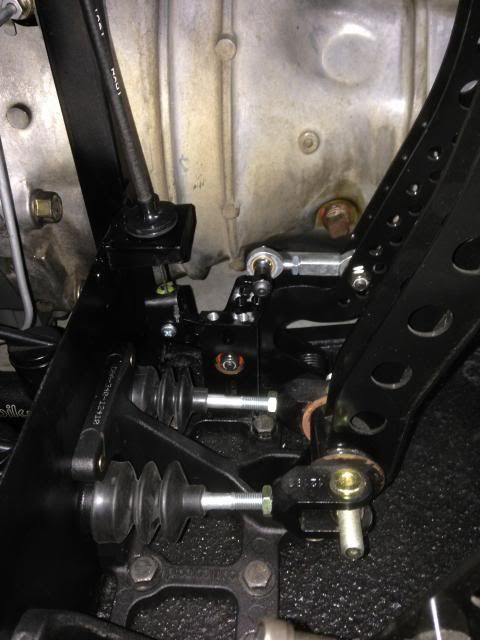
I ran the hard lines for the front brakes and fabricated the bracket and clevis to allow me to connect the mx5 throttle cable to the wilwood pedal box. When all said and done I'm very happy with how it turned out. It was a little tricky figuring out how the throttle cable needed to be routed in order to work with the wilwood throttle bracket (there are not many examples online of one of these pedal boxes installed and certainly nothing specific to the mx5). In the end I came from above, so that when the pedal is pressed its pulling the cable towards the floor.

Finally I placed a few orders for bodywork and brakes. On the bodywork side, I 've got my scuttle and rear fenders from equinox via kitcardirect.co.uk. I've also got a 7 style front grill and a westfield carbon fiber dash that should be shipping out soon. I stumbled upon a company in the states here that sells a set of carbon fiber sport bike mirrors for $80US. Quality is pretty good, although I'm going to 3d print out a set of trim rings to obscure the poor cut of the mirror itself. I'll post some before and after shots when I get that done.

On the braking side my original plan was to get a set of wilwood 4 piston calipers for the front and stick with the mx5 calipers in the rear. Well after needing a new set of rear rotors, rear pads and a replacement caliper, I came to the conclusion that I was approaching the price territory of a 4 wheel brake kit. So with that said, I now have a package on the way containing wilwood calipers for front and rear with slotted rotors, pads and just about everything else.

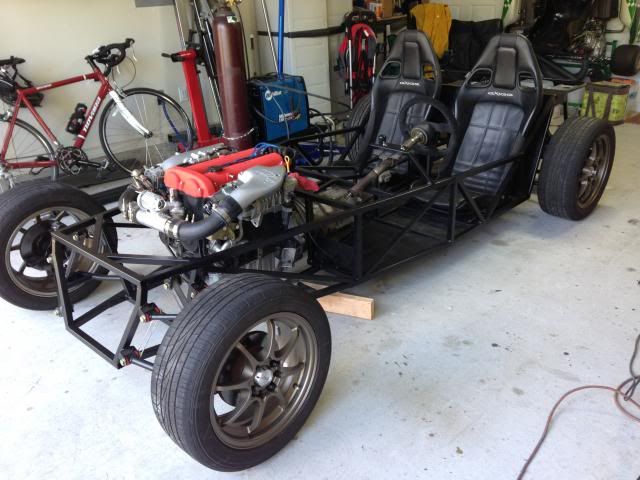
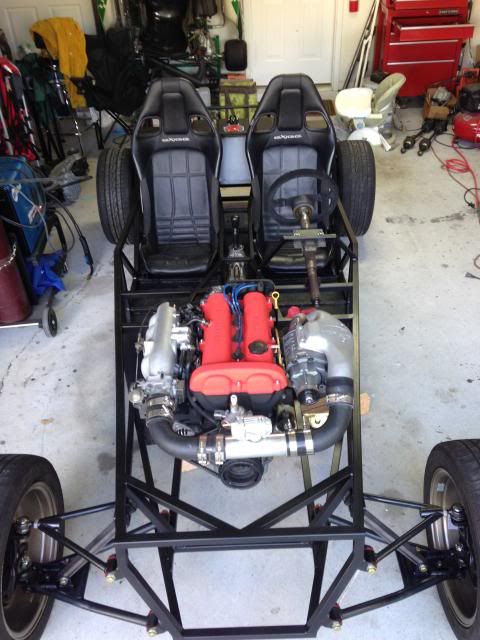
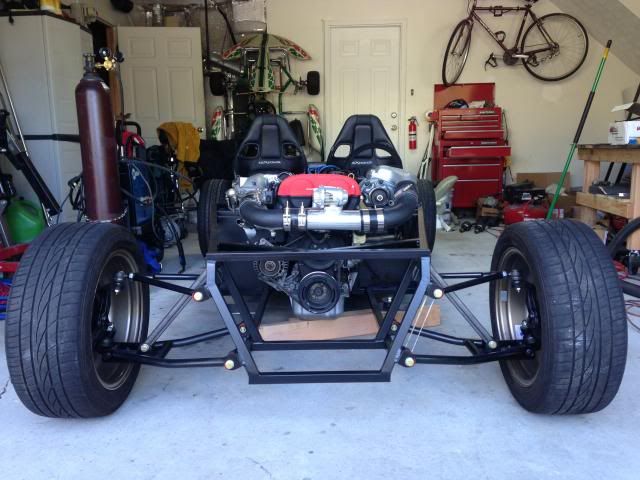
Here's this weeks pictures, sorry about the quality, shooting black on black at night isnt the best way to reveal whats going on.

Image
Image
Image
Image

_________________
Up to date build information can be found here:
https://allthingsspeed.com/projects/


Top
 Profile  
Reply with quote  
PostPosted: October 15, 2013, 9:53 pm 
Offline
User avatar

Joined: February 18, 2013, 10:57 pm
Posts: 231
Location: Cumming, Ga
Brakes arrived today. Flyin Miata Lil Big Brake Kit - Wilwood 4 piston front and rear, 10" slotted rotors, and the ebrake version for the rear caliper. It's nice to have something that just bolts together. Just need to get some longer steel braided line up front and bleed the system and brakes are complete.

Image
Image
Image
Image
Image
Image

_________________
Up to date build information can be found here:
https://allthingsspeed.com/projects/


Top
 Profile  
Reply with quote  
Display posts from previous:  Sort by  
Post new topic Reply to topic  [ 212 posts ]  Go to page 1, 2, 3, 4, 5 ... 15  Next

All times are UTC - 5 hours [ DST ]


Who is online

Users browsing this forum: No registered users and 45 guests


You cannot post new topics in this forum
You cannot reply to topics in this forum
You cannot edit your posts in this forum
You cannot delete your posts in this forum
You cannot post attachments in this forum

Jump to:  
POWERED_BY