LocostUSA.com

Learning how to build Lotus Seven replicas...together!
It is currently April 17, 2024, 9:50 pm

All times are UTC - 5 hours [ DST ]


Post new topic Reply to topic  [ 1436 posts ]  Go to page Previous  1 ... 63, 64, 65, 66, 67, 68, 69 ... 96  Next
Author Message
PostPosted: May 6, 2017, 11:21 am 
Offline
User avatar

Joined: October 24, 2008, 2:13 pm
Posts: 5326
Location: Carlsbad, California, USA
Nice job on the mount, Tom. There was some pretty tricky geometry in making the RHS section of it, that's clear.

Cheers,

_________________
Damn! That front slip angle is way too large and the Ackerman is just a muddle.

Build Log: viewtopic.php?f=35&t=5886


Top
 Profile  
Reply with quote  
PostPosted: May 7, 2017, 7:59 am 
Offline
We are Slotus!
User avatar

Joined: October 6, 2009, 9:29 am
Posts: 7651
Location: Tallahassee, FL (The Center of the Known Universe)
Yo Tom!
Beautiful bit o' kit that e-brake mount... No, it's not a br@cket, it's a work of art!

Quote:
those big nuts ... are placeholders for skinny jam nuts.
There's an off-color, smart-arse remark in there somewhere, probably about being an old guy, or needing replacement nuts, or buying larger underwear, but I just can't do it to you, Tom... :rofl:

:cheers:
JDK

_________________
JD, father of Quinn, Son of a... Build Log
Quinn the Slotus:Ford 302 Powered, Mallock-Inspired, Tube Frame, Hillclimb Special
"Gonzo and friends: Last night must have been quite a night. Camelot moments, mechanical marvels, Rustoleum launches, flying squirrels, fru-fru tea cuppers, V8 envy, Ensure catch cans -- and it wasn't even a full moon." -- SeattleTom


Top
 Profile  
Reply with quote  
PostPosted: May 9, 2017, 2:05 am 
Offline
User avatar

Joined: October 23, 2010, 2:40 am
Posts: 1455
Lonnie-S wrote:
Nice job on the mount, Tom. There was some pretty tricky geometry in making the RHS section of it, that's clear.
Thanks, Lonnie. Actually there was no math involved. Just cut to fit, then cut to fit again, and again, etc. :BH:
Maybe applying some geometry would have shortened the process.
GonzoRacer wrote:
Quote:
those big nuts ... are placeholders for skinny jam nuts.
There's an off-color, smart-arse remark in there somewhere, probably about being an old guy, or needing replacement nuts, or buying larger underwear, but I just can't do it to you, Tom...

I kinda walked into that set up, didn't I. Thanks for being merciful, JD.

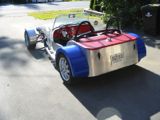
Well, more bathroom cabinets are on the way. But meanwhile, I actually got started on the tunnel. Unlike a book build, Car9's tunnel is not a structural entity. It just keeps one's tie or anything else (careful, JD) from wrapping around the driveshaft :ack: There are two spec steel rings that will contain the driveshaft if the U-joints let go, so the tunnel only needs to be made from light tubing with an aluminum skin.

The top of the tunnel's center section will stand 9" to 12" above the floor and be about 5 3/4" wide. The front and rear will flair out to accommodate the tranny tail and the diff nose. Its the side-view contour of the tunnel top that has me scratching my head.

I can have a flat top from the bottom of the shift boot straight to the rear panel of the cockpit. Quick, clean and simple at 12" above the floor. A workable height with no elbow conflict. (Yes, I had to have a vroom-vroom session to test that :oops: )

Or I can drop the top of the center section to 9" or 10" and slope down to it from under the tranny boot (12") and then slope upwards to accommodate the diff nose (also 12".) this would present a more developed look and perhaps be more aesthetically pleasing.

Oh, and a side note. I find I place my right hand over the back part of the tunnel area to help boost myself out of the seat. So there will need to be some stout support under where I place my hand.

I've been through the completed builds gallery looking at tunnels and it seems there are a lot of different ways to do them. That left me even more perplexed.

Appreciate hearing your thoughts on tunnel shape and aesthetics.

_________________
Cheers, Tom

My Car9 build: viewtopic.php?f=35&t=14613
"It's the construction of the car-the sheer lunacy and joy of making diverse parts come together and work as one-that counts."

Ultima Spyder, Northstar 4.0, Porsche G50/52


Top
 Profile  
Reply with quote  
PostPosted: May 9, 2017, 7:11 am 
Offline
We are Slotus!
User avatar

Joined: October 6, 2009, 9:29 am
Posts: 7651
Location: Tallahassee, FL (The Center of the Known Universe)
Quote:
Oh, and a side note. I find I place my right hand over the back part of the tunnel area to help boost myself out of the seat. So there will need to be some stout support under where I place my hand.
Likewise, I'm sure... I get out of the Slotus about as elegantly as a moose giving birth... Like Car9, the tunnel in the Slotus is just sheet metal, with driveshaft "safety hoops" underneath. Luckily, the rear hoop is in a pretty good place for that right hand to go and the hoops are the height of the tunnel. Are the safety hoops that tall in Car9? If not, perhaps you can build a tall hoop under the tunnel skin that just serve as a support?

:cheers:
JDK

_________________
JD, father of Quinn, Son of a... Build Log
Quinn the Slotus:Ford 302 Powered, Mallock-Inspired, Tube Frame, Hillclimb Special
"Gonzo and friends: Last night must have been quite a night. Camelot moments, mechanical marvels, Rustoleum launches, flying squirrels, fru-fru tea cuppers, V8 envy, Ensure catch cans -- and it wasn't even a full moon." -- SeattleTom


Top
 Profile  
Reply with quote  
PostPosted: May 10, 2017, 12:47 am 
Offline
User avatar

Joined: October 23, 2010, 2:40 am
Posts: 1455
GonzoRacer wrote:
Quote:
Oh, and a side note. I find I place my right hand over the back part of the tunnel area to help boost myself out of the seat. So there will need to be some stout support under where I place my hand.
Likewise, I'm sure... I get out of the Slotus about as elegantly as a moose giving birth... Like Car9, the tunnel in the Slotus is just sheet metal, with driveshaft "safety hoops" underneath. Luckily, the rear hoop is in a pretty good place for that right hand to go and the hoops are the height of the tunnel. Are the safety hoops that tall in Car9? If not, perhaps you can build a tall hoop under the tunnel skin that just serve as a support?
JD, you said it so well. You should post a video of extracting yourself from the Slotus cockpit moose-style. Personally, I'm thinking of adapting an ejection seat... Thank goodness for removable steering wheels.

OK, the top of my safety hoops (5" O.D. rings) are 10.25" above the floor. And where the tunnel top would meet the dash at the shifter base is 12" above the floor. Likewise it's 12" where the top meets the cockpit rear bulkhead above the protruding diff nose. So I'm thinking a flat tunnel top at the 12" level, but with round-over edges for consistent aesthetics with the round tube chassis. Also to save wear and tear on the funny bone.

Some light structure will be needed to frame the tunnel. The structure would probably not use the safety hoops for support. To get the round-over edges means framing the top with some light 1" round tube (0.049" wall) and then hammer-forming the top's edges to cap it off. A little vertical support for the tunnel walls (1/2" square tube) and a beefed-up "step" area for me to push off from. In theory it should work.

One thing is clear, though. I'll need to get a narrower passenger's seat. My 16" Kirkey bomber seat fits perfectly on the driver's side. :D So I bought another just like it for the passenger, forgetting that I had offset the engine 1" to the right. :BH:
With the tunnel mocked up, its clear I need a 15" wide seat on the right side. So I will soon be selling an unused, like new 16" Vintage Class bucket with cover and ordering a 15" version.

_________________
Cheers, Tom

My Car9 build: viewtopic.php?f=35&t=14613
"It's the construction of the car-the sheer lunacy and joy of making diverse parts come together and work as one-that counts."

Ultima Spyder, Northstar 4.0, Porsche G50/52


Top
 Profile  
Reply with quote  
PostPosted: May 10, 2017, 10:59 am 
Offline
The voice of reason
User avatar

Joined: January 10, 2008, 4:47 pm
Posts: 7652
Location: Massachusetts
Can we get a picture or two of the tunnel area with the hoops? I like the idea of a cover that fits the hoops and attaches to them, I don't think you want anything bigger, but maybe that makes sense - that's why I would like a picture.

If you weld a tube between the hoops that would give you the strength to lift yourself up. Are the hoops going to weld in or do they bolt on? You can make the tube between the hoops saddle shaped if you want...

I'll put all this in your SketchUp drawing because I think it's going to be a common issue and important detail.

_________________
Marcus Barrow - Car9 an open design community supported sports car for home builders!
SketchUp collection for LocostUSA: "Dream it, Build it, Drive it!"
Car9 Roadster information - models, drawings, resources etc.


Top
 Profile  
Reply with quote  
PostPosted: May 10, 2017, 12:27 pm 
Offline
We are Slotus!
User avatar

Joined: October 6, 2009, 9:29 am
Posts: 7651
Location: Tallahassee, FL (The Center of the Known Universe)
Quote:
a beefed-up "step" area for me to push off from. In theory it should work.
That "step" will need a big hand print painted on it in some contrasting color so everybody knows that's "the spot" to push on. Maybe you could velcro a small cushion to the tunnel in the right spot. Sorta like the little leather cushion on the tunnel in a Lotus Europa for the driver's elbow to rest on... :mrgreen:

A few years ago, Audi's LeMans cars had a marker painted on the sidepod to show the drivers where they could step getting in and out. In a similar ( :roll: ) stroke of genius ( :roll: ), when I had full (purple) sidepods on the Slotus, there was a "cutout" area around the (green) steel step/flipper/exhaust hangar on the side of the car so you knew where to step.

:cheers:
JDK

_________________
JD, father of Quinn, Son of a... Build Log
Quinn the Slotus:Ford 302 Powered, Mallock-Inspired, Tube Frame, Hillclimb Special
"Gonzo and friends: Last night must have been quite a night. Camelot moments, mechanical marvels, Rustoleum launches, flying squirrels, fru-fru tea cuppers, V8 envy, Ensure catch cans -- and it wasn't even a full moon." -- SeattleTom


Top
 Profile  
Reply with quote  
PostPosted: May 10, 2017, 10:58 pm 
Offline
User avatar

Joined: October 23, 2010, 2:40 am
Posts: 1455
horizenjob wrote:
Can we get a picture or two of the tunnel area with the hoops? I like the idea of a cover that fits the hoops and attaches to them, I don't think you want anything bigger, but maybe that makes sense - that's why I would like a picture.

If you weld a tube between the hoops that would give you the strength to lift yourself up. Are the hoops going to weld in or do they bolt on? You can make the tube between the hoops saddle shaped if you want...

I'll put all this in your SketchUp drawing because I think it's going to be a common issue and important detail.
Marcus, the safety hoops will be bolted in so I can get the driveshaft in and out. Here's some pics:
Attachment:
P5104532-1.jpg
Attachment:
P5104534-1.jpg

And some measurements: The cockpit is approximately 30" between the dash and the rear panel at the red line's height. The red line is 12" up from the floor and the tops of the 5" hoops are 10.6" above the floor. The two 1x2's on the floor are 5" apart on the outside and are centered on the chassis centerline. However, the engine/transmission is offset 1" to the right. :roll: The diff input shaft is about 7/16" to the right, IIRC, giving the U-joint bearings some action. The driveshaft is parallel to the floor at a 7.6" height. The dash vertical tubes are 9.75" outside to outside with their centerline shifted 1" to the right. The diff mounting cutout is about 12" wide at the widest. The ¼” plywood panel is a mockup for an alloy rear cockpit panel.

I'm using Ford 1330 U-joints/flanges, stout but not petite. The tunnel skin needs to clear them, or :ack:
The safety hoops are in an approximate fore/aft position as I don't have a driveshaft yet. I need to get one made. $$

That should provide some SketchUp fodder. The transitions fore and aft make the tunnel shape/fabrication potentially challenging, or simple, depending on the tunnel shape. As a reference point, the "rectangular cross-section" Haynes tunnel slopes upward as it goes aft from a low of 11.2" at the transmission tailshaft to a high of 11.9" at the diff.

GonzoRacer wrote:
Quote:
a beefed-up "step" area for me to push off from. In theory it should work.

That "step" will need a big hand print painted on it in some contrasting color so everybody knows that's "the spot" to push on. Maybe you could velcro a small cushion to the tunnel in the right spot. Sorta like the little leather cushion on the tunnel in a Lotus Europa for the driver's elbow to rest on...

A cushion, I like it. One could even call it the Gonzo Spot. Abbreviated as... Oh, nevermind :oops:


You do not have the required permissions to view the files attached to this post.

_________________
Cheers, Tom

My Car9 build: viewtopic.php?f=35&t=14613
"It's the construction of the car-the sheer lunacy and joy of making diverse parts come together and work as one-that counts."

Ultima Spyder, Northstar 4.0, Porsche G50/52


Last edited by seattletom on April 27, 2020, 2:22 am, edited 1 time in total.

Top
 Profile  
Reply with quote  
PostPosted: May 11, 2017, 1:23 am 
Offline
User avatar

Joined: December 24, 2007, 5:11 am
Posts: 1307
Location: Seattle area
Go ahead Tom and be sure to take a pic. Call it what you wanna, and you know you wanna. That way JD will finally know where one is.

_________________
Larry in Seattle


Top
 Profile  
Reply with quote  
PostPosted: May 11, 2017, 7:25 am 
Offline
We are Slotus!
User avatar

Joined: October 6, 2009, 9:29 am
Posts: 7651
Location: Tallahassee, FL (The Center of the Known Universe)
Quote:
One could even call it the Gonzo Spot. Abbreviated as...

Quote:
That way JD will finally know where one is.
And, with me in Tallahassee and Tom in Seattle, once again art imitates life. I'll finally know where one is, but won't be able to reach it... :BH:

Good one, Larry! :rofl:

Now that I think about it a minute, if it's Tom's "spot" we're talking about, I don't wanna be the one to reach it! :ack:
That would all be just too weird, even by my standards. :mrgreen:

Luv ya, Tom, but not like that...
:cheers:
JDK

_________________
JD, father of Quinn, Son of a... Build Log
Quinn the Slotus:Ford 302 Powered, Mallock-Inspired, Tube Frame, Hillclimb Special
"Gonzo and friends: Last night must have been quite a night. Camelot moments, mechanical marvels, Rustoleum launches, flying squirrels, fru-fru tea cuppers, V8 envy, Ensure catch cans -- and it wasn't even a full moon." -- SeattleTom


Top
 Profile  
Reply with quote  
PostPosted: May 11, 2017, 1:30 pm 
Offline
User avatar

Joined: August 27, 2005, 1:04 am
Posts: 1414
Location: Kamloops, BC, Canada
If you can put the driveshaft hoops where you need to put your hand to get in and out, I think I'd be tempted to just form some aluminum over the driveshaft hoops for the middle part of the tunnel, then a similar rounded cone at each end to flare it out. Even with a 1" round tube, I think it might still dig into your leg when driving and be annoying. You don't have an ebrake on the tunnel, so you don't really need any structure there.
Kristian

_________________
V6 in a book frame build. Now registered.
viewtopic.php?f=35&t=7587
viewtopic.php?f=33&t=18172


Top
 Profile  
Reply with quote  
PostPosted: May 11, 2017, 3:40 pm 
Offline
User avatar

Joined: December 24, 2007, 5:11 am
Posts: 1307
Location: Seattle area
Thanks JD. Cheap shot that was too easy to resist.

_________________
Larry in Seattle


Top
 Profile  
Reply with quote  
PostPosted: May 13, 2017, 6:51 pm 
Offline
User avatar

Joined: October 23, 2010, 2:40 am
Posts: 1455
benny_toe wrote:
Go ahead Tom and be sure to take a pic. Call it what you wanna, and you know you wanna. That way JD will finally know where one is.

Errr, let's just call it a Launch Pad and let it go at that. :lol:

_________________
Cheers, Tom

My Car9 build: viewtopic.php?f=35&t=14613
"It's the construction of the car-the sheer lunacy and joy of making diverse parts come together and work as one-that counts."

Ultima Spyder, Northstar 4.0, Porsche G50/52


Top
 Profile  
Reply with quote  
PostPosted: May 13, 2017, 7:11 pm 
Offline
User avatar

Joined: October 23, 2010, 2:40 am
Posts: 1455
turbo_bird wrote:
If you can put the driveshaft hoops where you need to put your hand to get in and out, I think I'd be tempted to just form some aluminum over the driveshaft hoops for the middle part of the tunnel, then a similar rounded cone at each end to flare it out. Even with a 1" round tube, I think it might still dig into your leg when driving and be annoying. You don't have an ebrake on the tunnel, so you don't really need any structure there.
Kristian
Thanks Kristian, that was my original plan. But shaping and blending the transition pieces to clear the U-joints got me thinking (always a risk). A narrow version of Perry's flat top tunnel cover is interesting, but I would still need to make transition pieces for the ends. I don't think either approach would dig into my leg. Good point, though. I'll need another vroom-vroom session to verify that. :D

And then more thinking... :?

_________________
Cheers, Tom

My Car9 build: viewtopic.php?f=35&t=14613
"It's the construction of the car-the sheer lunacy and joy of making diverse parts come together and work as one-that counts."

Ultima Spyder, Northstar 4.0, Porsche G50/52


Top
 Profile  
Reply with quote  
PostPosted: May 27, 2017, 1:18 pm 
Offline
The voice of reason
User avatar

Joined: January 10, 2008, 4:47 pm
Posts: 7652
Location: Massachusetts
I drew a picture, but now reviewing what you show above I think it might not work. Your hoops are low and the tubes mean they can't be raised. The tubes are a good thing though because they will well contain the driveshaft which is what they are supposed to do, a simple hoop would allow improbably large excursions of the shaft at high speed which would cause some real damage.

One of our talented metal shapers would take a block of aluminum out to the back yard and pound it on a tree and come back with a Jaguar. Then you would send them out back again and they would bring you a really nice driveshaft cover that fit the hoops and also flared at the ends. In my picture I was imagining finding a large stainless steel kitchen mixing bowl and using half of it to make the top of the cover over the diff. The rest is just flat sheet with simple bends, probably riveted together.

I think the round top tunnel looks a bit better, the early sevens looked like that. You may be using the front of the tunnel near the dash for switches so that might not work. It could work if the front of the tunnel is rivited or dzus fastened etc. to flat sheet to fair into the dash.

This style would still work with hoop stiffeners under it instead of the driveshaft hoops. It comes down to how many hours you want to invest in either making the driveshaft cover small and elegant or a little bigger. Much of this should include where you think the cover needs to provide a G spot to climb in and out. No use having a car you can only use once because you can't get out of it!

If you go for aluminum hoops, 10" tall from the 1x2, it can bolt to tabs on top of the 1x2. We can try to figure out how thick they should be. I think 2" wide by 1/8 might be fine when riveted to the tunnel material. Maybe a little thicker, I'll see what they have at online metals and try to figure how hard it is to bend into a hoop.


You do not have the required permissions to view the files attached to this post.

_________________
Marcus Barrow - Car9 an open design community supported sports car for home builders!
SketchUp collection for LocostUSA: "Dream it, Build it, Drive it!"
Car9 Roadster information - models, drawings, resources etc.


Top
 Profile  
Reply with quote  
Display posts from previous:  Sort by  
Post new topic Reply to topic  [ 1436 posts ]  Go to page Previous  1 ... 63, 64, 65, 66, 67, 68, 69 ... 96  Next

All times are UTC - 5 hours [ DST ]


Who is online

Users browsing this forum: No registered users and 26 guests


You cannot post new topics in this forum
You cannot reply to topics in this forum
You cannot edit your posts in this forum
You cannot delete your posts in this forum
You cannot post attachments in this forum

Jump to:  
cron
POWERED_BY